It's often quicker to assign your own IP address to a PC than it is to assign one to your router automatically. We'll walk you through the whole process of allocating a static IP address in Windows 10 in this post.
Set a static IP address in Windows 10
Follow this process step by step to assign a Static IP address on Windows 10.
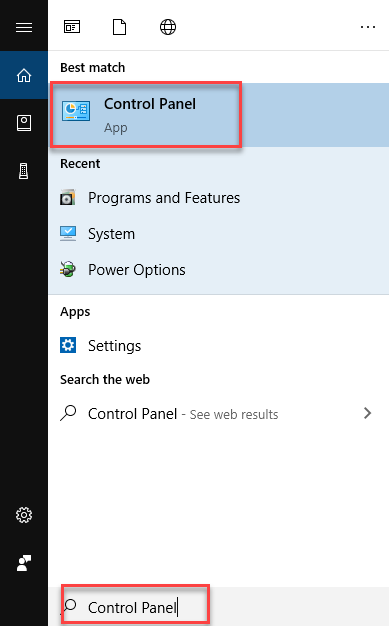
To begin, press the Search button. In the search field, type Control Panel and select the Control Panel option, as shown in the figure below.
As soon as you will choose the Control Panel option, the following screen will appear.
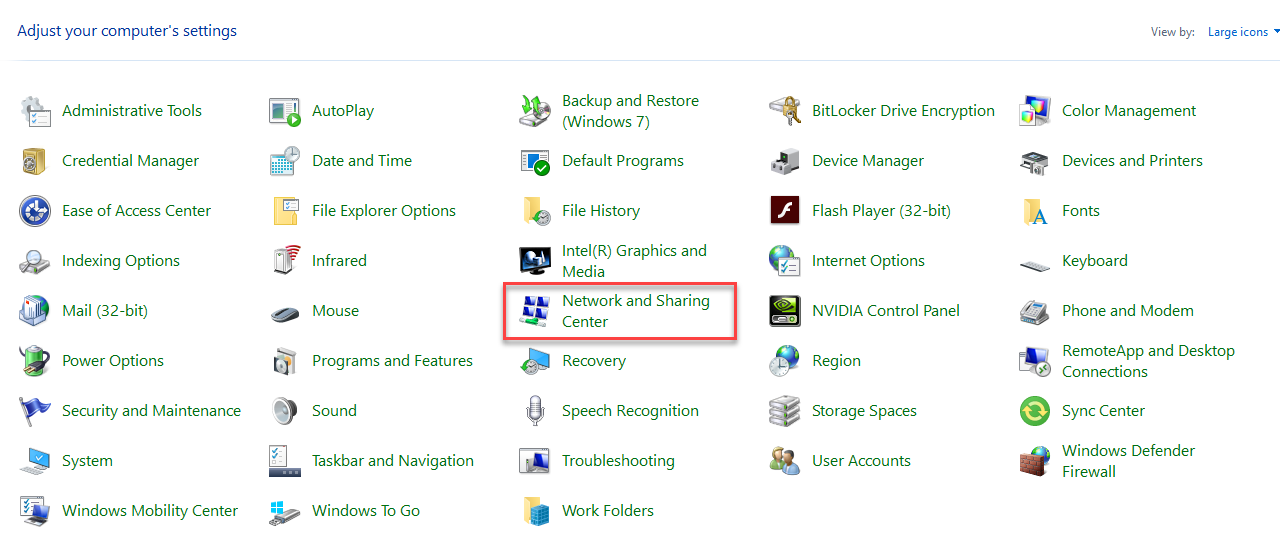
Select the Network and Sharing Center option from the Control Panel screen as highlighted in the above image. As soon as you will choose this option, the following screen will appear.
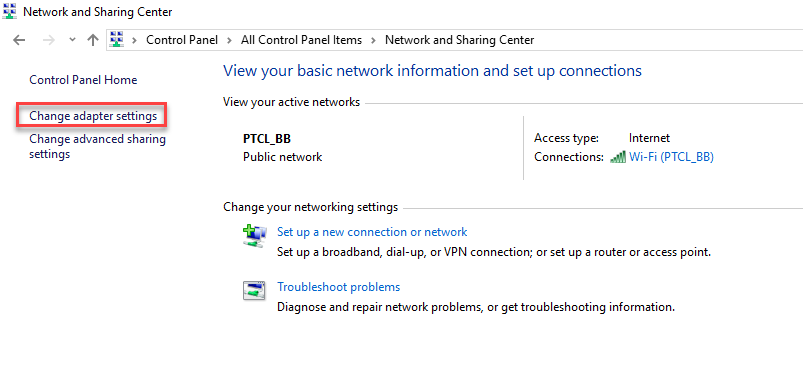
Choose the Change adapter settings option from the left side of the screen as highlighted in the above image. The following screen will appear.
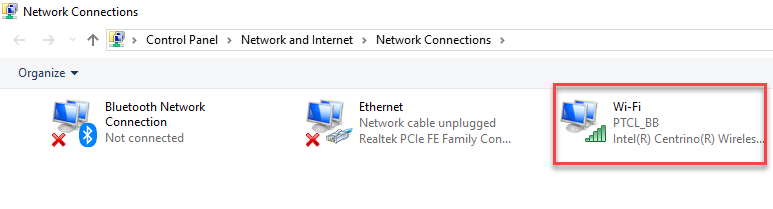
Now right click on the router for which you want to allocate Static IP address as highlighted in the above image. As soon as you right click the router option, the following menu will appear.
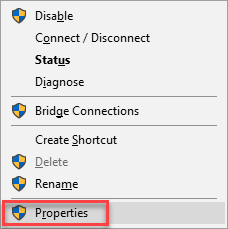
Click the Properties option from the menu as highlighted in the above image. After clicking the Properties option, the following dialogue box will appear.
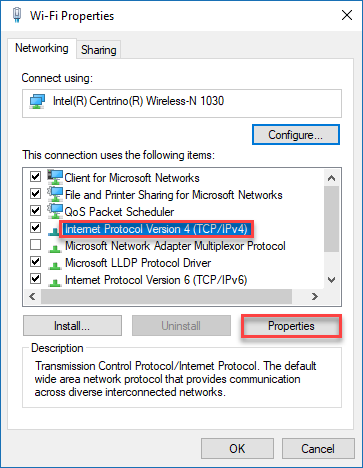
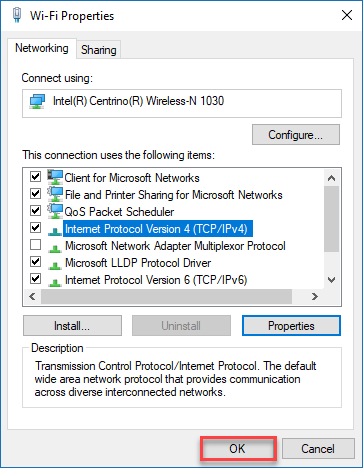
Choose the needed protocol and then click the Properties button as highlighted in the above image. The following dialogue box will appear.
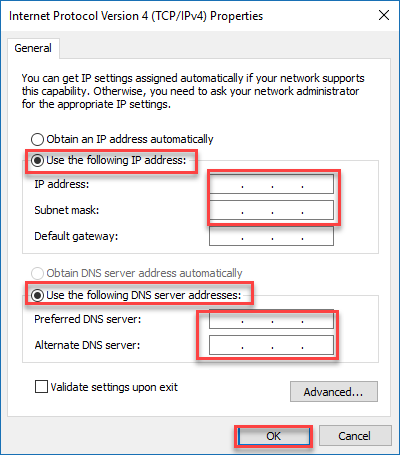
Select Use the following IP address radio button. Then, in the text boxes, type in the IP address and Subnet mask. After that, select the radio box for Use the following DNS server addresses. In the textboxes, type Preferred DNS server and Alternate DNS server. Then, as seen in the figure above, click the OK button. Also, click the OK button in the final open dialogue window.