
Gitea is one of the most well-known self-hosted Git servers and is written in the Go programming language. Gitea includes a file editor for the repository, user management, wiki, project issue tracking, and so on.
Besides the many pros of Gitea, it’s also a lightweight application that doesn’t require much of the resources of your computer.
This article will show you the steps to install Gitea on your Ubuntu 20.04 machine.
Install pre-enquiries
Firstly, let’s update the software packages list then upgrade your Ubuntu 20.04 machine by running the following commands:
$ sudo apt update
$ sudo apt upgrade
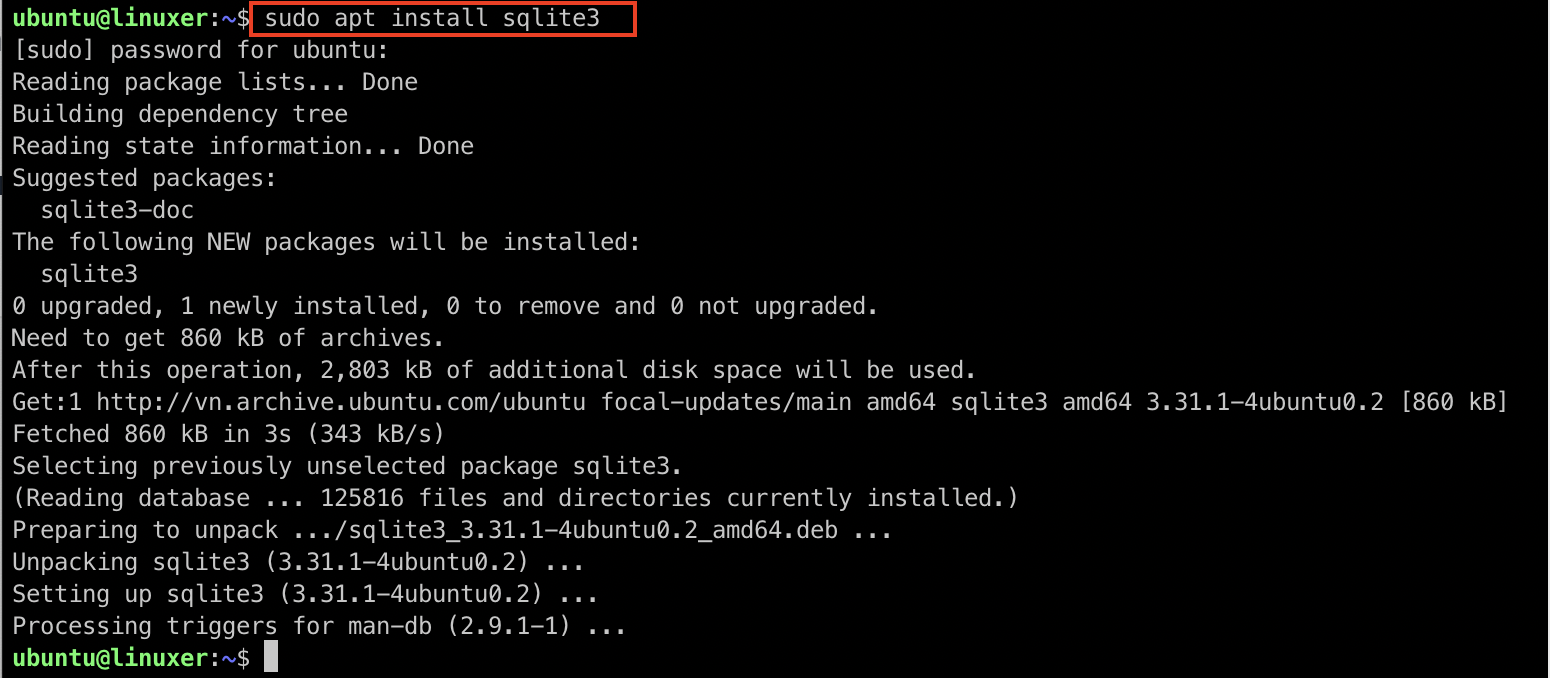
Please make sure that SQLite will be installed.
$ sudo apt install sqlite3
You can also install MySQL, PostgreSQL, or MariaDB for the database backends. In this tutorial, we will use SQLite.
Install Gitea
You can install Gitea in some ways such as: using a Docker image, installing from source code, or binary. This guide will show you the way to install Gitea from binary.
First, let’s install Git on your Ubuntu machine:
$ sudo apt install git
Verify whether Git is successfully installed or not:
$ git --version

Then, let’s create a Git user by running the following command:
$ sudo adduser --system --gecos 'Version Control' --group --disabled-password git

The next step is downloading the Gitea binary. At the time of this writing, the latest version of Gitea is v.14.3.
$ wget https://dl.gitea.io/gitea/1.14.3/gitea-1.14.3-linux-amd64
Now, let’s move the gitea binary file to the /usr/local/bin directory then grant it the execute permission.
$ sudo mv gitea-1.14.3-linux-amd64 /usr/local/bin/gitea
$ sudo chmod +x /usr/local/bin/gitea
Next, you have to create the following directories and establish suitable permissions and ownership for git user:
$ sudo mkdir -p /var/lib/gitea/{custom,data,log}
$ sudo chown -R git:git /var/lib/gitea/
$ sudo chmod -R 750 /var/lib/gitea/
$ sudo mkdir /etc/gitea
$ sudo chown root:git /etc/gitea/
$ sudo chmod 770 /etc/gitea/
It’s necessary to run Gitea as a systemd service. Let’s download the sample systemd unit file from the gitea site.
$ sudo wget https://raw.githubusercontent.com/go-gitea/gitea/main/contrib/systemd/gitea.service -P /etc/systemd/system/
Then, enable and start the service:
$ sudo systemctl daemon-reload
$ sudo systemctl enable --now gitea
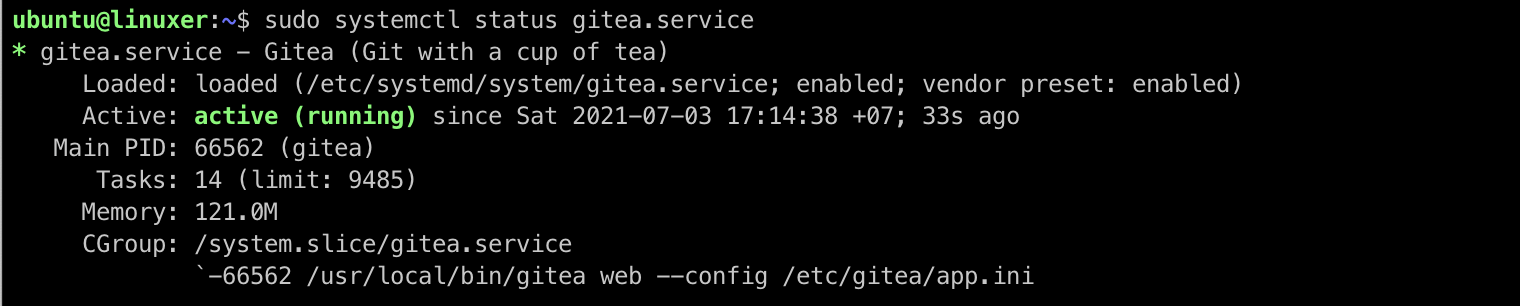
Verify that the Gitea service is running:
$ sudo systemctl status gitea.service
Configure Gitea
By default, the Gitea is running on port 3000. If you enable the firewall on your Ubuntu 20.04 machine, you need to allow traffic on port 3000:
$ sudo ufw allow 3000/tcp
Open your browser and visit the Gitea site at http://YOUR_DOMAIN_OR_IP:3000
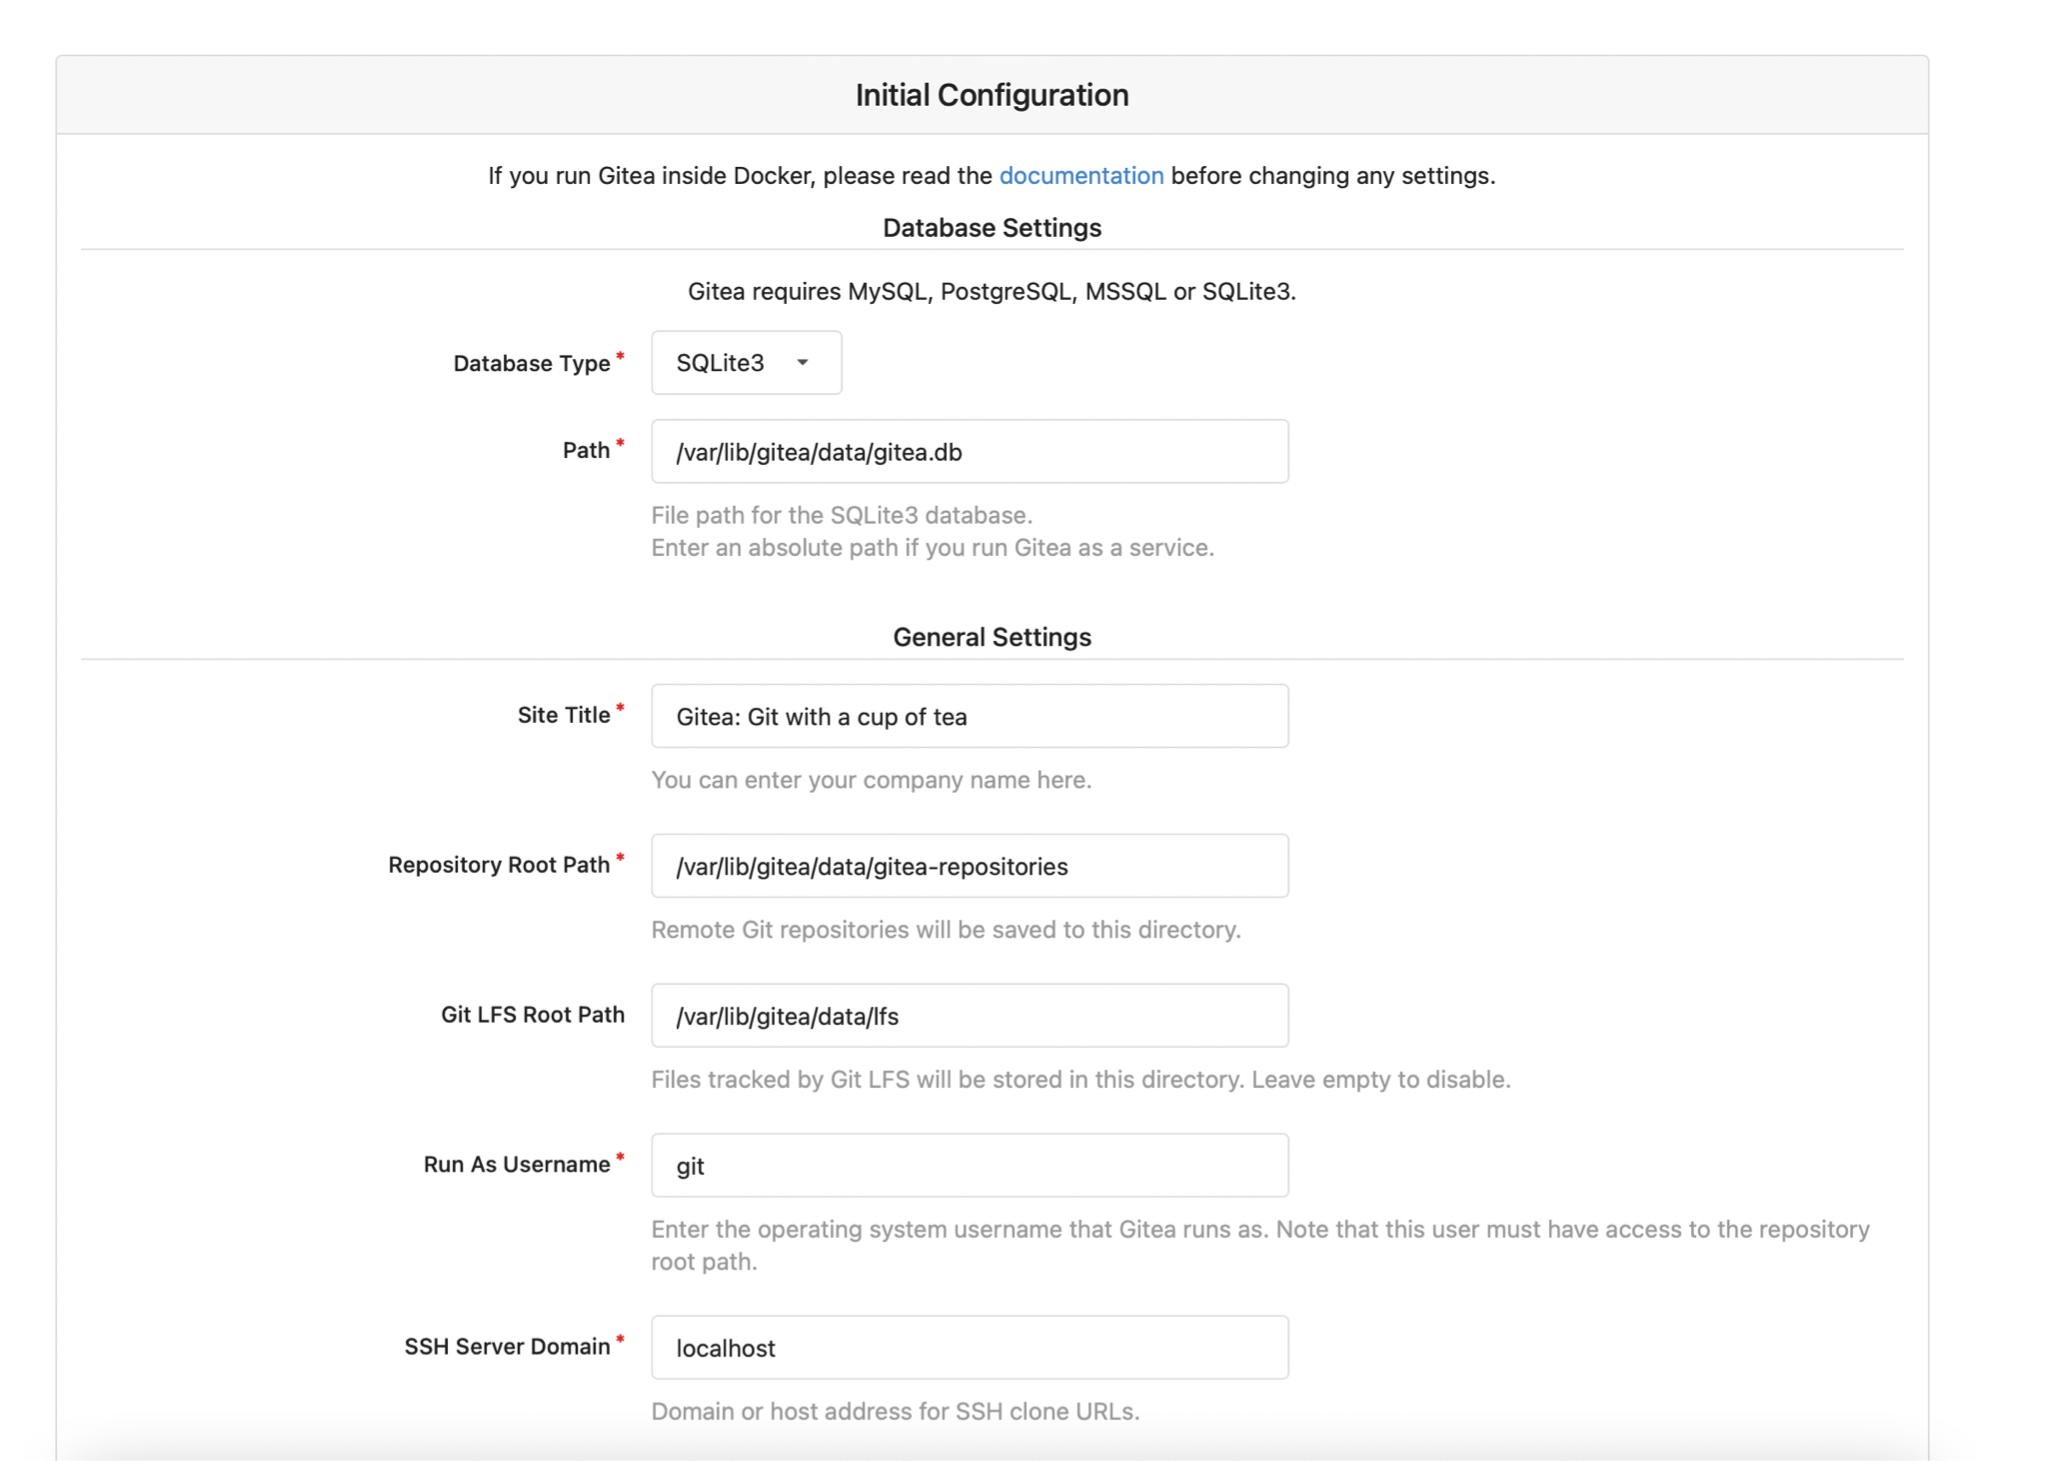
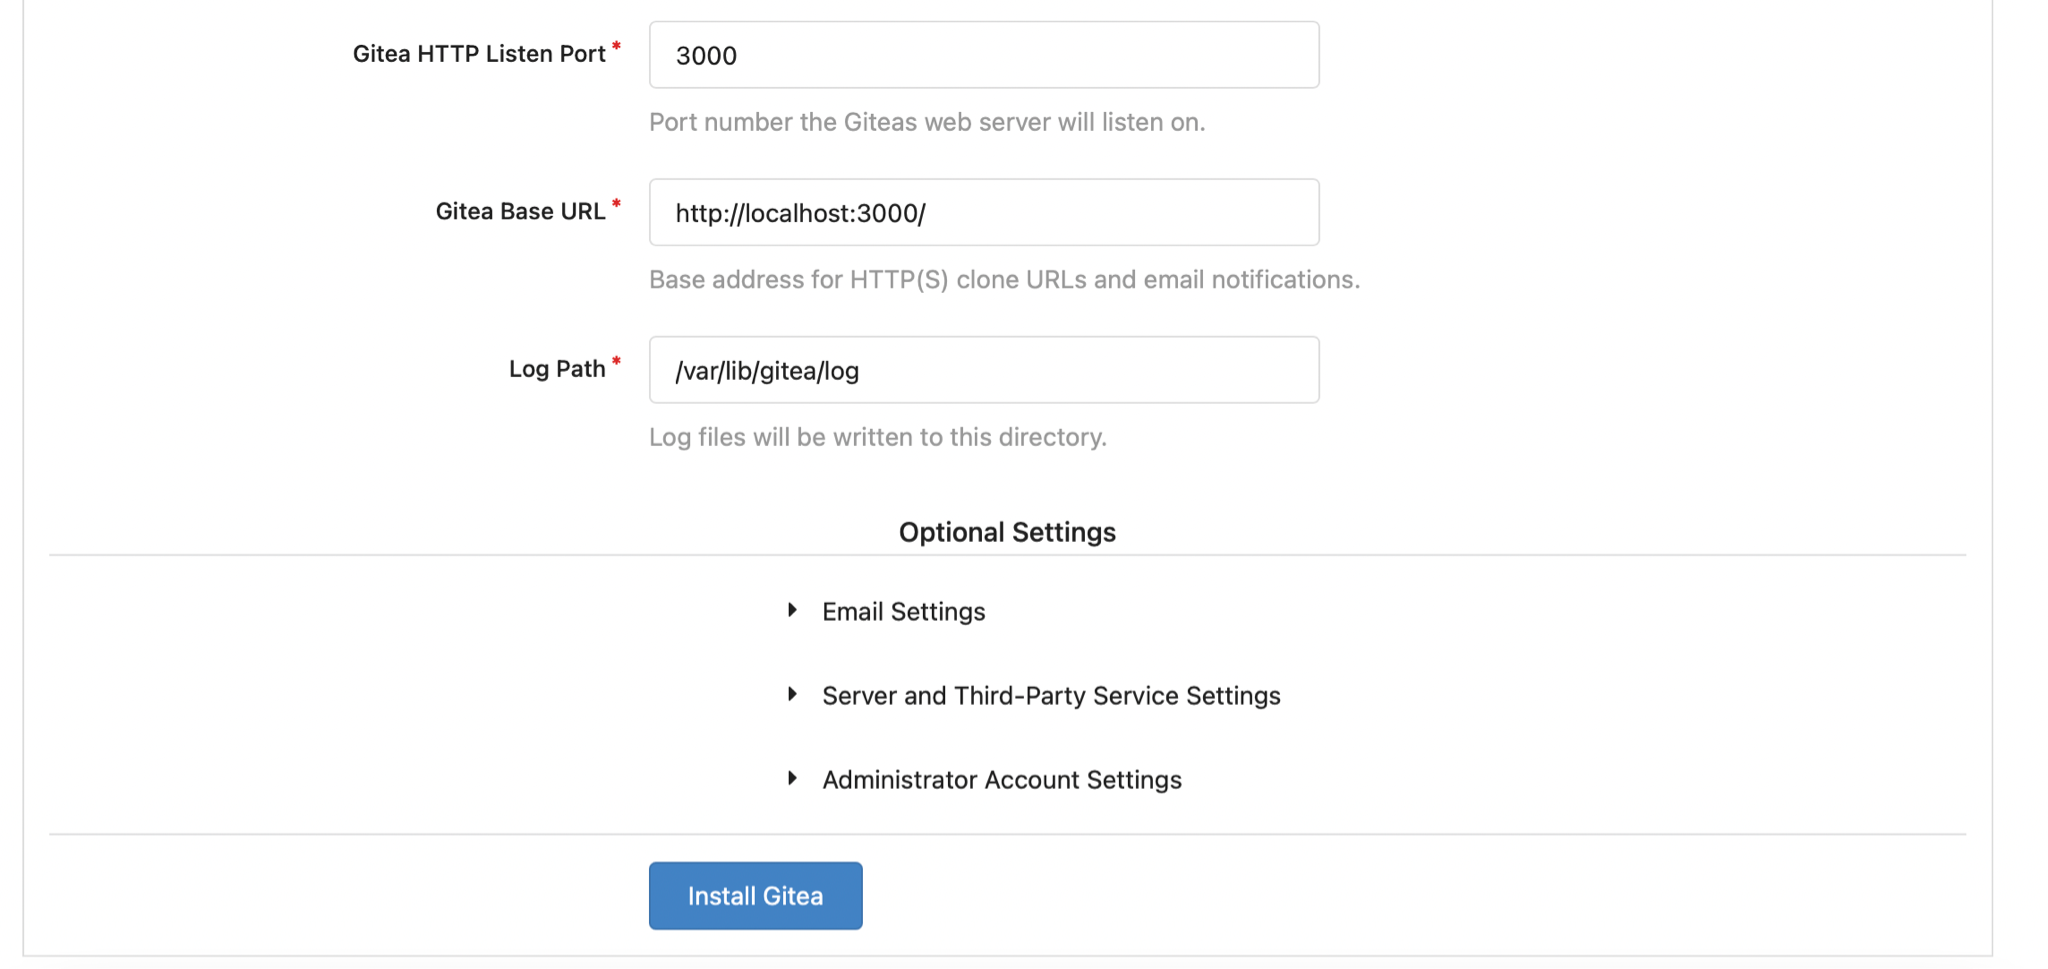
Let the settings be as the above pictures. Hit the “Install Gitea” button to start the installation.
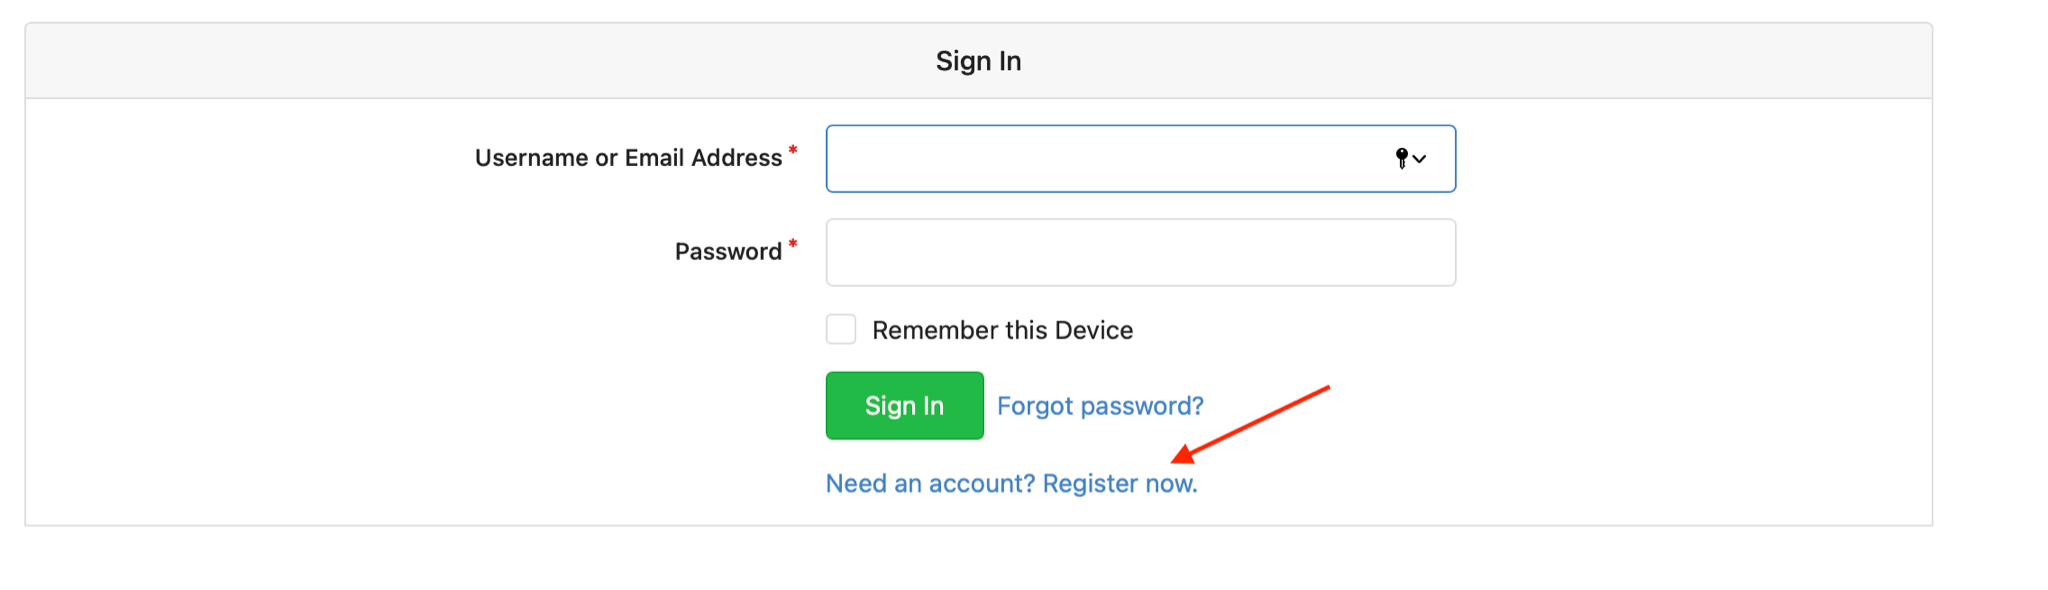
In the following step, register an account.
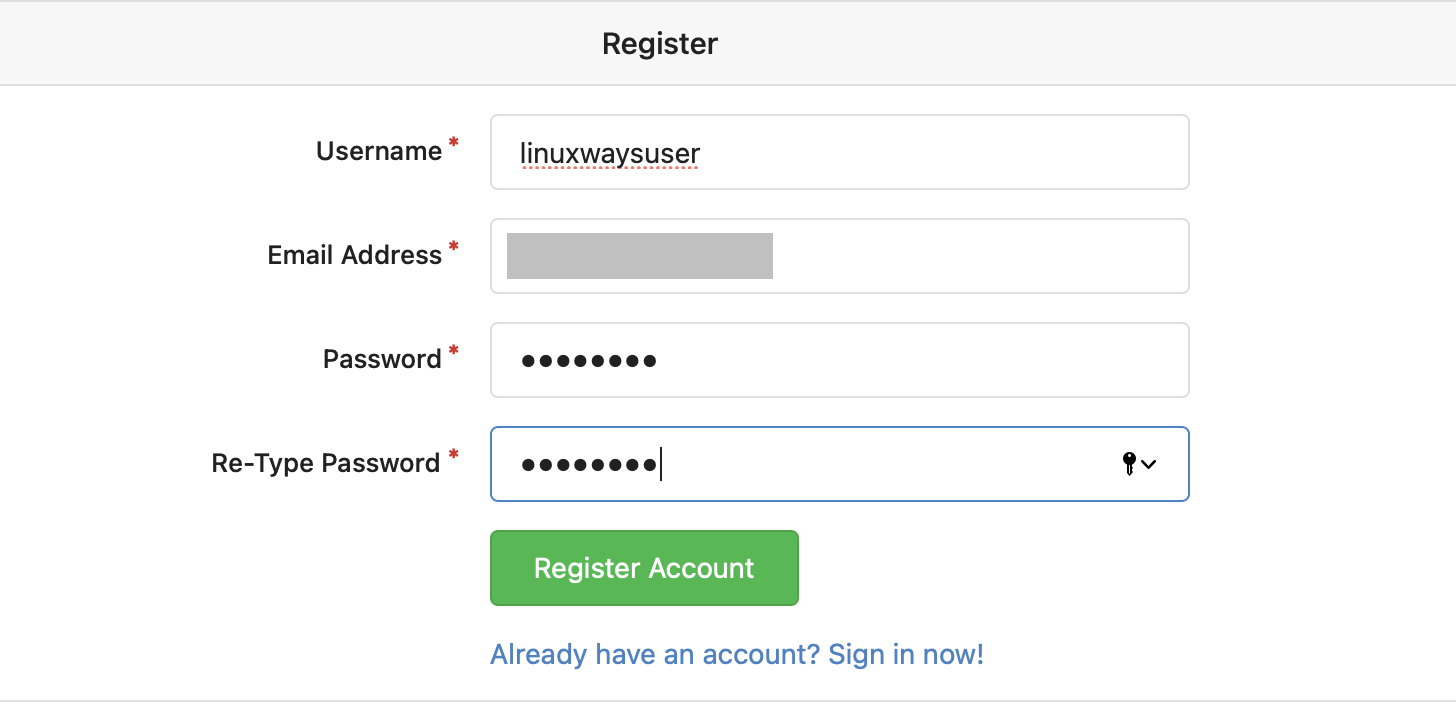
Fill up the necessary information:
That’s all. Gitea has been successfully installed on your Ubuntu 20.04 machine.
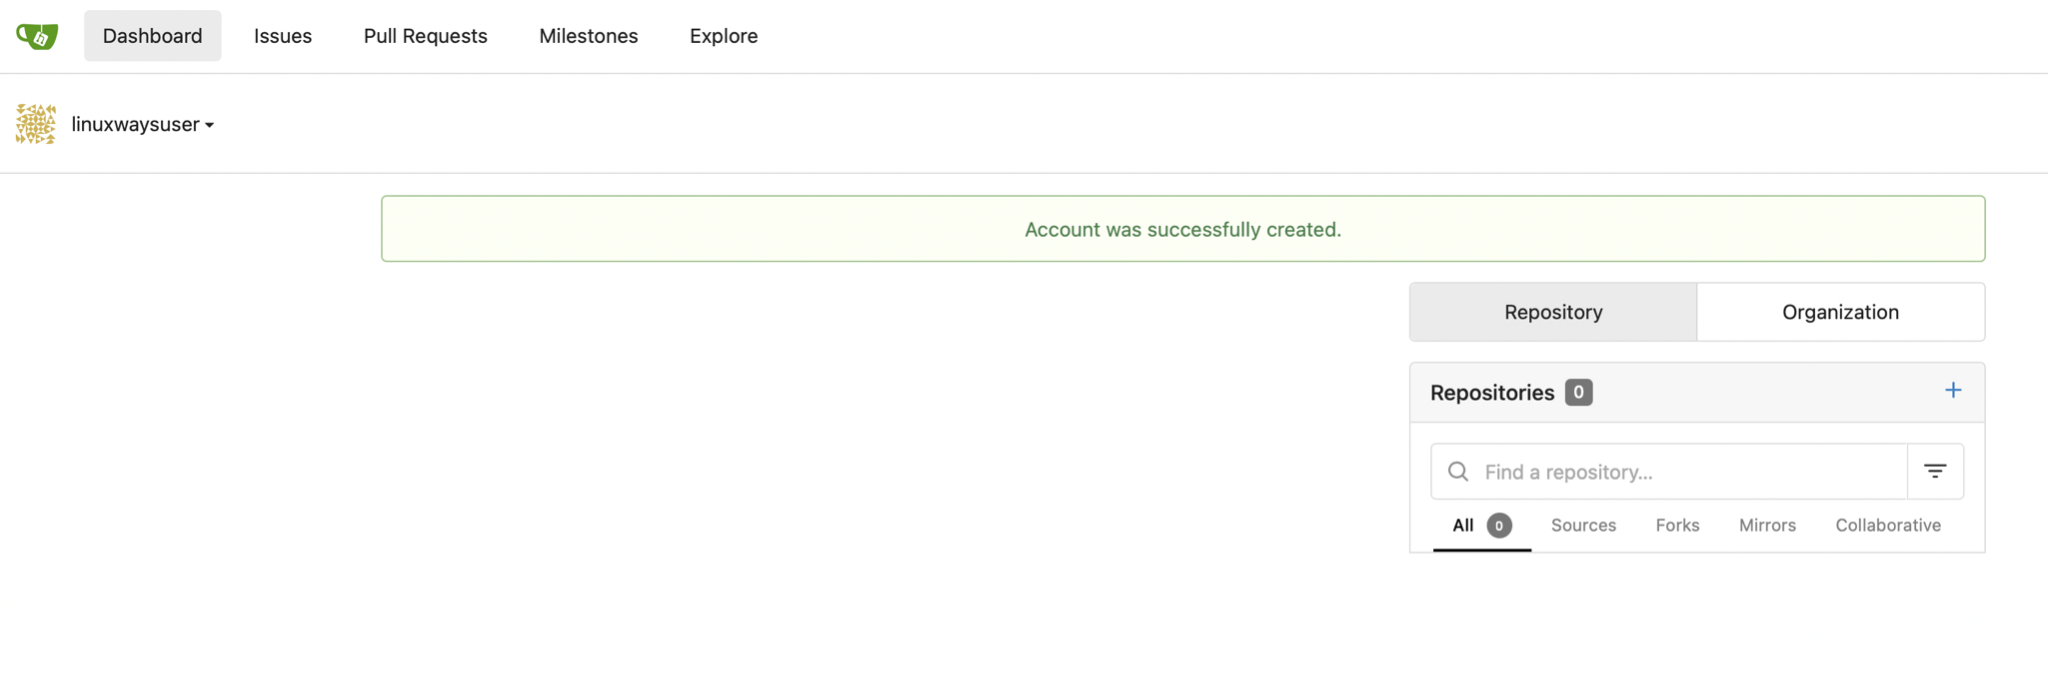
Gitea has been successfully installed on our Ubuntu 20.04 system.