
The system protection feature in Windows 10 allows you to create restore points so that whenever you install new software and it tries to harm your computer system, then you can easily recover your computer system and mitigate the effects of risk. In this article, we will explain to you the method through which you can enable system protection in Windows 10.
Enabling System Protection in Windows 10
In order to enable system protection in Windows 10, you will need to perform the following steps:
Type control panel in the search section of your taskbar and click on the search results to launch the control panel window. The newly opened Control Panel window is shown in the following image:
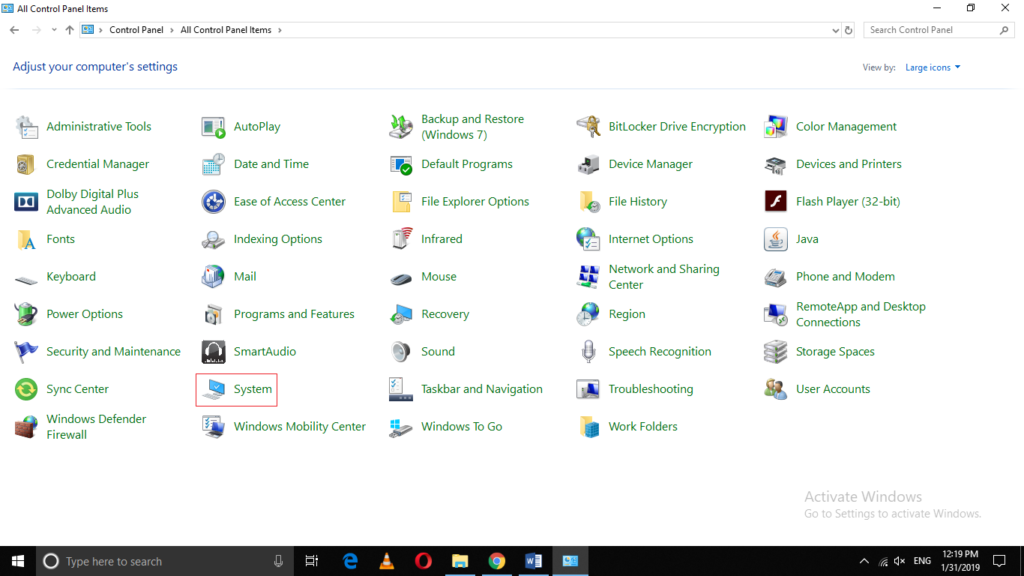
Click on the System tab as highlighted in the image shown above.
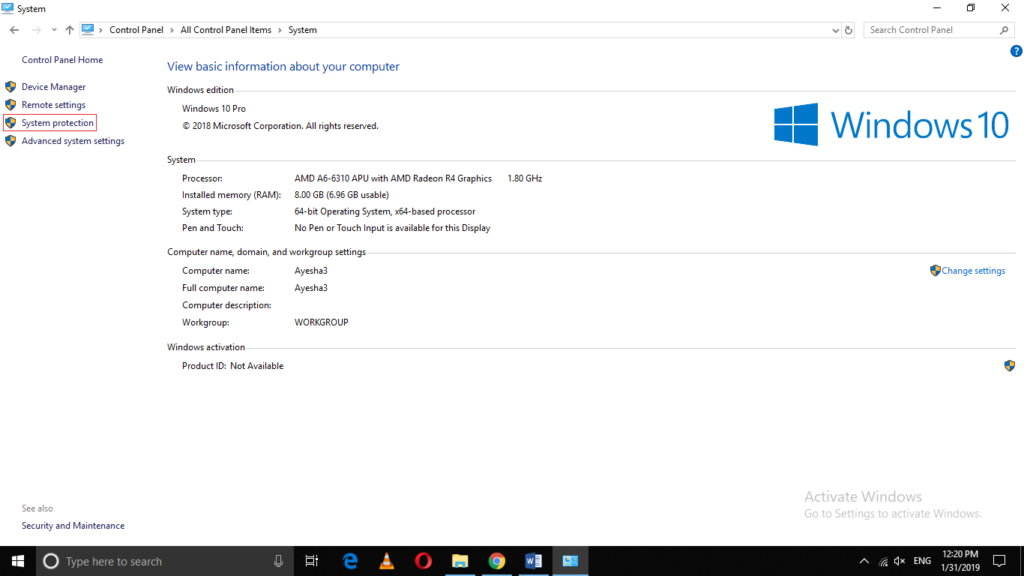
Under the System window, click on the link saying, “System Protection” as highlighted in the image shown below:
As soon as you will click on it, the System Properties window will appear on your screen as shown in the following image:
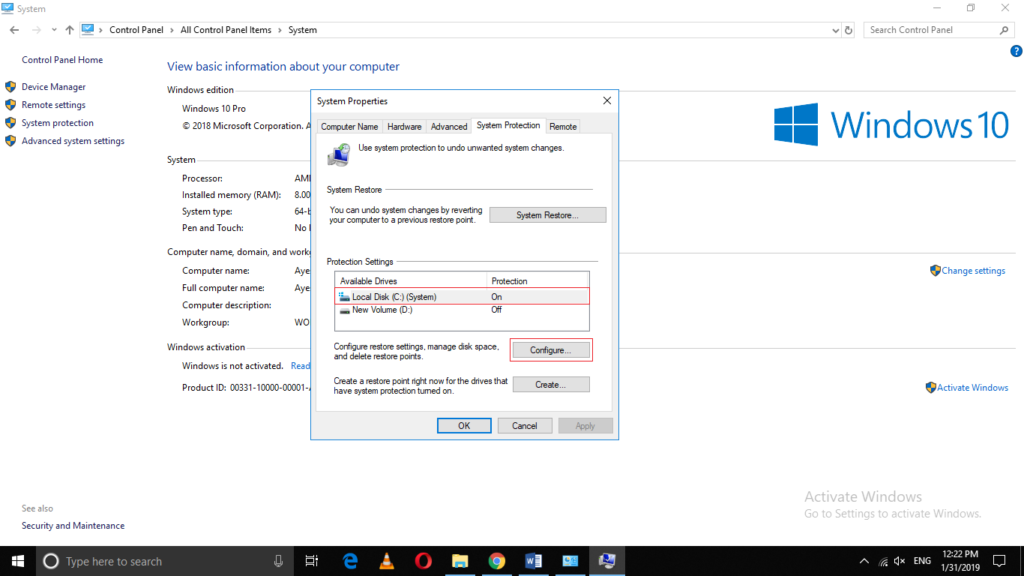
Now select the drive for which you want to turn on system protection by clicking on it and then click on the Configure button as highlighted in the image shown above.
Click on the radio button corresponding to the field saying, “Turn on System Protection” and then allocate the space that will be used for this purpose as highlighted in the image shown below:
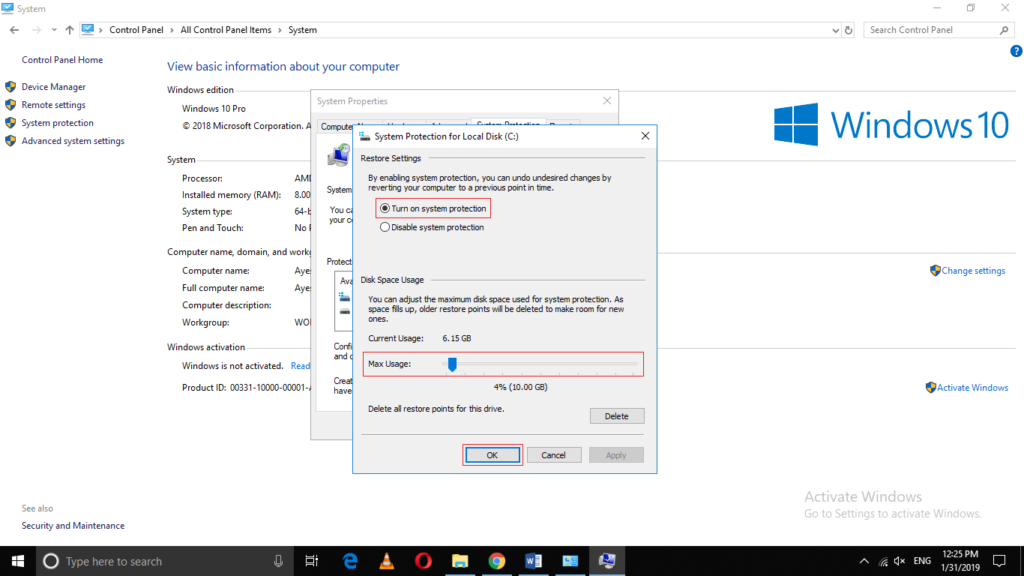
Click on the Apply button and then click on the OK button in order to save your settings as highlighted in the image shown above.
Conclusion
By following the method discussed in this article, you can easily enable system protection in Windows 10 and in this way; you can keep your computer system safe from harmful software updates.