
The firewall is the security defender of Windows operating systems. When enabled, the firewall blocks any unwanted websites or advertisements that can harm your computer system in any way. Usually, Windows Firewall has a predefined set of rules according to which it allows or restricts access to certain programs. However, you can also create your own advanced rules in Windows Firewall. In this article, we will explain the method you can use to create advanced firewall rules in Windows 10 Firewall. We have also a guide on enabling PING requests only.
Creating Advanced Firewall Rules in Windows 10 Firewall
In order to create advanced Firewall rules in Windows 10 Firewall, you will need to perform the following steps:
Type control panel in the search section of your taskbar and click on the search result in order to launch the control panel window. The newly opened Control Panel window is shown in the following image:
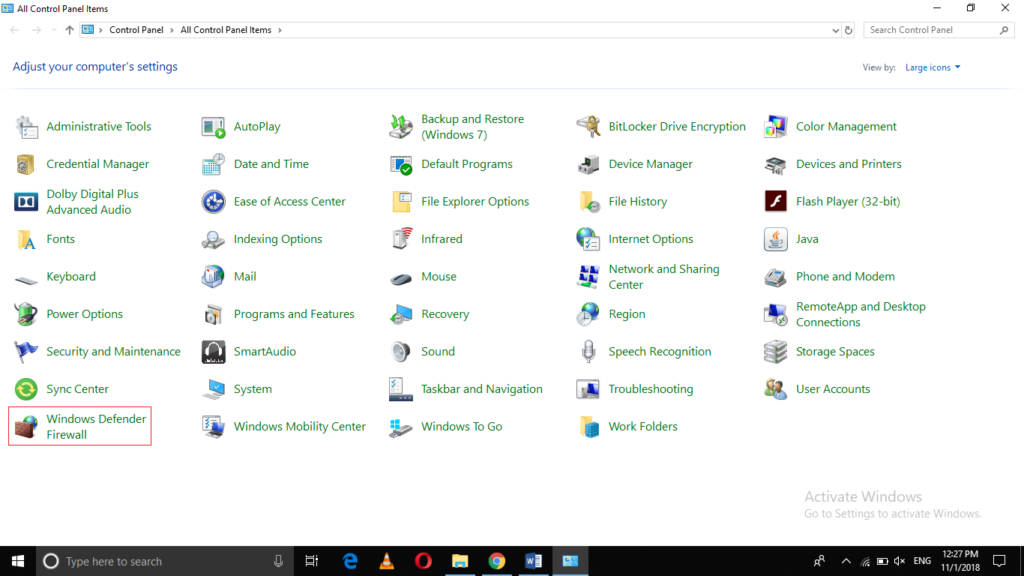
Click on the Windows Defender Firewall tab as highlighted in the image shown above.
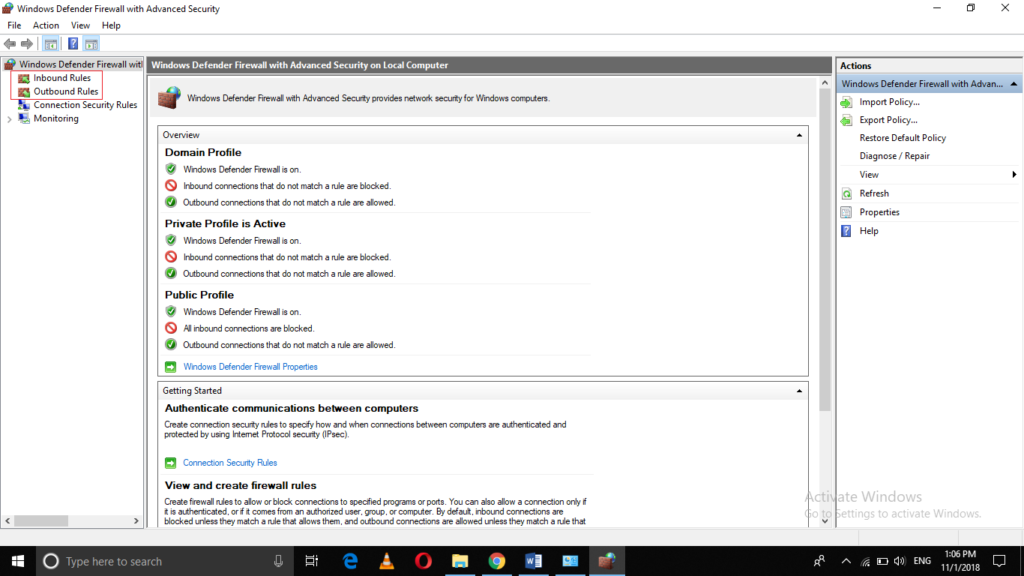
- Now click on the Advanced Settings as highlighted in the image shown below:

As soon as you will click on it, the Windows Defender Firewall with Advanced Security window will appear on your screen as shown in the following image:
Click on any of the Inbound or Outbound Rules according to the kind of rule that you want to create as highlighted in the image shown above.
In this example, I will create an Outbound Rule so I will click on the Outbound Rule option.
As soon as you will click on it, the interface of the screen will change as shown in the image below:
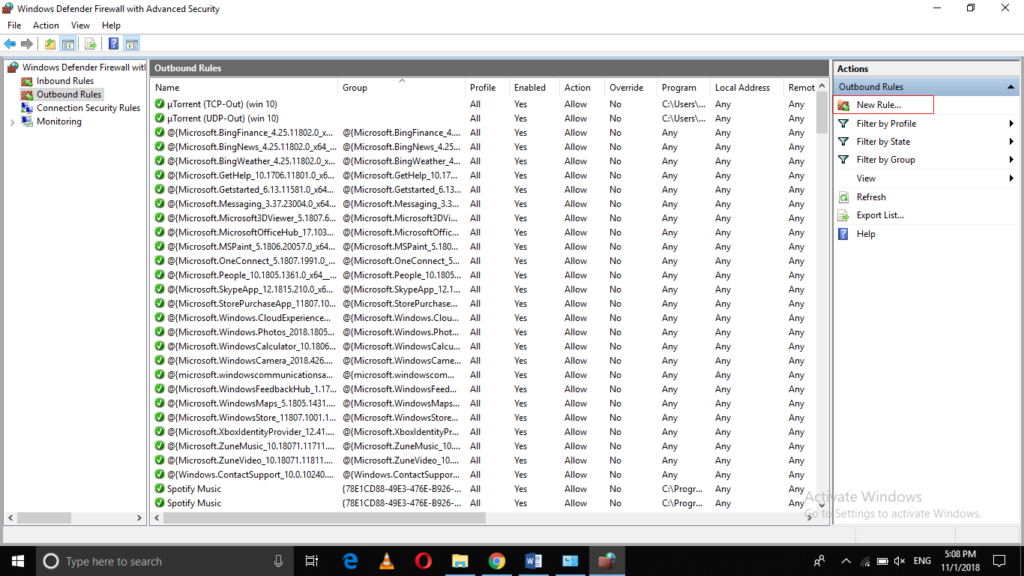
Click on the New Rule option from the extreme right pane of the window as highlighted in the image shown above.
After clicking on it, you will be asked to select a Rule Type. There are four Rule Types i.e. Program, Port, Predefined and Custom. The Program type lets you block or unblock a program. The Port type lets you block or unblock a port number. The Predefined type lets you use a built-in Windows 10 rule. The Custom type allows you to create a combination of Program and Port rules. You can select any rule type according to your needs. The Rule Type window is shown in the following image:
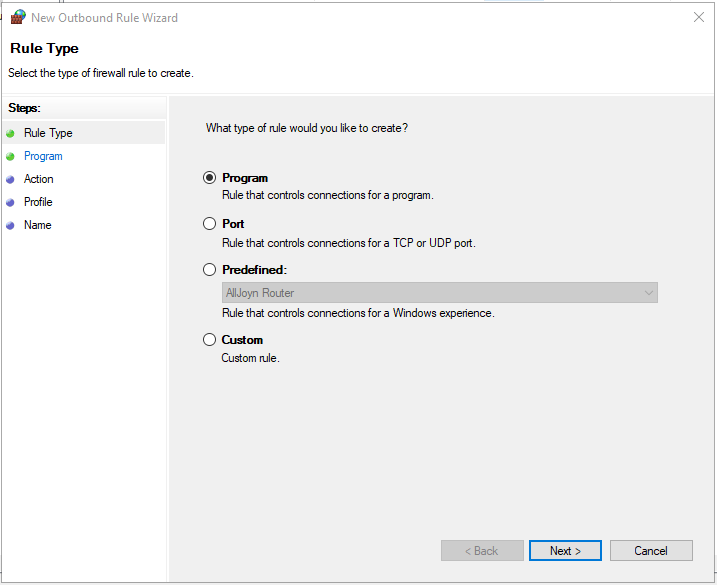
In this example, I want to create a rule in which I will block the connection of Microsoft Edge browser. For doing this, I will select the Program rule type and then click on the Next button.
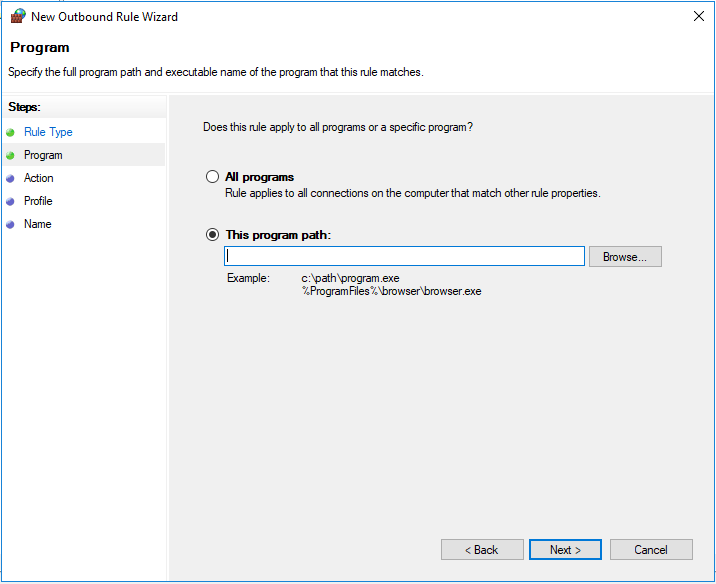
After clicking on the Next button, you will be asked to select the path of the exe file of the Microsoft Edge browser. You need to browse through your computer system in order to search for the exe file of Microsoft Edge browser as shown in the image below:
Once you manage to select the path of the exe file of your desired program, it will appear in the “This program path” textbox as shown in the following image:
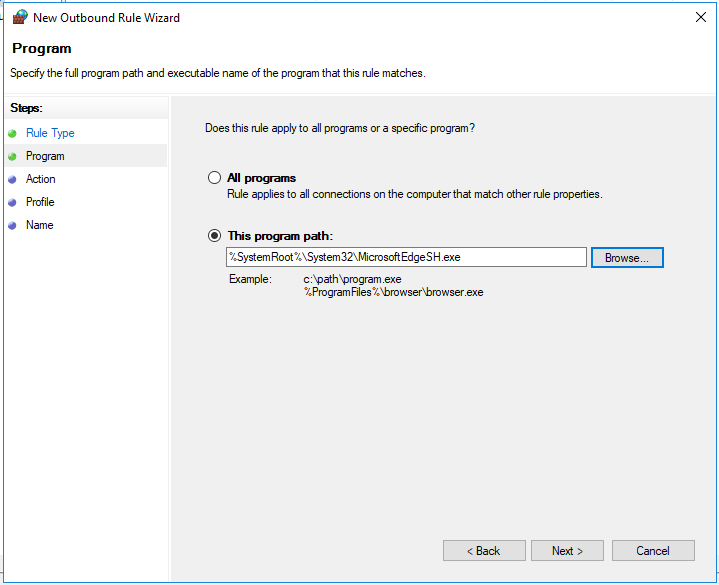
After selecting the path, click on the Next button.
Now Windows 10 will ask you to select an action that you want this rule to perform. I want to block the connection through this rule so I will select the radio button corresponding to the field of Block the connection as shown in the image below:
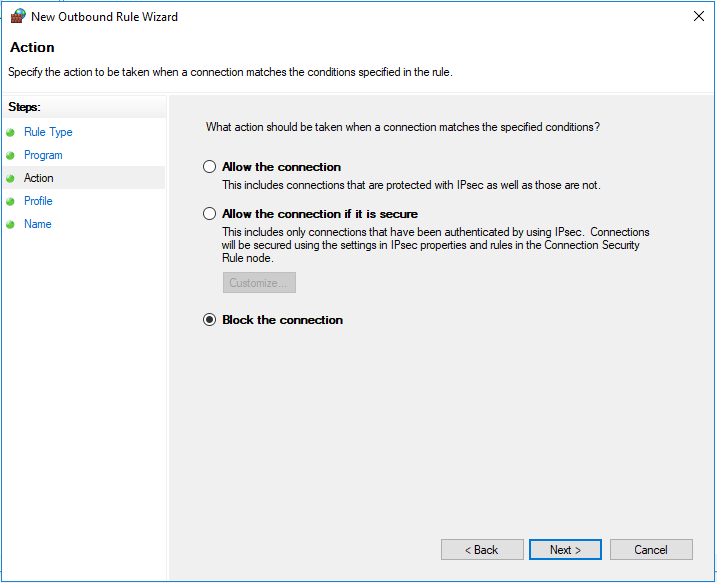
Again, click on the Next button.
Now you will be asked to select a Profile for which you want to block the connection. Windows 10 has three types of profiles i.e. Domain, Private and Public. If you will select the Domain profile, then your connection will only be blocked if your computer system is connected to a Domain or a corporate network. If you will select the Private profile, then your connection will be blocked only if you are connected to your home network. If you will select the Public profile, then your connection will be blocked if you are connected to a public network. However, the checkboxes corresponding to these Profiles let you select a combination of these profiles at a time. In this example, I am selecting all the profiles as shown in the following image:
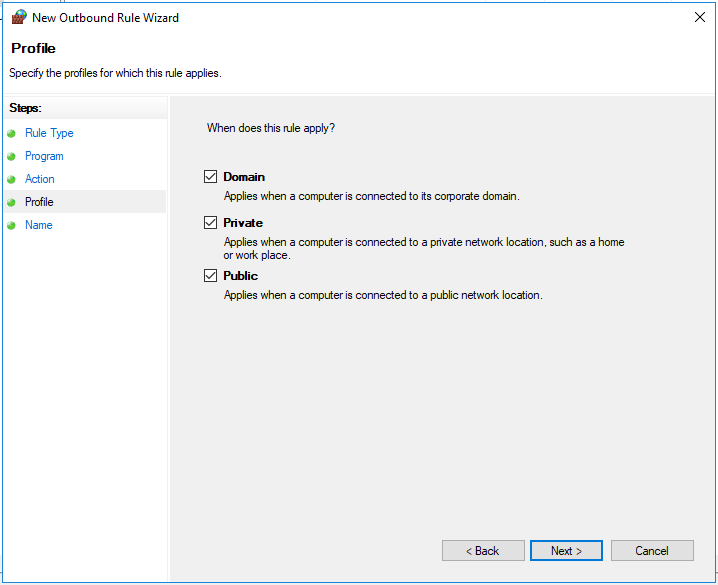
Click on the Next button.
Finally, you will be asked to give a name to your newly created rule so that you can easily identify it among the predefined rules.

You can give any name of your choice to your rule but it will be better if you give it a meaningful name so that you can easily remember it. In this example, I am naming my rule as “Block Microsoft Edge” as shown in the image below:
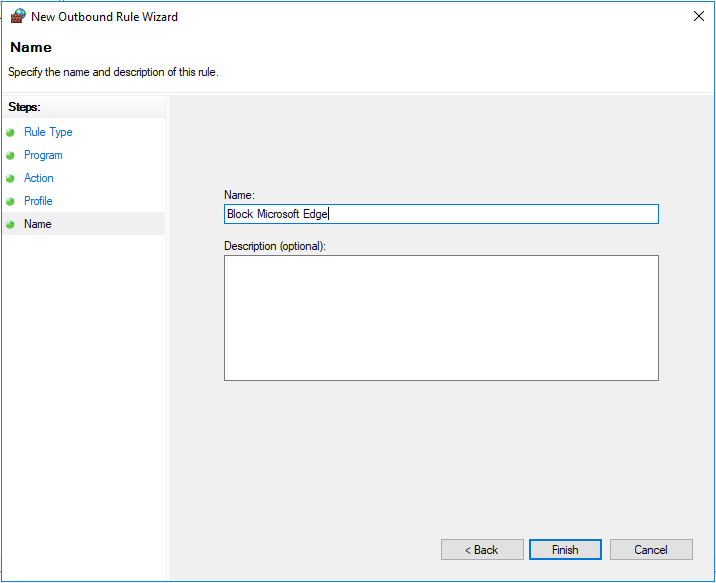
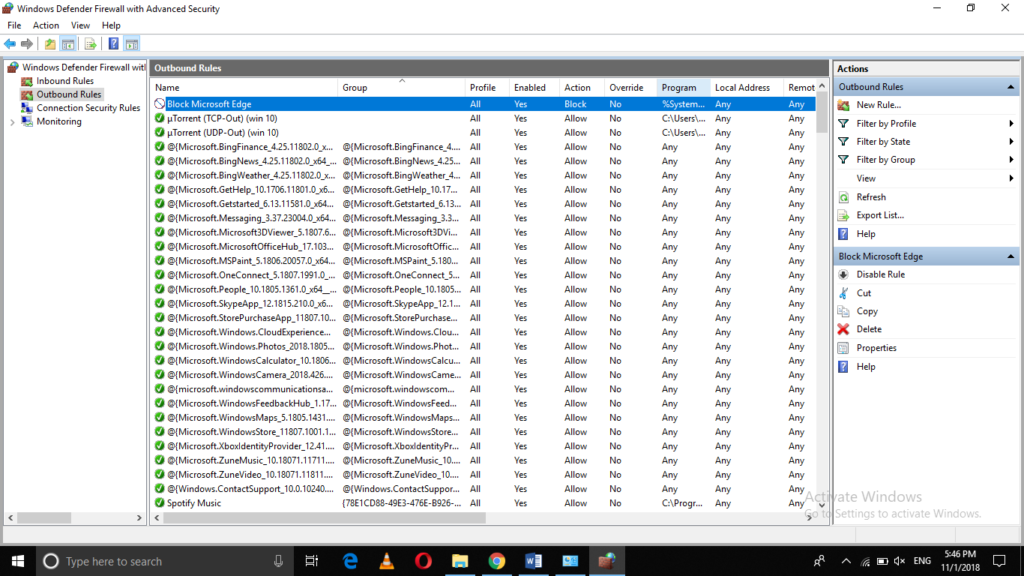
Now click on the Finish button in order to save your newly created advanced Firewall rule in Windows 10. This rule will now appear in the list of your Outbound Rules as highlighted in the following image:
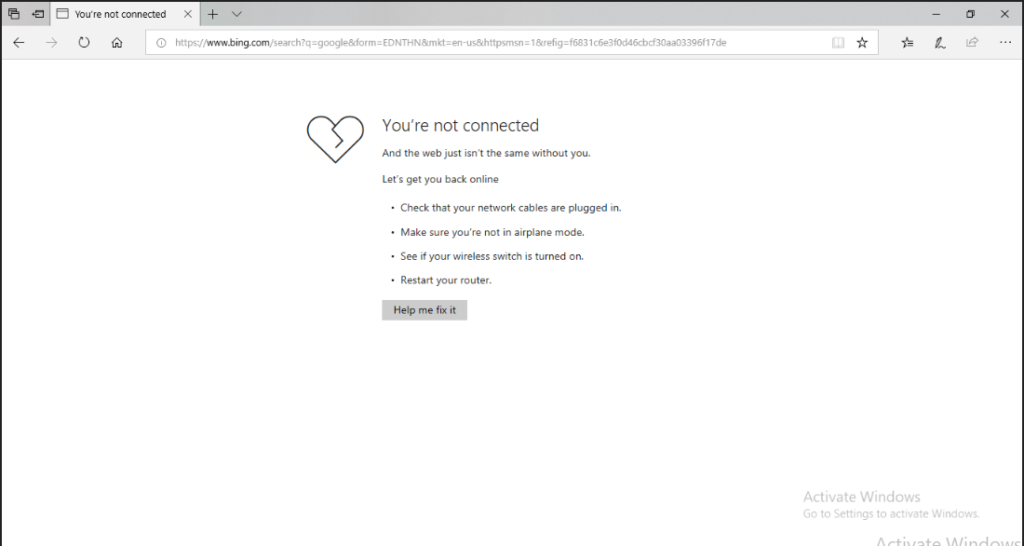
Now, whenever you will try to search anything through the Microsoft Edge browser, your access will be denied because of this newly created advanced Firewall rule as shown in the image below:
Conclusion
By following the method discussed in this article, you can create as many advanced Firewall rules, as you want. You can make these rules perform the actions of your choice. All you need to do is just to follow five simple steps, which are as follows:
- Select the rule type
- Select the path of the program on which you want to apply the rule
- Choose the action that you want your rule to perform
- Select the profile for which you want to apply your rule
- Give an appropriate name to your newly created advanced Firewall rule
Just follow these steps in the correct sequence and you are all set to go. If in any instance, you feel that you no longer need to use this rule anymore, you can simply disable or delete that rule by clicking on it and then choosing the desired option.
