
No one can send ping requests to your system to know whether it is alive or not when the Firewall is enabled on your Windows 10 computer system. You can enable ping by disabling the Firewall but this can prove to be very disastrous, as your PC will be exposed to external threats and malware. In this article, we will explain to you how to allow ping requests coming through the Firewall in Windows 10. We also have a guide that shows you how to use ping command in Windows.
Allowing Ping through the Firewall in Windows 10
For allowing ping from the Firewall in Windows 10, you need to proceed as follows:
Type control panel in the search section of your taskbar and click on the search result to launch a new control panel window. The newly opened Control Panel window is shown in the following image:

Click on the System and Security tab located at the top left corner of the image shown above.
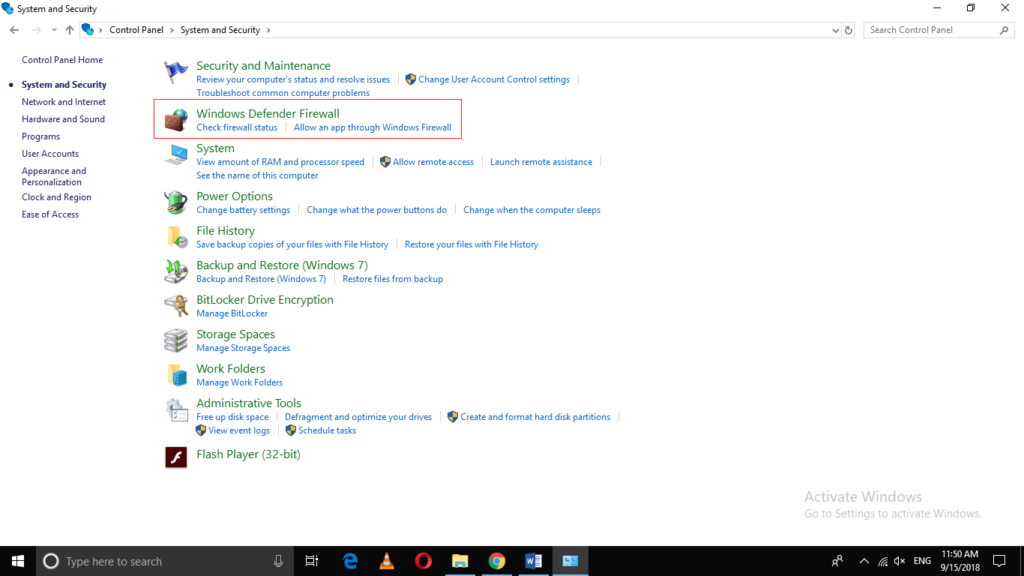
Now click on Windows Defender Firewall as highlighted in the image shown above.
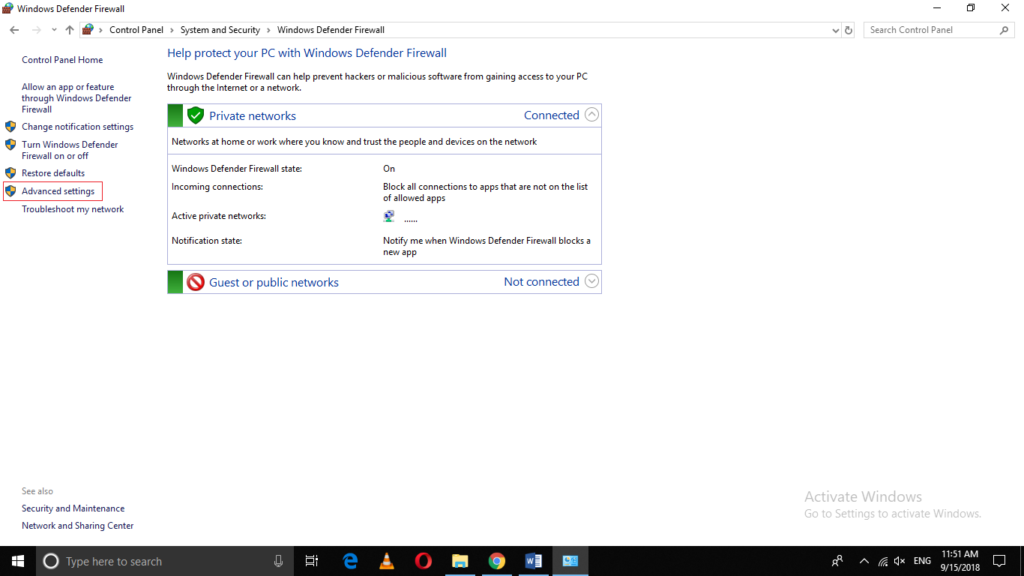
Click on Advanced Settings.
As soon as you will click on it, Windows Defender Firewall with Advanced Security window will appear as shown in the following image:
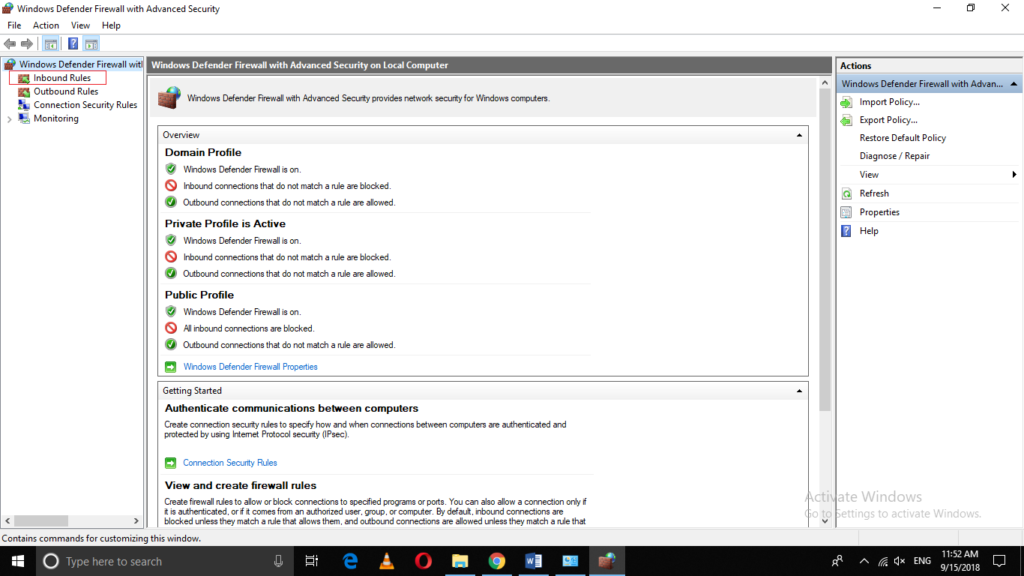
Now click on the Inbound Rules as highlighted in the image shown above.
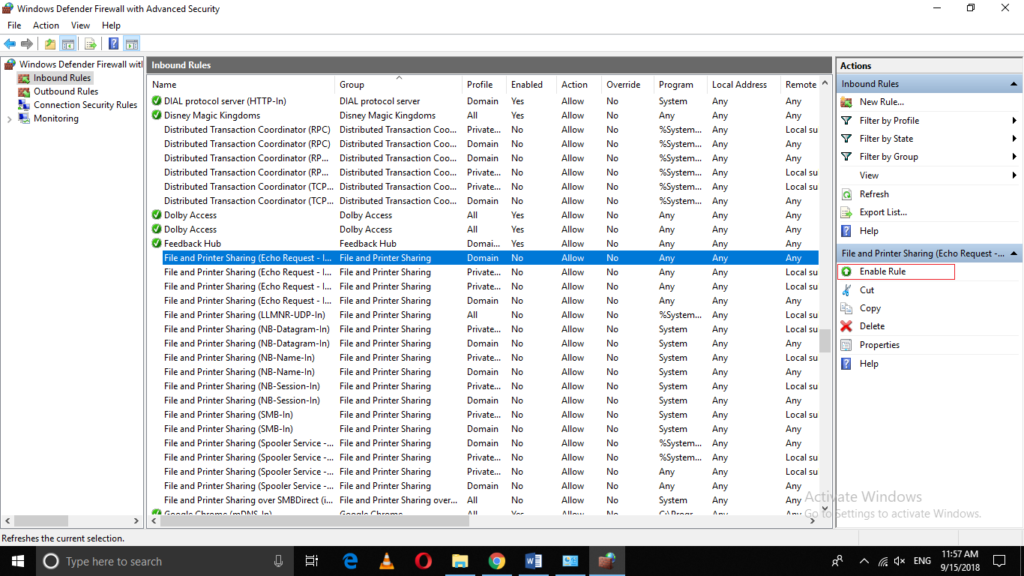
Scroll down to locate “File and Printer Sharing (Echo Request – ICMPv4 – In)” as highlighted in the image shown below:
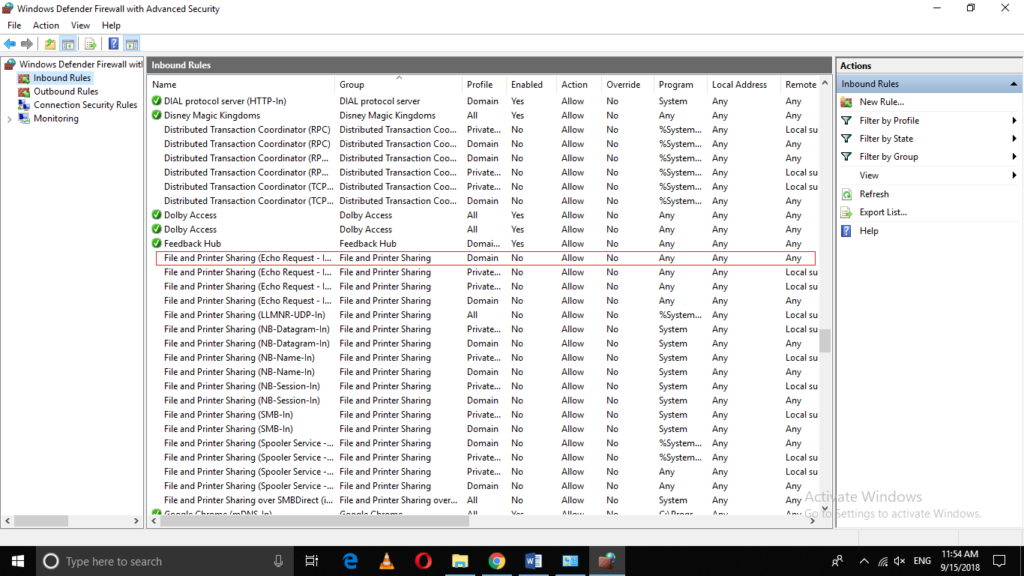
As soon as you manage to locate it, just click on it for once.
When you will click on it, some options will appear in the extreme right pane of the window as shown in the following image. Click on “Enable Rule” from these options in order to allow ping from the Firewall in Windows 10.
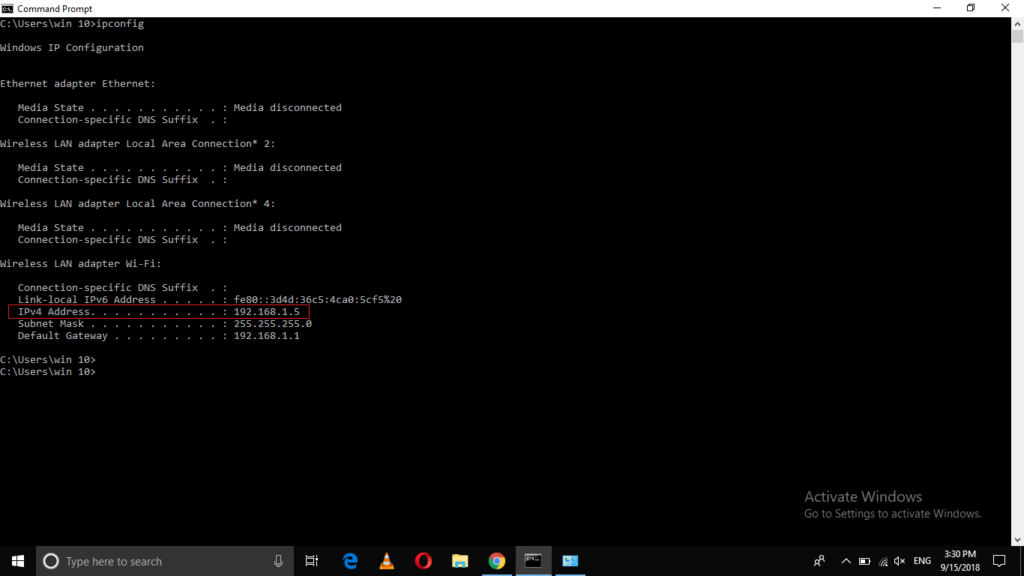
In this example, I have pinged my PC from another PC on the same network after enabling this rule. The IP address of my machine is highlighted in the following image:
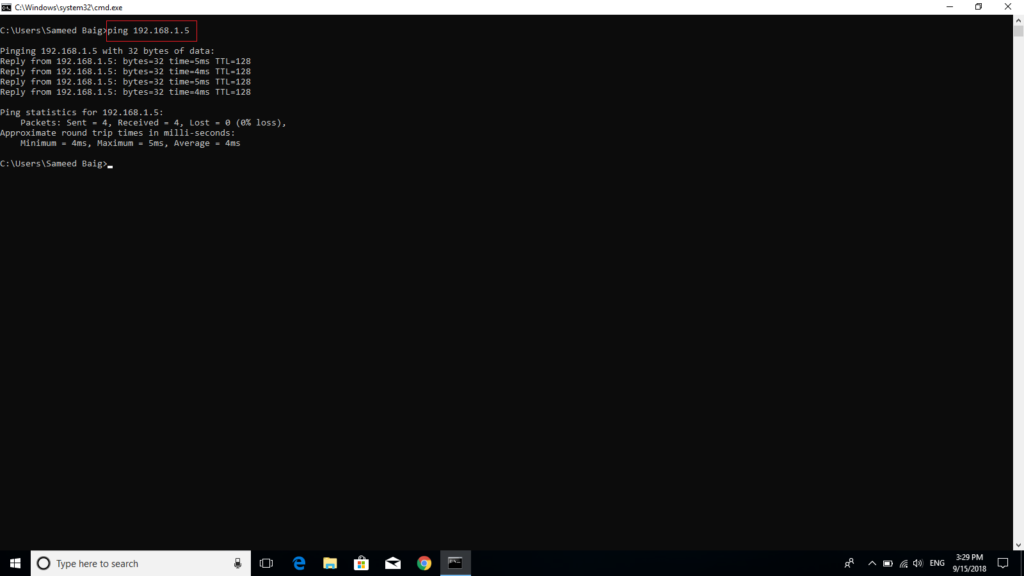
The image given below shows the success of ping from Firewall after enabling this rule.
Conclusion
By following the method discussed above, you can easily allow ping from the Firewall in Windows 10 without disabling your Firewall and exposing your system to external threats. Whenever you want to disable the ping requests from the Firewall, just follow the same steps and as soon as you will locate that rule, just click on it and then select “Disable Rule”. There is also a guide on creating advanced firewall rules in Windows.
