Some laptops come with ‘Wi-Fi’ function keys or switches, which enables or disables your Wi-Fi quickly. Furthermore, if your PC does not have one of these, you can use the software built into Windows to make one. You will have to begin by creating a desktop or start a shortcut menu. Once you have done so, if you like, you can invoke it using a keyboard shortcut. In this article, we will guide you through the whole procedure to turn on or off Wi-Fi with a shortcut keyboard or desktop in Windows 10.
Turn on or off Wi-Fi with a keyboard shortcut in Windows 10
To turn on or off Wi-Fi with a shortcut keyboard or desktop in Windows 10, follow this procedure step by step.
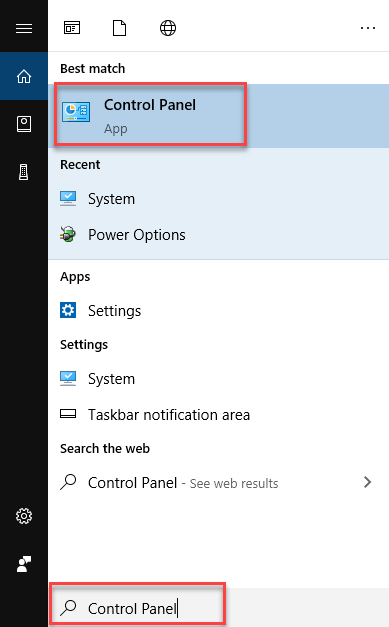
Click the Search button. Type Control Panel in the search bar and choose the Control Panel option as the following image is showing.
As you click the Control Panel option, the following screen will appear.
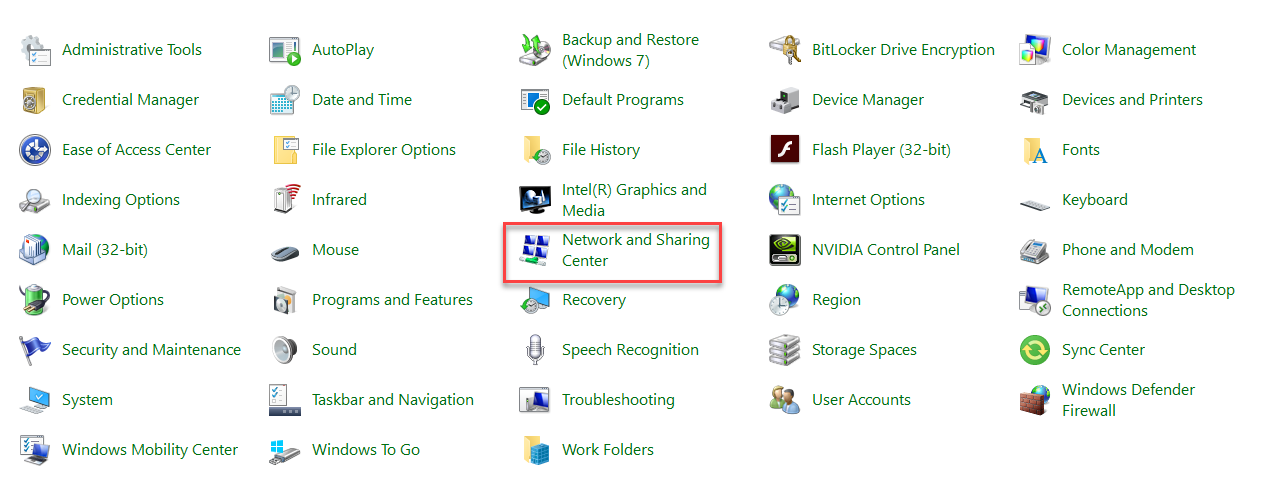
Now choose the Network and Sharing Center option as highlighted in the above image. As you click the Network and Sharing Center option, the following screen will appear.
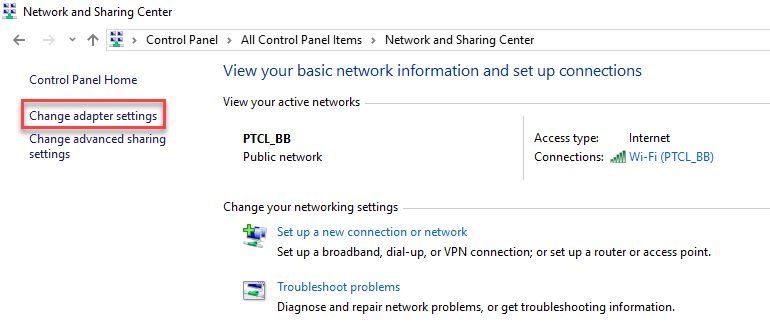
Click the Change adapter settings option from the left side of the screen as highlighted in the above image. The following screen will appear.

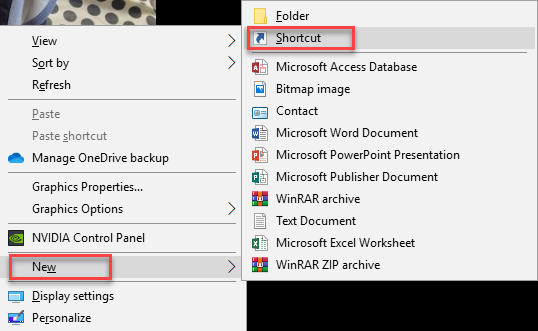
Note the Wi-Fi option. Now click anywhere on the desktop and select the New -> Shortcut option as the following image is showing.

As you select the Shortcut option, the following dialogue box will appear.
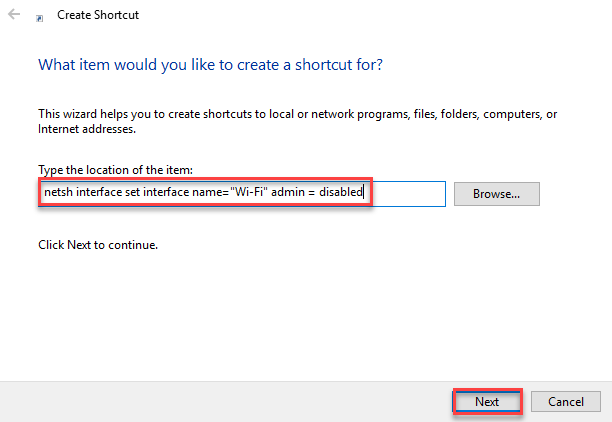
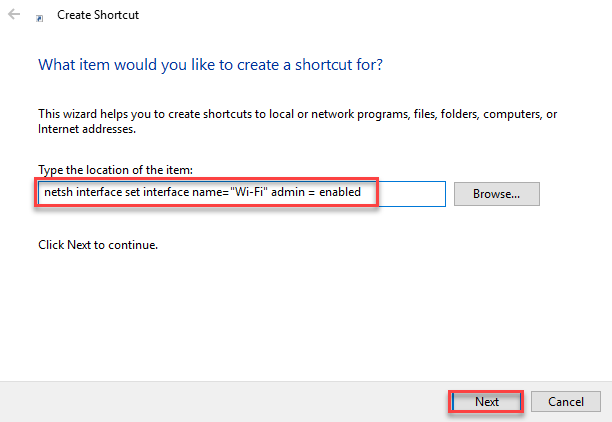
Paste the following command in the location and then click the Next button as highlighted in the above image.
netsh interface set interface name="Wi-Fi" admin = disabled
As you click the Next button, the following options will appear.
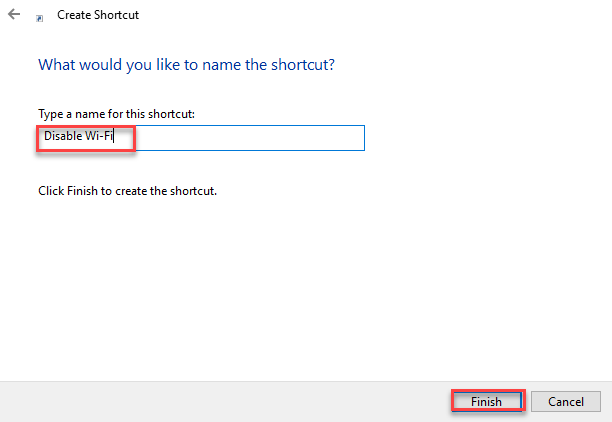
Type the name of shortcut and then click the Finish button as highlighted in the above image.
Click anywhere on the desktop and select the New -> Shortcut option as the following image is showing.
As you select the Shortcut option, the following dialogue box will appear.
Paste the following command in the location and then click the Next button as highlighted in the above image.
netsh interface set interface name="Wi-Fi" admin = enabled
As you click the Next button, the following options will appear.
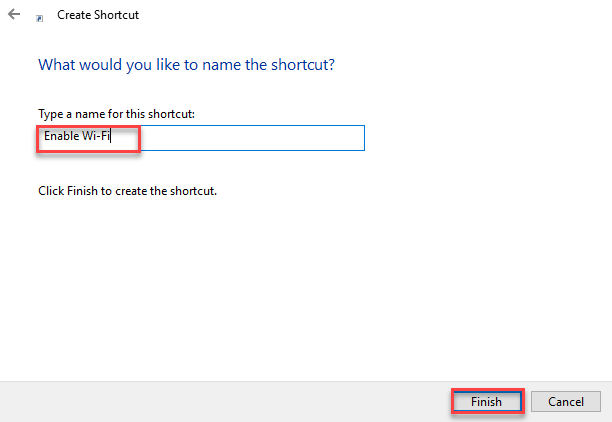
Type the name of shortcut and then click the Finish button as highlighted in the above image. Right click on the shortcut and select the Properties option.
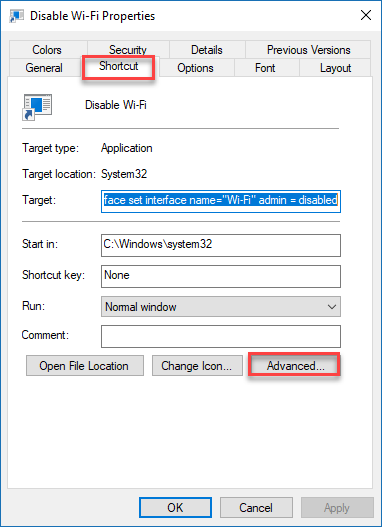
Under the Shortcut tab, click the Advanced button as highlighted in the above image. The following dialogue box will appear.
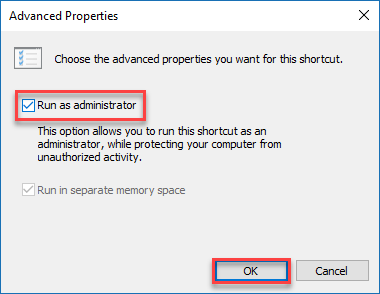
Check the Run as administrator checkbox and then click the OK button as highlighted in the above image. You will get back to the previous dialogue box. Then click the Apply and the OK button.
Conclusion
By following this procedure, you will be able to turn on or off Wi-Fi with a shortcut keyboard or desktop in Windows 10.
