The printer is indeed a very useful hardware device, which enables you to bring your important documents and other software artifacts into their hard copies so that they can be preserved in a better way. However, managing a printer is not something that everyone knows. This management includes several tasks such as adding a printer, printing a test document, clearing printer queue etc. In this article, we will tell you the ways in which all the printer related tasks could be managed in Windows 10.
Managing a Printer in Windows 10
The most important printer-related tasks and the methods of managing these tasks are listed below:
Adding a Printer in Windows 10
In order to add a printer in Windows 10, you need to proceed as follows:
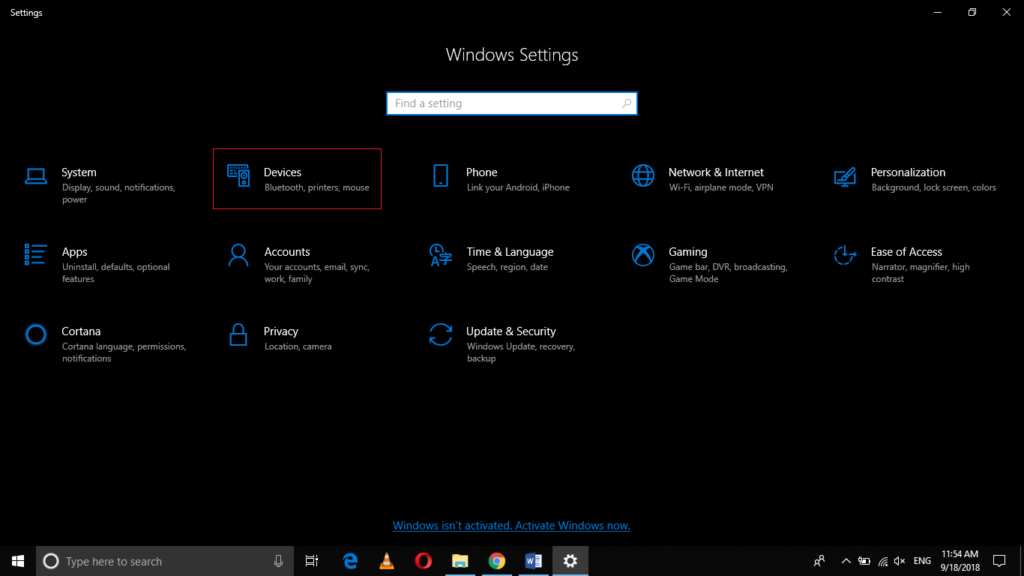
Type settings in the search section of your taskbar and click on the search result to launch a new settings window. The newly opened Settings window is shown in the following image:

Click on the Devices tab as highlighted in the image shown above.

Now click on Printers and Scanners.
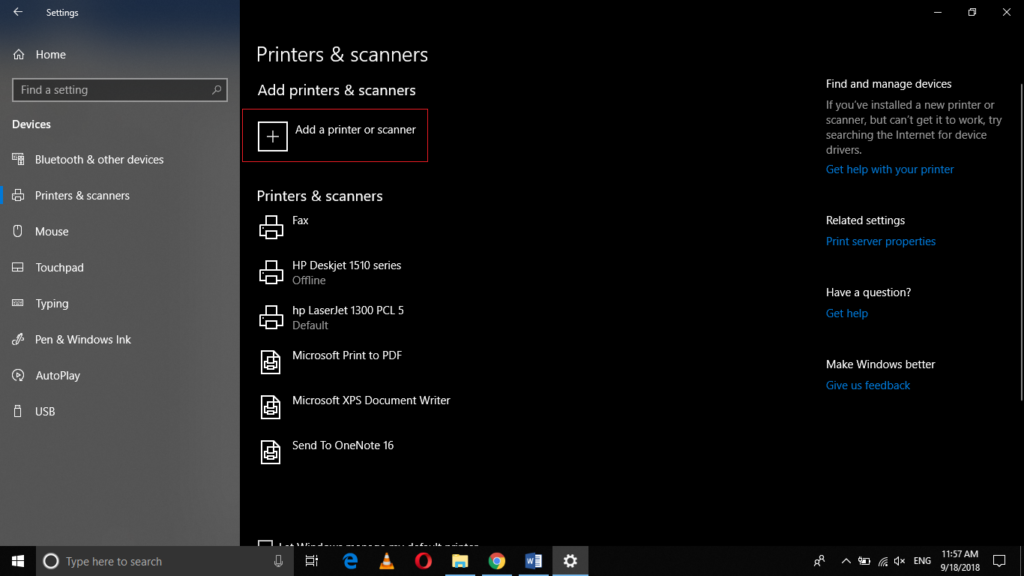
Click on Add a printer or scanner.
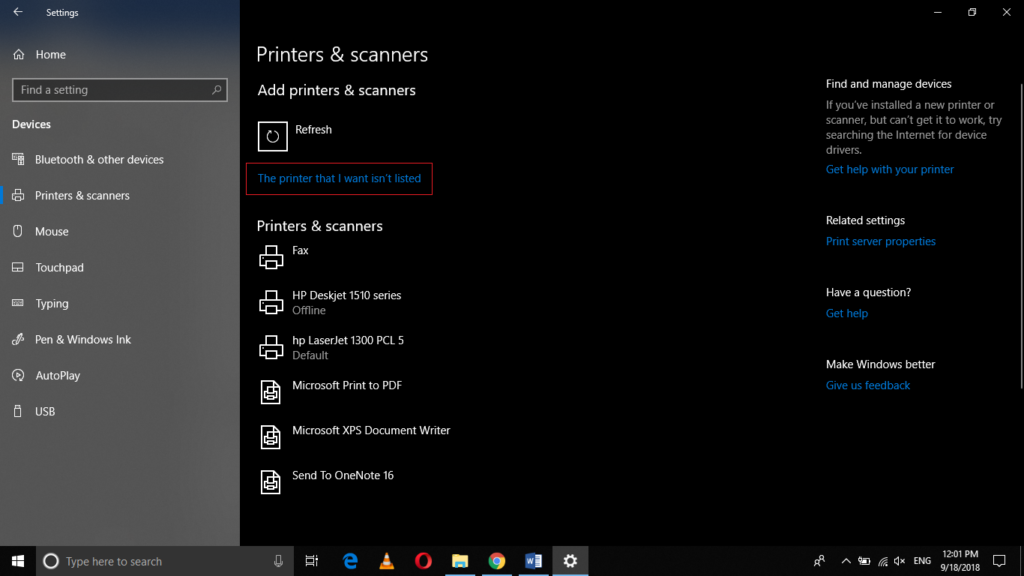
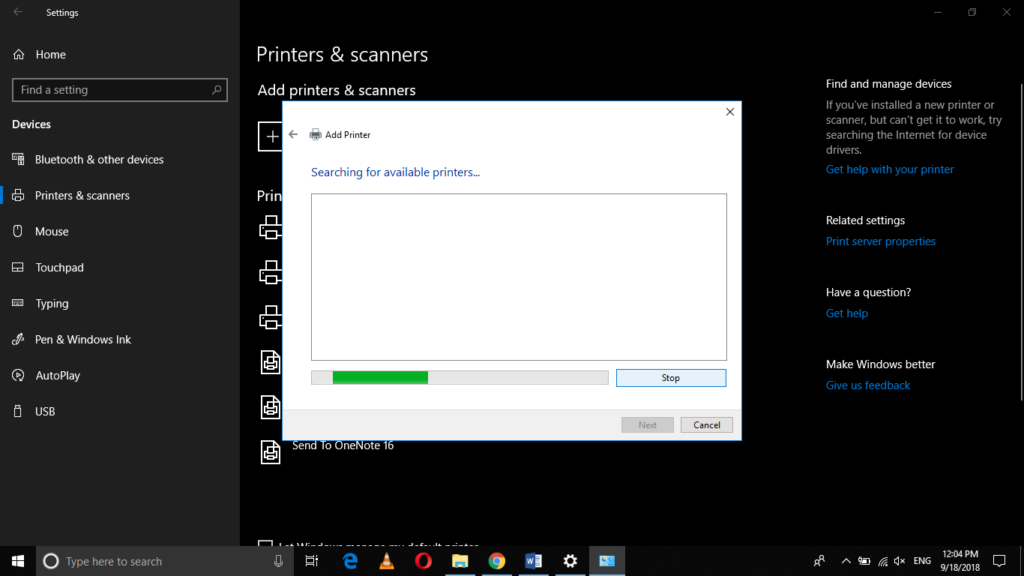
As soon as you will click on it, Windows 10 will start searching for the nearby printers.
After the search finishes, a list of available printers will appear on the screen and you can click on any one of them to add it.
If the printer you are looking for does not appear after the search, then click on “The printer that I want is not listed” as highlighted in the following image:
After clicking on it, a dialogue box will appear which is shown in the image below:
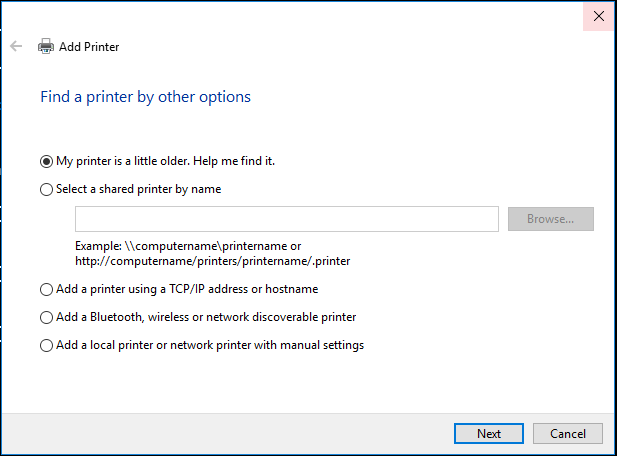
Click on the Next button.
As soon as you will click on it, Windows 10 will start searching for your printer and then you can easily add it.
How to change the Printer Preferences
For changing the printing preferences, you need to perform the following steps:
Type settings in the search section of your taskbar and click on the search result to launch a new settings window. The newly opened Settings window is shown in the following image:

Click on the Devices tab.

Now click on Printers and Scanners as highlighted in the image shown above.
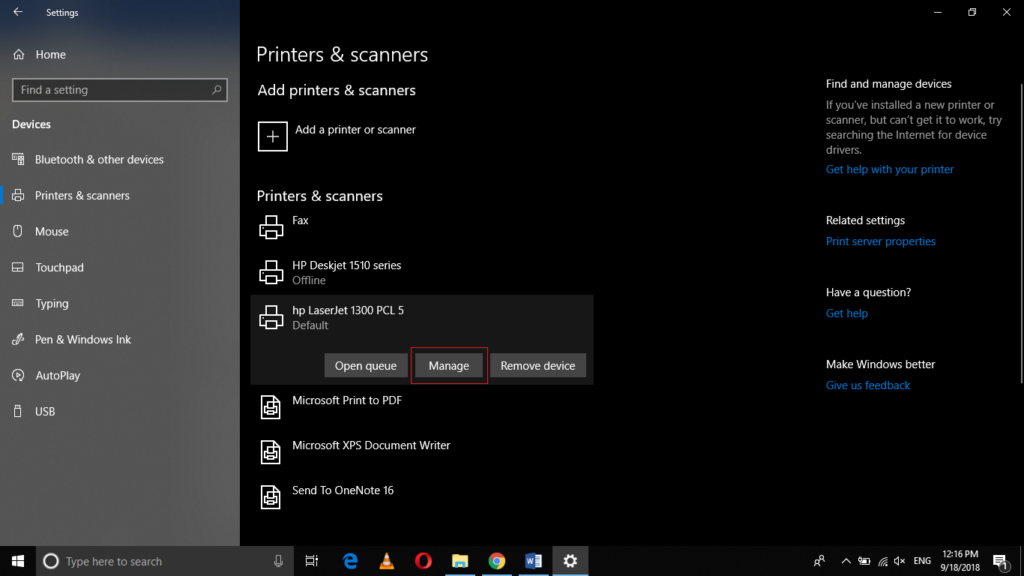
Click on your printer as shown in the following image:

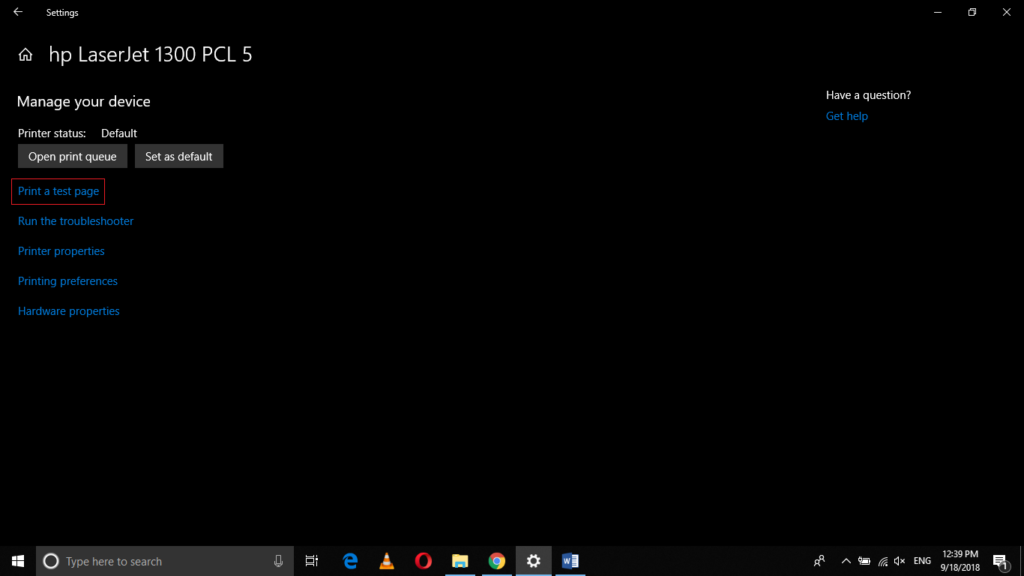
Click on the Manage button as highlighted in the image shown below:
Now click on Printing Preferences.

As soon as you will click on it, the Printing Preferences window will appear which is shown in the following image:
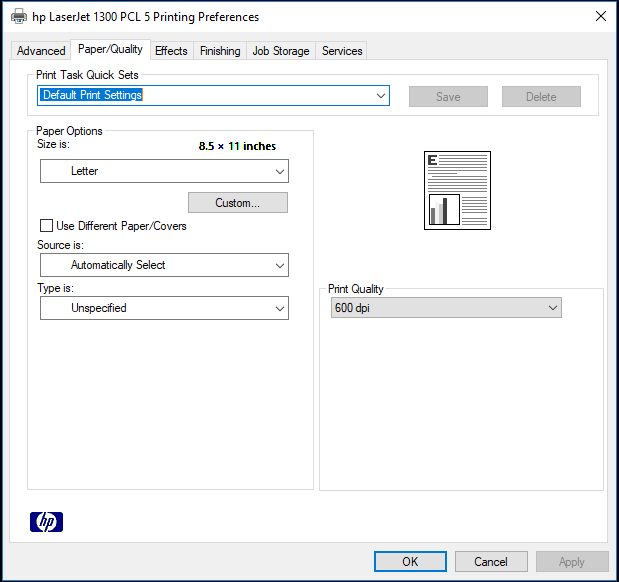
Here you can select different preferences for printing such as print quality, paper size, pages per sheet etc.
After selecting your desired preferences, just click on the Apply button.
Finally, click on the OK button to save your settings.
Changing Printer Properties
In order to change the printer properties, you need to proceed as follows:
Type settings in the search section of your taskbar and click on the search result to launch a new settings window. The newly opened Settings window is shown in the following image:

Click on the Devices tab.

Now click on Printers and Scanners as highlighted in the image shown above.
Click on your printer as shown in the following image:

Click on the Manage button as highlighted in the image shown below:

Click on the Printer Properties as shown in the following image:

As soon as you will click on it, the Printer Properties window will appear which is shown in the image below:
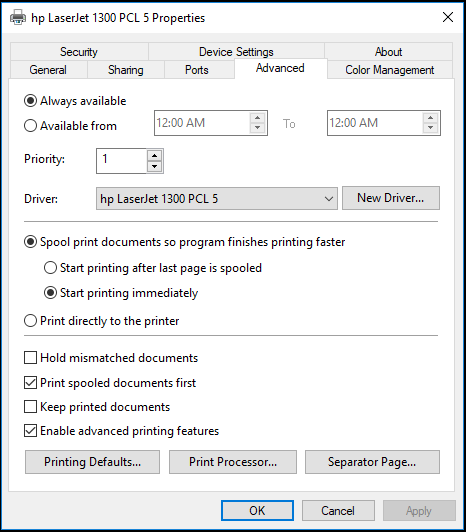
Here you can change various printer properties such as adding a new driver, priority, color management etc.
Once you make your desired changes, just click on the Apply button.
Finally, click on the OK button to save your settings.
Printing a Test Page
For printing a test page, you need to perform the following steps:
Type settings in the search section of your taskbar and click on the search result to launch a new settings window. The newly opened Settings window is shown in the following image:
Click on the Devices tab.

Now click on Printers and Scanners as highlighted in the image shown above.
Click on your printer as shown in the following image:

Click on the Manage button as highlighted in the image shown below:

Finally, click on Print a test page as shown in the following image:
How to Clear Printer Queue in Windows 10
In order to clear the printer queue, you need to proceed as follows:
Type settings in the search section of your taskbar and click on the search result to launch a new settings window. The newly opened Settings window is shown in the following image:

Click on the Devices tab.
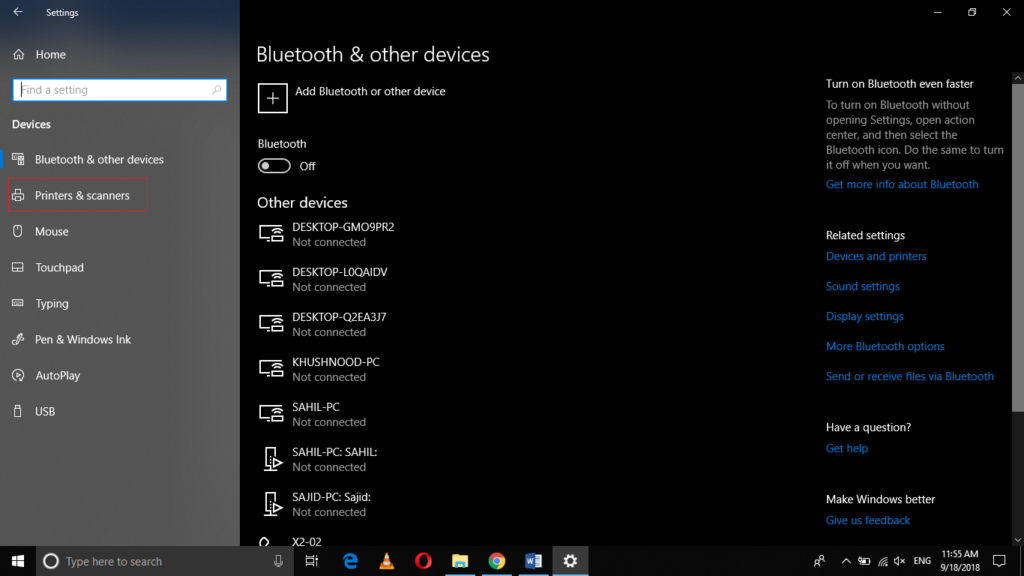
Now click on Printers and Scanners as highlighted in the image shown above.
Click on your printer as shown in the following image:

Click on the Manage button as highlighted in the image shown below:

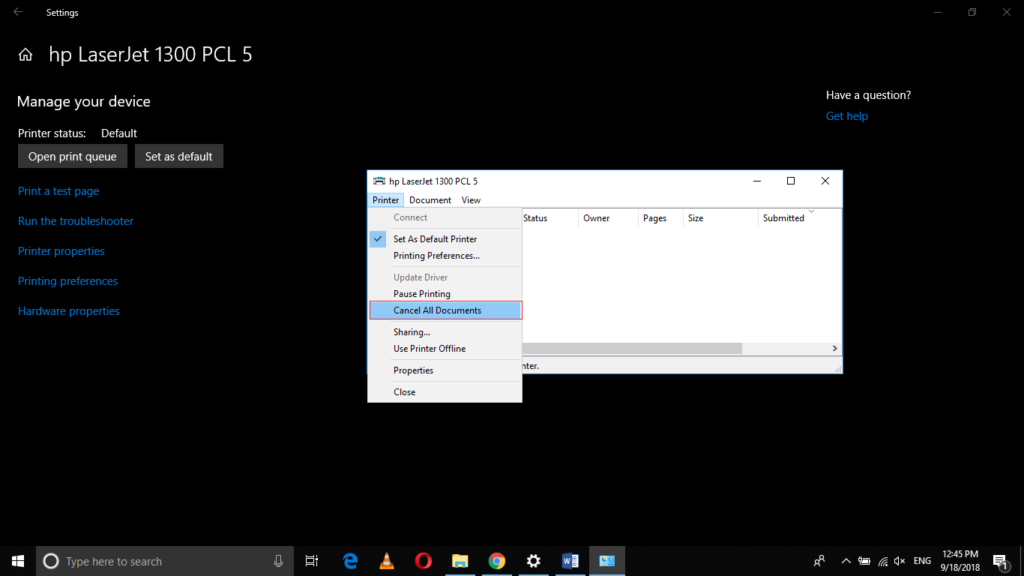
Now click on Open print queue as shown in the following image:

As soon as you will click on it, the window shown in the image below will be displayed.
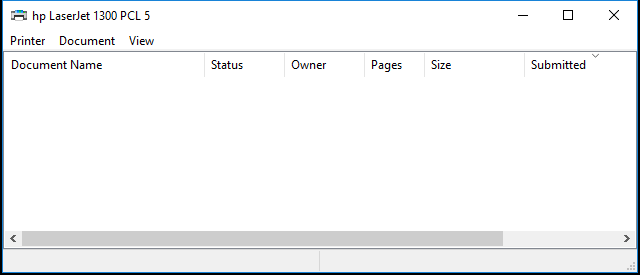
Click on the Printer tab.
Finally, click on Cancel All Documents as highlighted in the image shown below:
Sharing a Printer in Windows 10
For sharing a printer in Windows 10, you need to perform the following steps:
Type settings in the search section of your taskbar and click on the search result to launch a new settings window. The newly opened Settings window is shown in the following image:

Click on the Devices tab.

Now click on Printers and Scanners as highlighted in the image shown above.
Click on your printer as shown in the following image:

Click on the Manage button as highlighted in the image shown below:

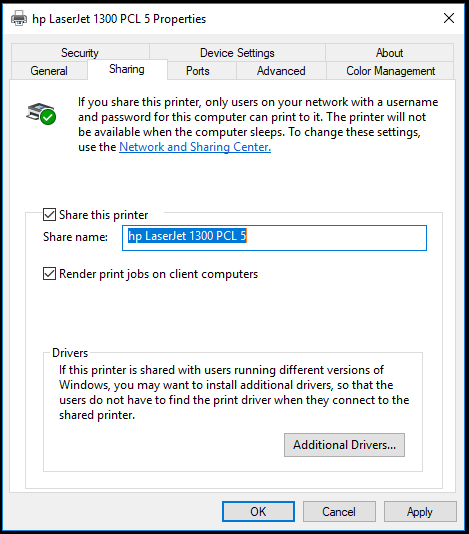
Click on the Printer Properties as shown in the following image:

As soon as you will click on it, the Printer Properties window will appear which is shown in the image below:

Now click on the Sharing tab.
Check the checkbox corresponding to the field of “Share this printer” and give a suitable name for your printer as shown in the following image:
Click on the Apply button and then click on the OK button to save your settings.
Now anyone on your network who has your account username and password can connect to this printer using its name and can easily use this shared printer.
Troubleshooting a Printer in Windows 10
For troubleshooting a printer, you need to proceed as follows:
Type settings in the search section of your taskbar and click on the search result to launch a new settings window. The newly opened Settings window is shown in the following image:

Click on the Devices tab.

Now click on Printers and Scanners as highlighted in the image shown above.
Click on your printer as shown in the following image:

Click on the Manage button as highlighted in the image shown below:

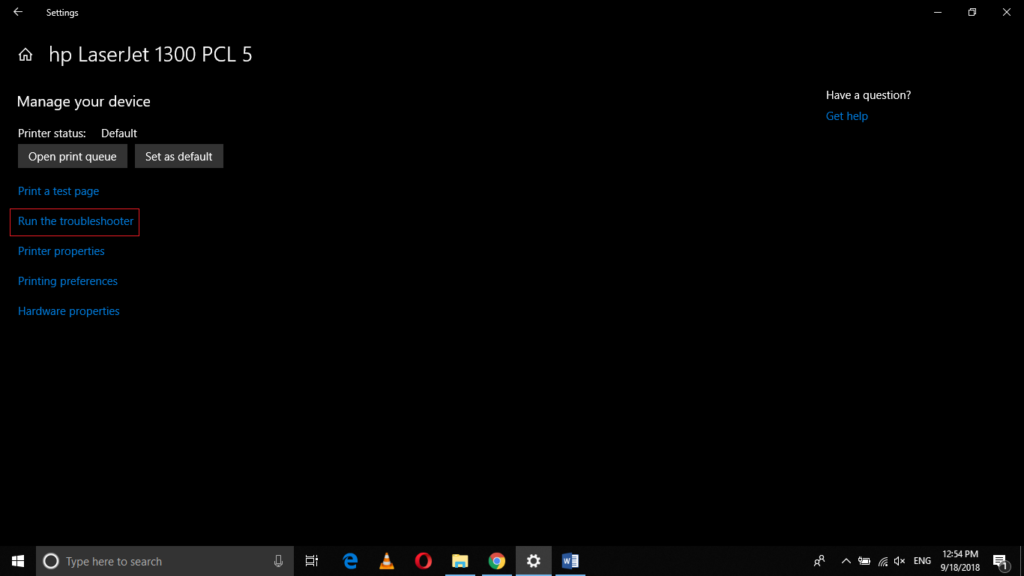
Finally, click on Run the troubleshooter in order to troubleshoot your printer as shown in the following image:
Conclusion
In this article, we studied different printer-related tasks and their management through the Settings application in Windows 10. Now you will no longer find it troublesome to use and manage a printer after reading this article.