Hardware Acceleration usually refers to using hardware from a device to accomplish a specific activity quicker and easier. In almost all instances, Hardware Acceleration is used to make graphics rendering smooth and quicker on a device by unloading graphics rendering responsibilities. The concept behind Hardware Acceleration is to accelerate and boost graphical output and rendering by transferring it from CPU to the GPU, allowing for better output. Some of the users may want to disable this feature. In this article, we will guide you through the whole procedure to disable Hardware Acceleration in Windows 10.
Disable Hardware Acceleration in Windows 10
To disable Hardware Acceleration in Windows 10, follow any of these procedures step by step.
Method #1
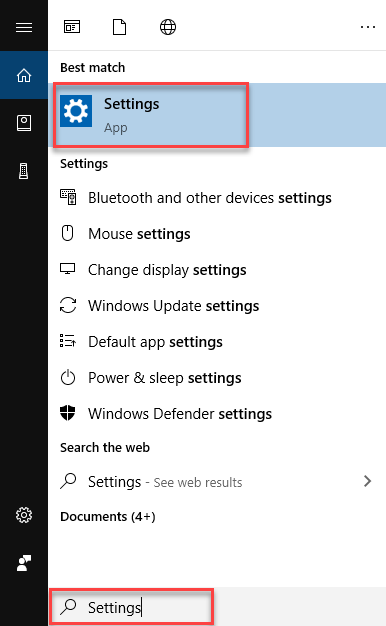
Click the Search button on the taskbar. Type Settings in the search box and then click the Settings option as the following image is showing.
As soon as you click the Settings option, the Windows Settings will display as follows.
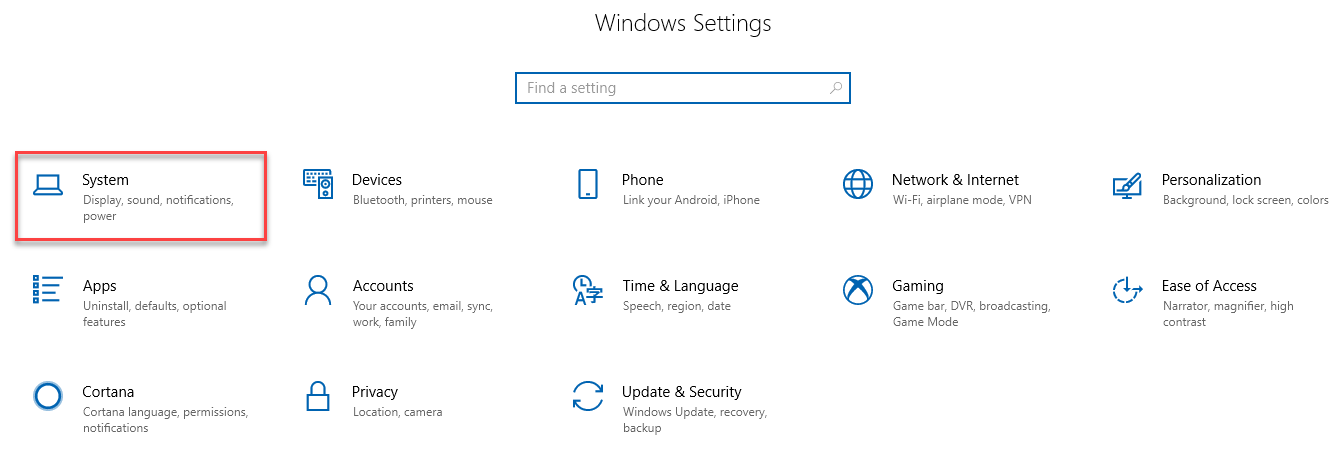
Click the System option as highlighted in the above image. The next screen will appear as the following image is showing.
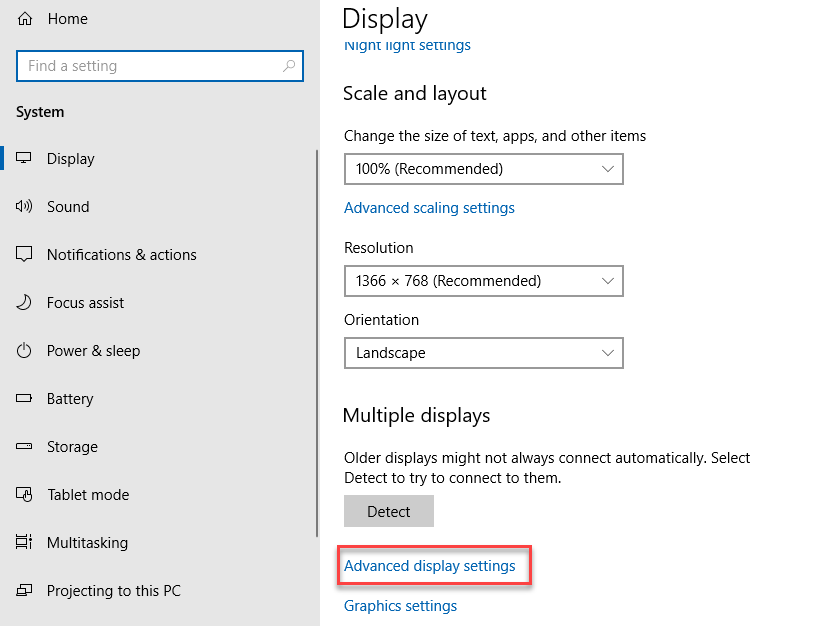
Now click the Advanced display settings option as highlighted in the above image. After this, the screen will appear as the following image is showing.
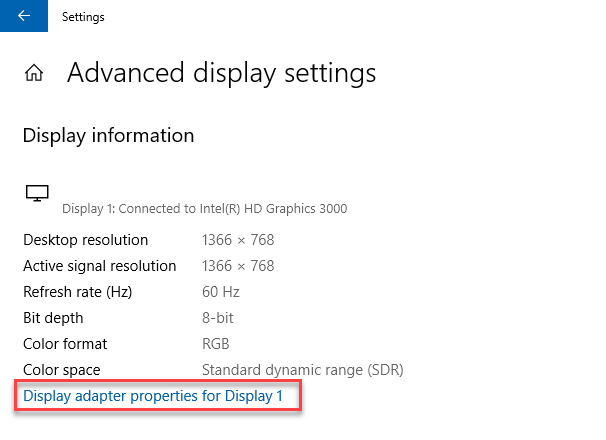
Click the Display adapter properties for Display 1 option as highlighted in the above image. It will display the following dialogue box.
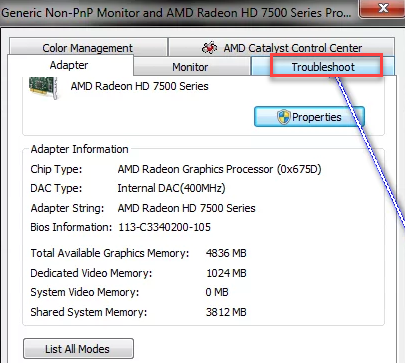
Click the Troubleshoot tab from the dialogue box as highlighted in the above image. After that, move the slider to the None side under the Hardware Acceleration option. Click Apply and then OK button. Restart the computer to apply the changes.
Method #2
Click the Search button on the taskbar. Type Run in the search box and then click the Run option as the following image is showing.
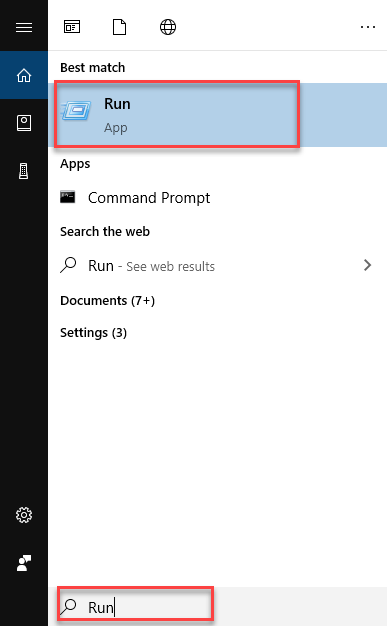
As you click the Run option, the following dialogue box will appear.
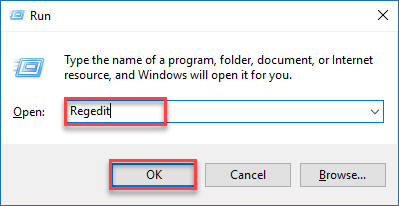
Type Regedit in the Open textbox and then click the OK button as highlighted in the above image. The Registry Editor screen will appear as the following image is showing.

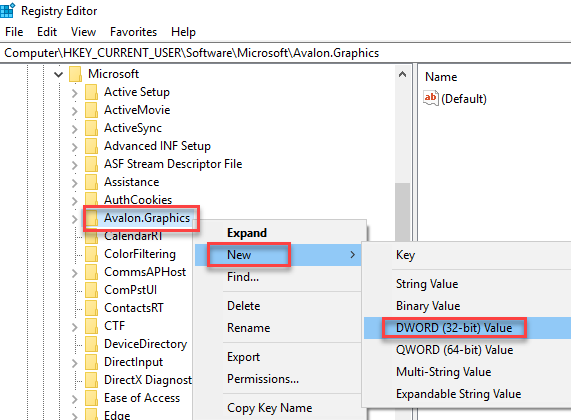
Navigate to the following path from the left side of the screen.
HKEY_CURRENT_USER -> Software -> Microsoft
As you click the Microsoft option then locate the Avalon.Graphics option under this. Right click on it and choose the New -> DWORD (32-bit) Value as the following image is showing.
Rename the newly created word as DisableHWAcceleration as the following image is showing.

Double click on it and the following dialogue box will appear.

Put 1 in the Value data textbox and then click the OK button as highlighted in the above image. Close the Registry Editor and restart the computer.
Conclusion
By following any of these procedures, you will be able to disable Hardware Acceleration in Windows 10.