Whenever we create a new folder or file in Windows 10, it is always created with a default name such as New Folder or New Text Document, etc. However, you can always customize these names according to your choice. Today’s article will be based on the method of changing the default new folder or file name in Windows 10.
Changing the Default New Folder or File Name in Windows 10:
For changing your default new folder or file name in Windows 10, you will have to perform the following steps:
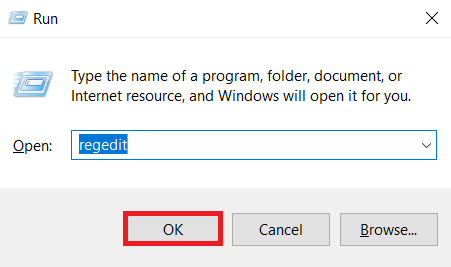
Step # 1: Open the Registry Editor in Windows 10
For opening the Registry Editor in Windows 10, you need to first launch the Run Prompt with the Windows+ R key combination. In the Run Prompt, type:
regedit
in the text field provided and then click on the OK button as highlighted in the image shown below:
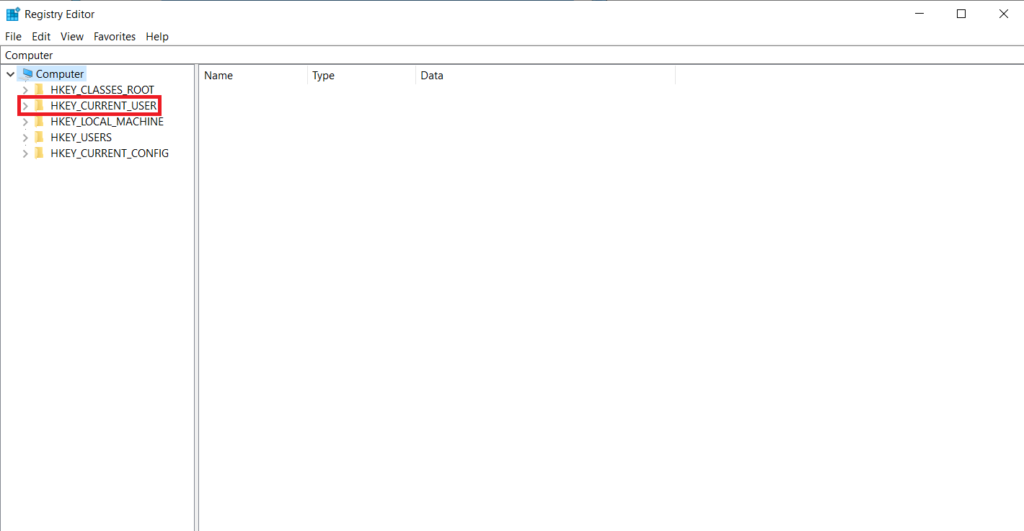
Step # 2: Access the Specified Path within your Registry Editor
When you are able to view the Registry Editor window, click on the HKEY_CURRENT_USER folder.
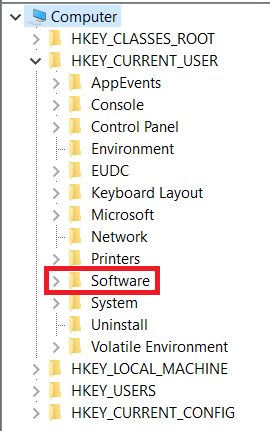
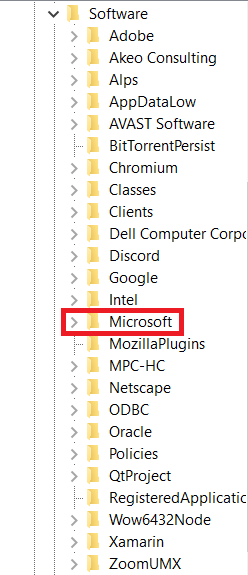
Then you need to click on the Software folder as highlighted in the following image:
In the Software folder, you need to click on the Microsoft folder:
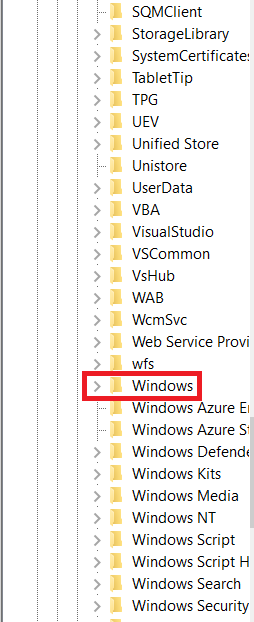
Then you need to click on the Windows folder as highlighted in the image shown below:
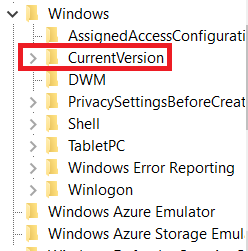
In the Windows folder, you need to click on the CurrentVersion folder:
Then you need to locate the Explorer folder as highlighted in the following image:
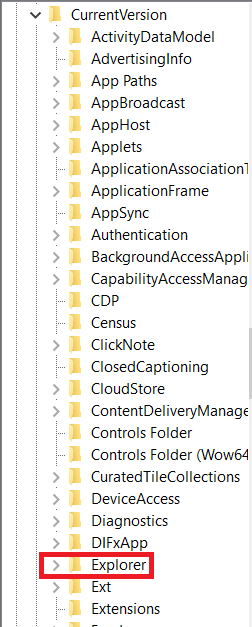
The complete path to which you have to navigate is as follows:
HKEY_CURRENT_USER\Software\Microsoft\Windows\CurrentVersion\Explorer
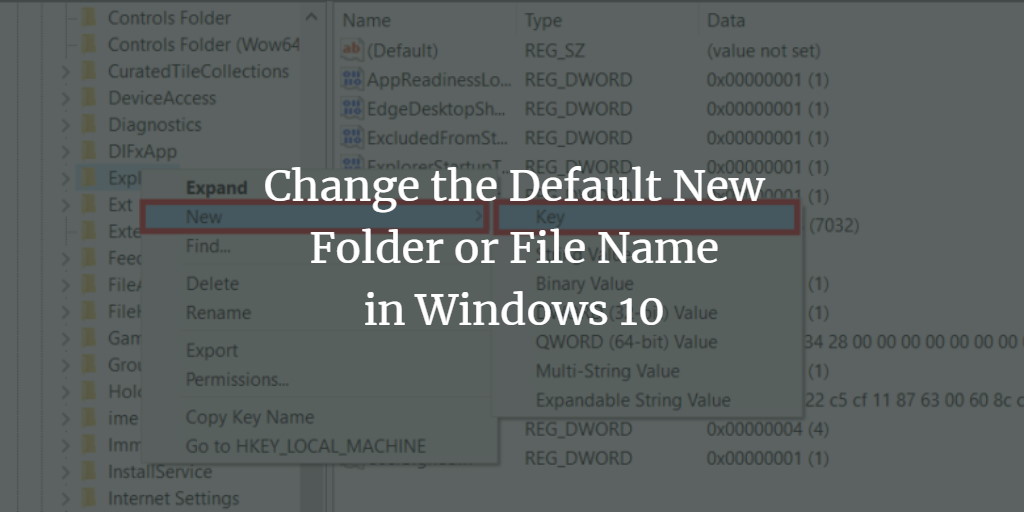
Step # 3: Create a New Key at the Specified Path:
Now after reaching the specified path, you have to right-click on the Explorer folder, to open a pop-up menu. From that menu, you need to click on the New option and then click on the Key option as highlighted in the image shown below:
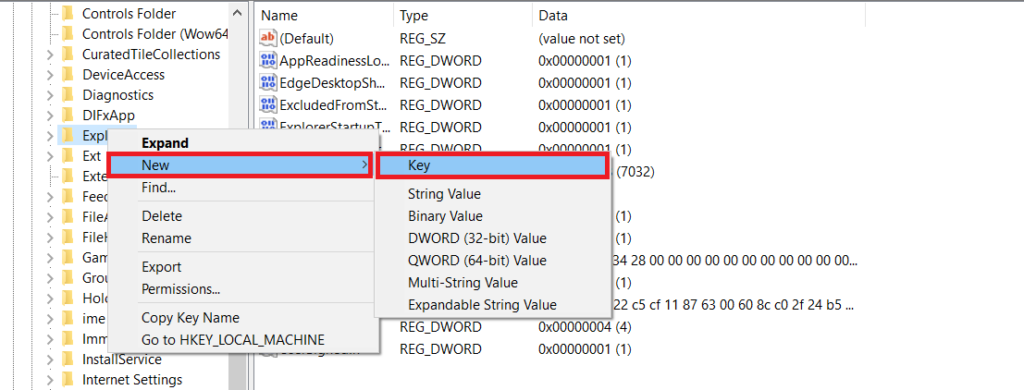
Rename this newly created key as NamingTemplates.

Step # 4: Create a New String Value for your Newly Created Key
Double click on the newly created key and then right-click in the right pane of the Registry Editor window. This will cause a menu to appear on your screen from which you need to click on the New option and then on the String Value option as highlighted in the following image:
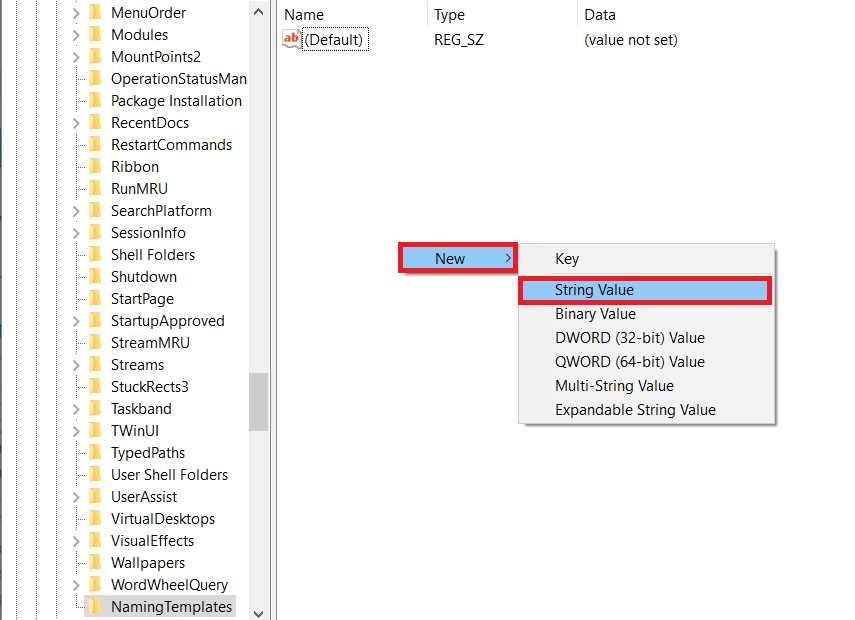
Specify the name of this new string value as RenameNameTemplate.

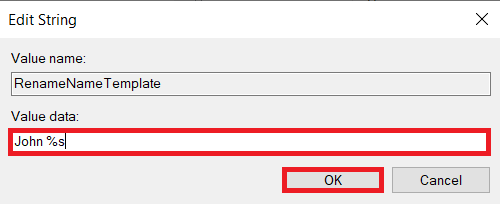
Step # 5: Set the Value for Changing the Default New Folder or File Name
Now double click on this newly created string to set its value. In the Edit String dialogue box, type any desired name that you want for your new file or folder followed by a space and a “%” sign. For example, we wanted all our new folders to be named as “John New folder” and new text files as “John New Text Document”. That is why we have typed the value as “John %” as highlighted in the image shown below and then clicked on the OK button.
Step # 6: Verify if the New Folder or File Name has been Changed in Windows 10 or not:
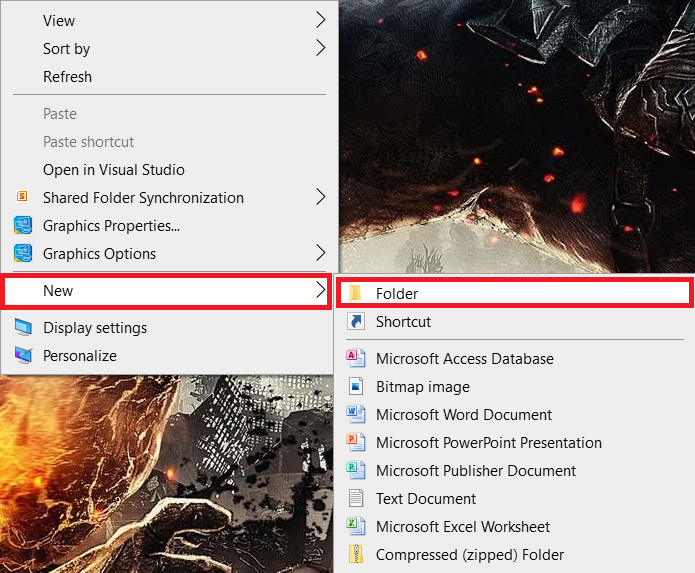
Once this value has been set up, you can test if the specified process works fine or not. For testing it, we are going to create a new folder on our Desktop. Right-click on your Desktop and select the New option from the menu that appears and then select the Folder option as highlighted in the following image:
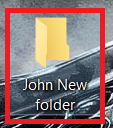
When we will do that, we will notice that a new folder will be created on our Desktop with the name John New folder as shown in the image below:
Similarly, when we will create a New Text file following the same procedure, then it will be named as John New Text Document as shown in the following image:

Bonus Tip
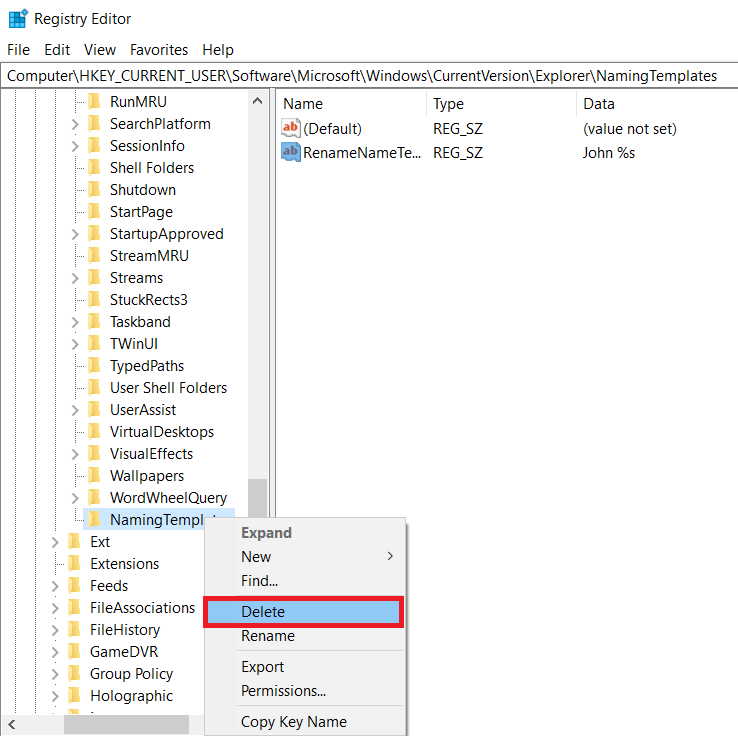
If you want to revert the changes you just made by following the method shown above, you should go to the same path in your Registry Editor as specified in the method above. Then right-click on the NamingTemplates key and select the Delete option from the menu that appears as shown in the image below:
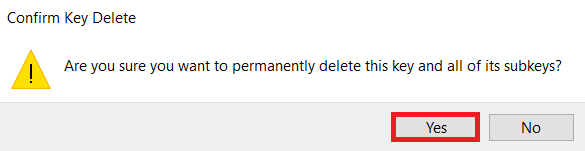
After that, you will be prompted with a confirmation dialogue box from which you are supposed to select the Yes option as shown in the following image:
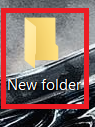
Once you will do that and try to create a new folder or file again, it will be created with the old default name as shown in the image below:
Conclusion
In this article, we taught you the method of customizing the default new folder or file name in Windows 10. After following this procedure, you will get to see your new folders and files with customized names. However, you can always revert back to the default names by following the bonus tip shared with you in this article.
