Updates are automatically installed on Windows 10, this guide will help you regain control and decide when to install which update. There are two ways to prevent auto updates:
- Using Local Group Policy Editor.
- Using Registry.
Preventing Automatic Updates Using Local Group Policy Editor
Step 1: Use Windows key + R keyboard shortcut to open the run command window.
Step 2: Type in gpedit.msc to open the local group policy editor.
Step 3: Go to the following path:
Computer Configuration\Administrative Templates\Windows Components\Windows Update
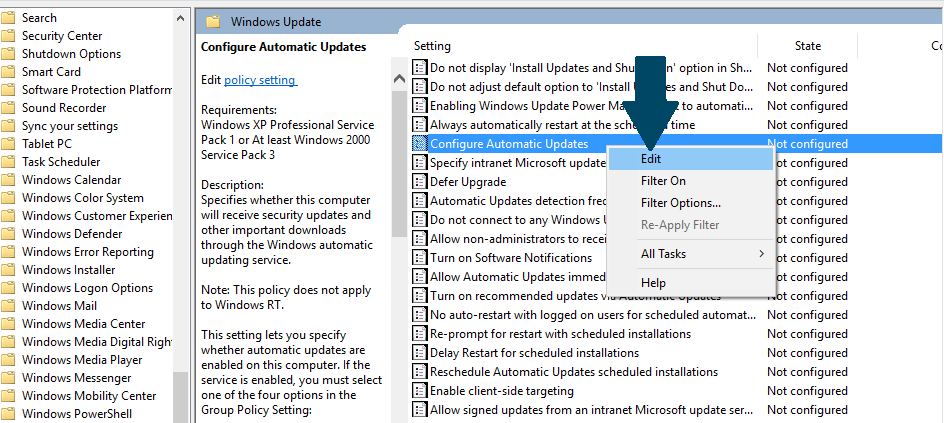
Step 4: Right-click the "Configure Automatic Updates policy" and then click on Edit.
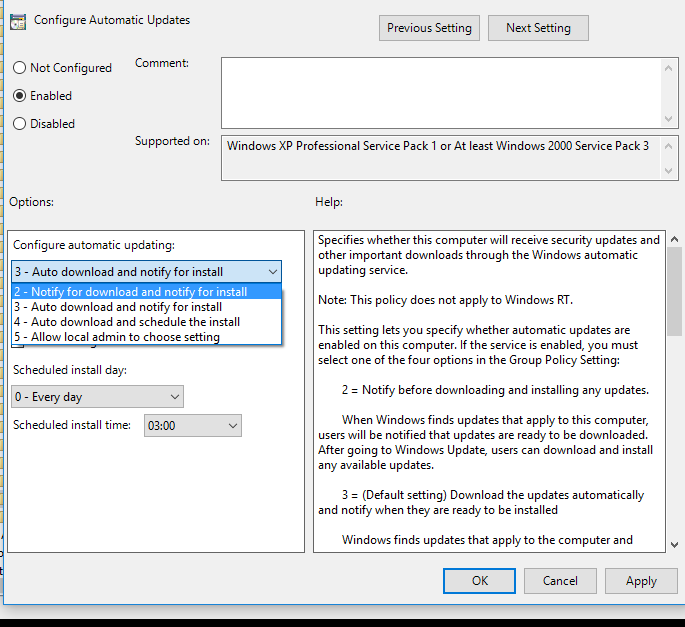
Step 5: Check the Enabled option to enable the policy.
Step 6: You will have four options to choose from:
2 - "Notify for download and notify for install."
3 - "Auto download and notify for install."
4 - "Auto download and schedule the install."
5 - "Allow local admin to choose setting."
Probably, 2 - "Notify for download and notify for install" is the best option for you.
Step 7: Click Apply.
Step 8: Click OK.
When new updates are released, you will receive a notification in the Action Center. The new updates won't be downloaded or installed until you perform the following steps:
Step 1: Open Settings.
Step 2: Click Update and Security.
Step 3: Click Windows Update.
Step 4: Click Download and restart your PC to complete the process.
Preventing Automatic Updates Using the Registry
Step 1: Use Windows key + R keyboard shortcut to open the run command window.
Step 2: Type regedit and click OK to open the registry.
Step 3: Go to the following path:
HKEY_LOCAL_MACHINE\SOFTWARE\Policies\Microsoft\Windows
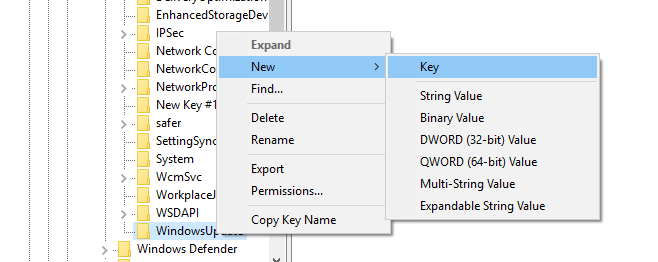
Step 4: Right-click the window. Scroll to New and then click on Key.
Step 5: Provide WindowsUpdate as the new key name and click on Key.
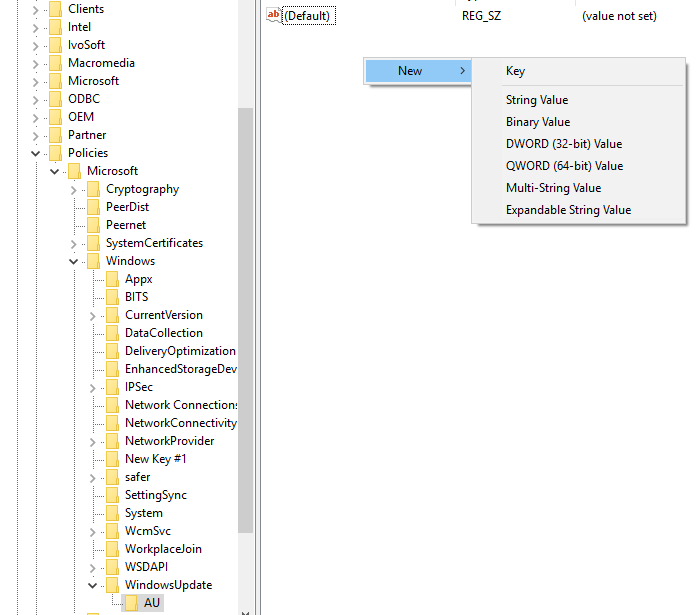
Step 6: Right-click the key you created in the above step, scroll to New and click Key.
Step 7: Name the new key AU and press Enter.
Step 8: Choose the key AU. Right click on the right side. Scroll to New and click DWORD (32-bit) value.
Step 9: Name the new key AUOptions and press the Enter key.
Step 10: Double click the AUOptions key and change it's value to '2' which means: Notify for download and notify for install.
Available options are:
2- "Notify for download and notify for install."
3 - "Auto download and notify for install."
4 - "Auto download and schedule the install."
5 - "Allow local admin to choose settings."

Step 11: Click OK.
Step 12: Close the registry.
When new updates are released, you will receive a notification in the Action Center. Updates won't be installed until you download and install them by following these steps:
Step 1: Open Settings.
Step 2: Click Update and security.
Step 3: Click Windows Update.
Step 4: Click Download.
Step 5: Click Restart to complete the task.