When you delete files and folders from your computer, they are not permanently removed from your hard drive. They still exist in Recycle Bin and consume space.
In this Windows 10 guide, I'll show you the steps to automatically empty the recycle bin using the task scheduler to keep your hard drive space free.
Emptying the Recycle Bin Automatically Using Task Scheduler on Windows 10
Step 1: Search Task Scheduler and press Enter to open it.
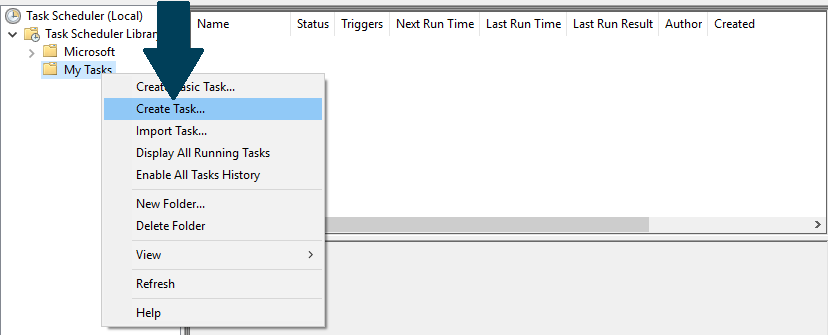
Step 2: Right-click Task Scheduler Library and click New Folder.

Step 3: Give a descriptive name to new folder like My Tasks.
Step 4: Right-click the folder you created in above step and click Create Task.
Step 5: On the General tab, enter the name of task such as "Empty Windows Recycle Bin".
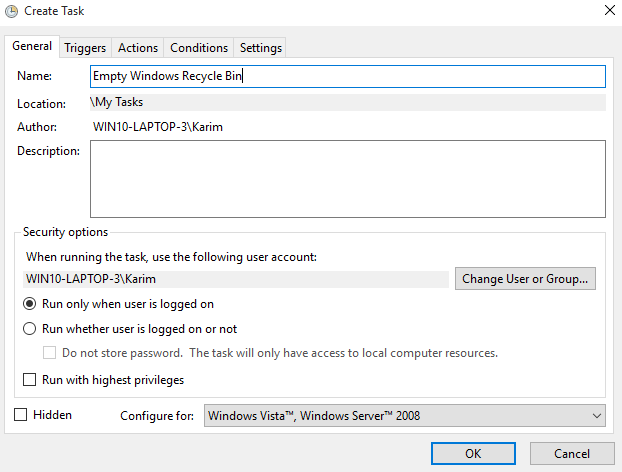
Step 6: Click OK.
Step 7: On Triggers tab, click New to create an action.
Step 8: Choose when to begin the task from drop down. Choose other details like time and date accordingly.
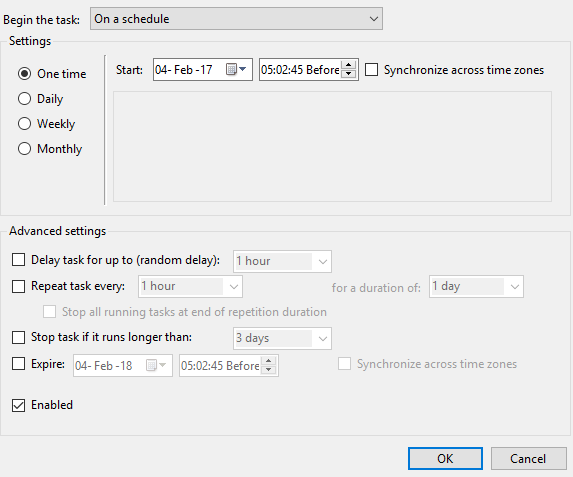
Step 9: Click OK.
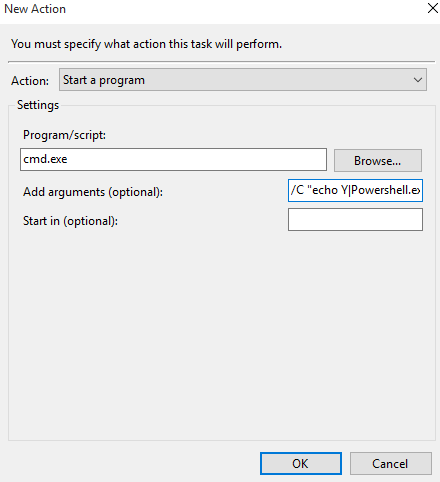
Step 10: Go to actions tab and click New.
Step 11: In Programs/script field, type cmd.exe.
Step 12: Add following arguments and click OK.
/C "echo Y|PowerShell.exe -NoProfile -Command Clear-RecycleBin"
Step 13: Click OK.
Once you are done with above steps, the task will run automatically on your specified schedule and will empty the recycle bin automatically.