This tutorial describes the steps that need to be taken to join a Windows 7 desktop to a Windows domain.
Join a Windows Domain
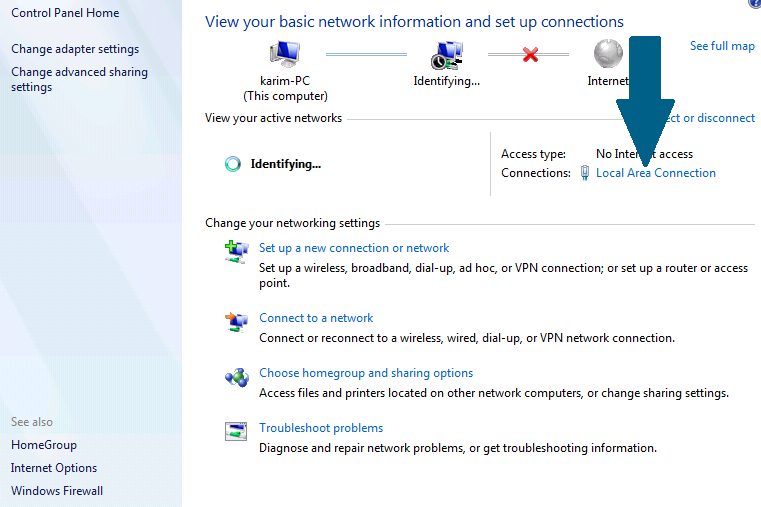
Step 1: Right-click the computer icon located on the bottom right corner of the task bar. Then click Open Network and Sharing Center

Step 2: Click Local Area Connection
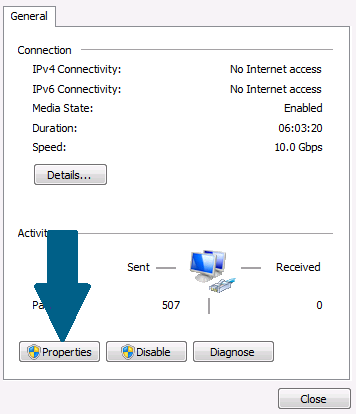
Step 3: Click Properties
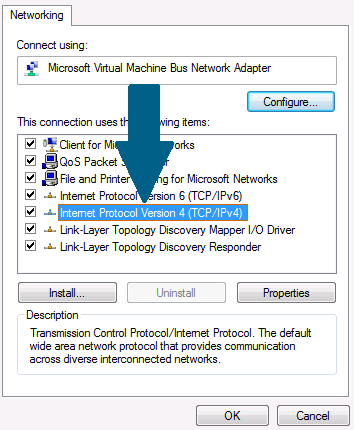
Step 4: Select Internet Protocol Version 4 (TCP/IPv4) and click Properties
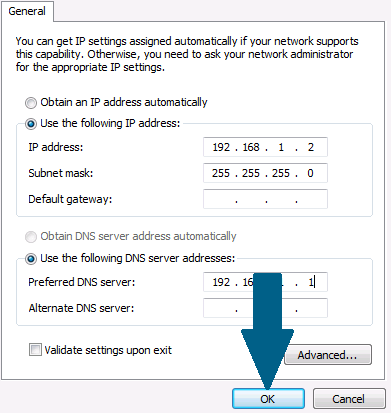
Step 5: Provide correct IP address and subnet mask to this machine. Provide correct DNS Server IP of domain controller in Preferred DNS server text field. When done click OK
Step 6: Open the command prompt and ping your domain. Make sure that there are 0% packet loss and the domain is resolved successfully

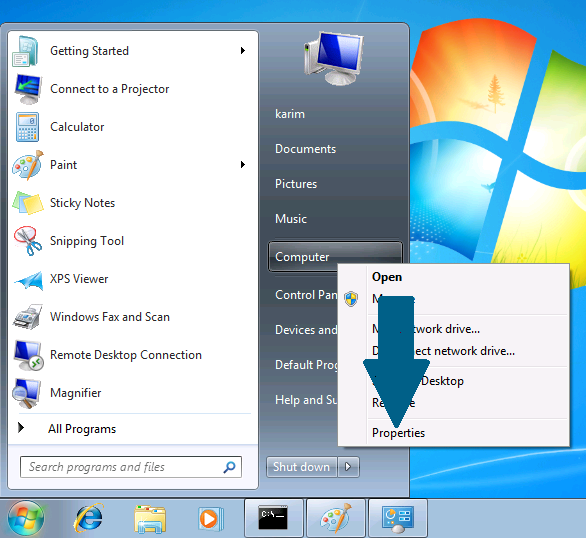
Step 7: Click Start icon and scroll to 'computer'. Right click Computer and scroll to Properties and click it .
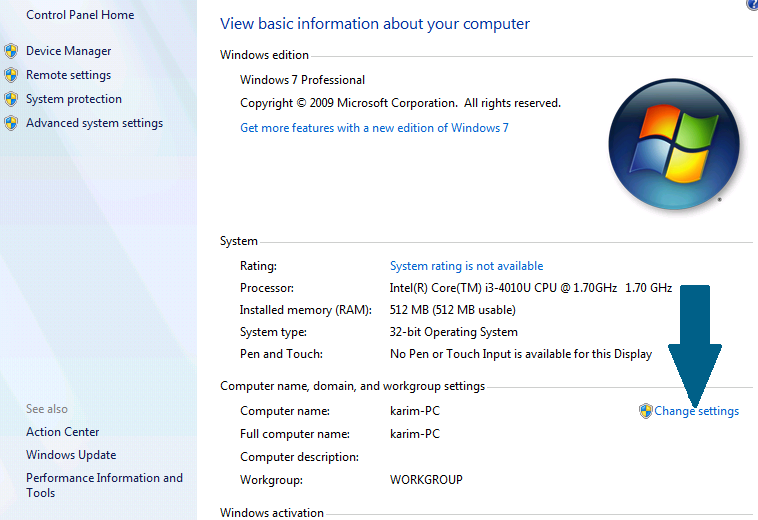
Step 8: Click Change settings
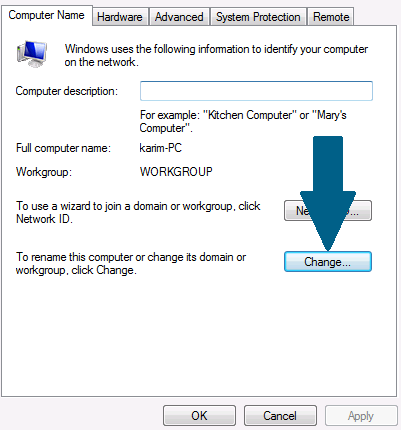
Step 9: Click Change
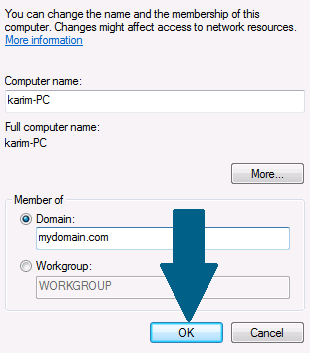
Step 10: Provide domain name in domain text field and click OK
Step 11: You will be prompted to provide a credential of an account having permission to join a client machine to this domain
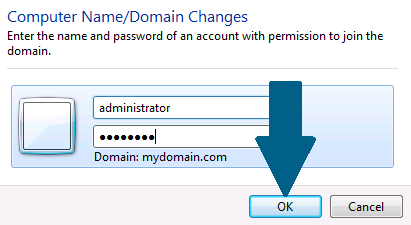
Step 12: A welcome window appears. Click OK

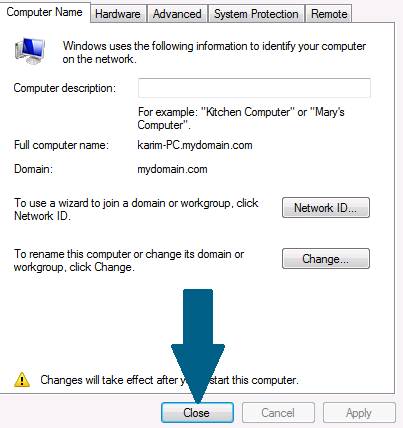
Step 13: Restart your machine so that changes can take effect. Click OK

Step 14: Click Close
Step 15: Click Restart Now

Conclusion
Congratulations on joining windows 7 Professional to a domain. Once your machine has been restarted, login with your user name and password provided by domain administrator. All domain policies will be applied on your machine and you will be centrally administered.
