While safeguarding your Windows 10 PC, Windows Defender delivers regular notifications, which might become unpleasant over time. You can choose to keep track of these notifications and alerts. In this post, we will walk you through the whole process of monitoring Windows Defender alerts on Windows 10.
Windows Defender alert Monitoring
Follow this process step by step to monitor Windows Defender alerts on Windows 10.
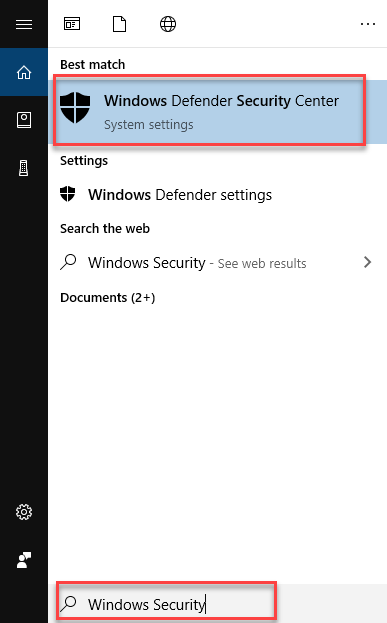
On the taskbar, click the Search button. Enter Windows Security in the search box and then select the Windows Defender Security Center option, as seen in the figure below.
When you select the Windows Defender Security Center option, the following screen will show.
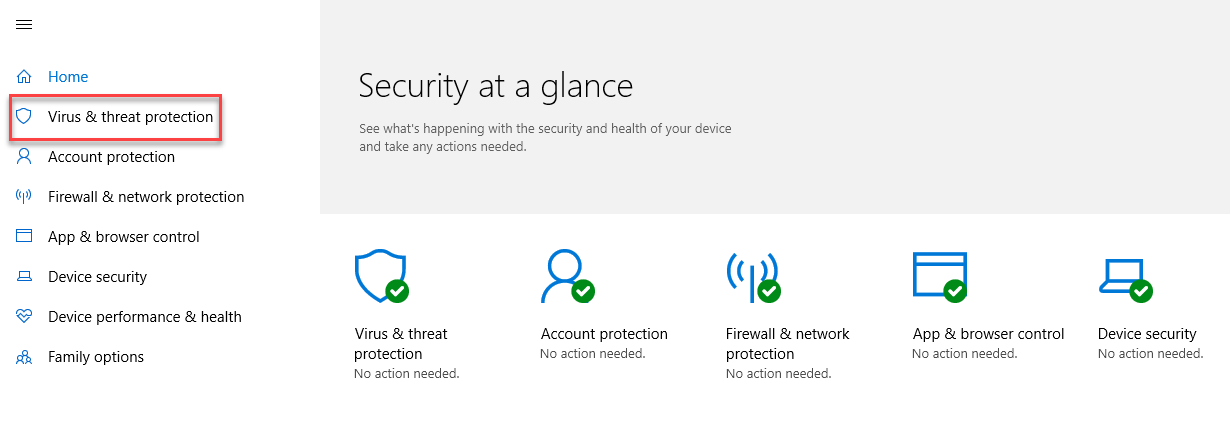
The screen, as you can see, is divided into two sections. Choose Virus & threat protection from the left side of the screen, as seen in the above image. The following screen will then display.
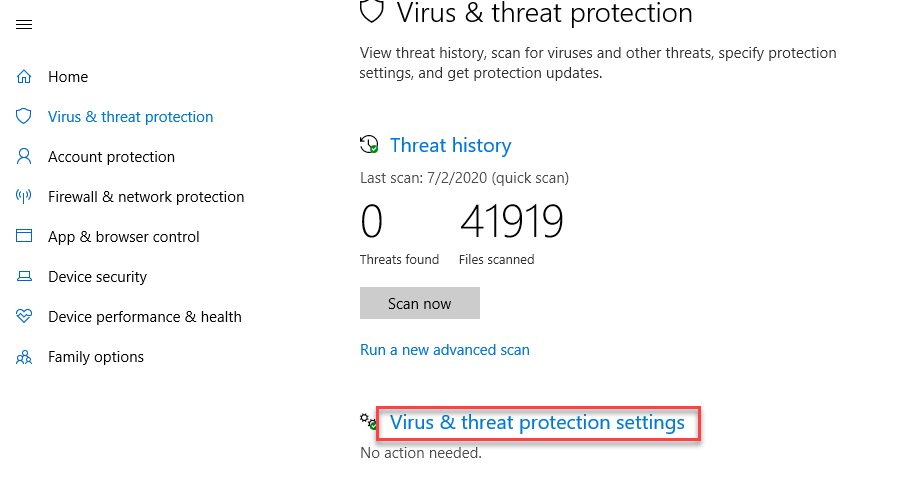
Select the Virus & threat protection settings option, as seen in the preceding figure. The following screen will look like this.
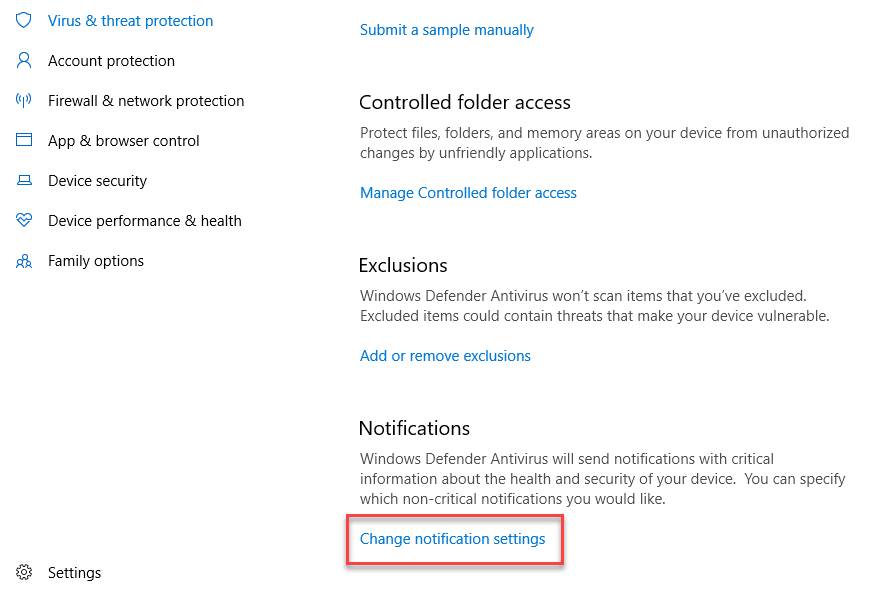
Scroll down the page until you find the Change notification settings option, which is indicated in the above image, and click on it. The Settings will appear as seen in the image below.
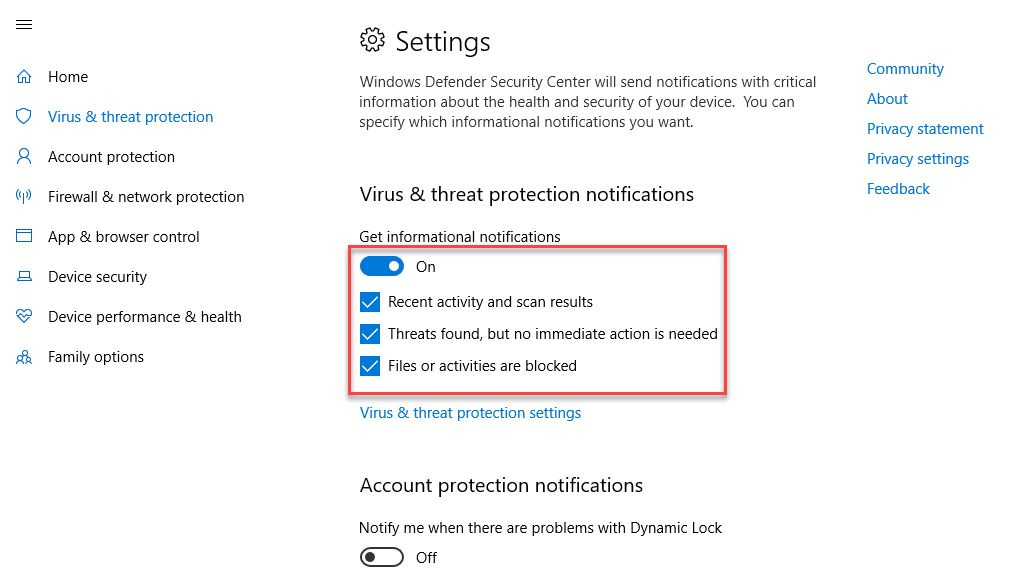
The toggle button for Get informative notifications will be shown. If you don't want to get these alerts, turn it off. There are also some checkboxes, like as
- Recent activity scan results
- Threats found, but no immediate action is needed
- Files or activities are blocked
You may enable or disable the alerts by checking and unchecking the checkboxes.
Close the Windows Defender Security Center to save your changes. The computer does not need to be restarted.