The File Server Resource Manager is a role in Windows Server 2012 R2 which is used to enable quotas on shared folders. This article will explain how to share a folder and enable quota using the File Server Resource Manager. Specifically, you will learn:
- Configuring File Server Resource Manager.
- Sharing a folder using File and Storage Services.
- Enabling quota on shared folder.
Prerequisites
Following are prerequisites for this tutorial:
- The administrator account has a strong password.
- Static IP is configured.
- Latest windows updates are installed.
- Firewall is turned off.
Configuring File Server Resource Manager
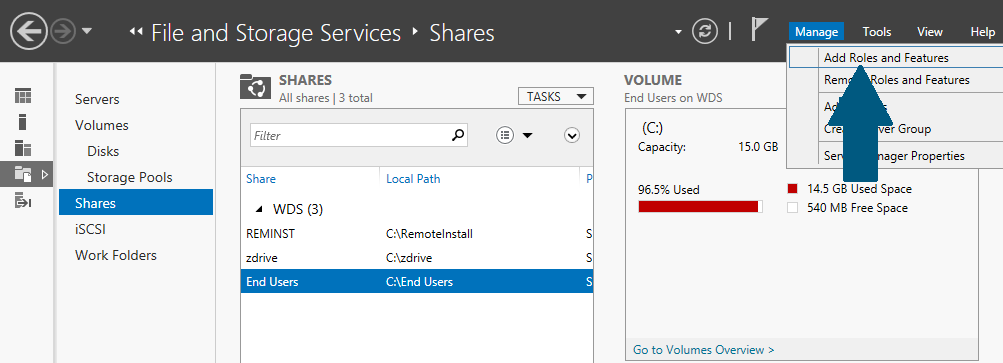
Step 1: Open server manager dashboard, click Manage -> Add Role and Features.
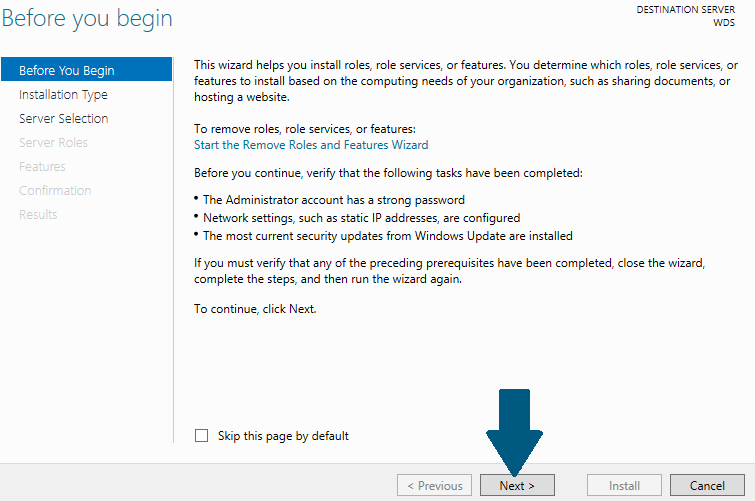
Step 2: Click Next.
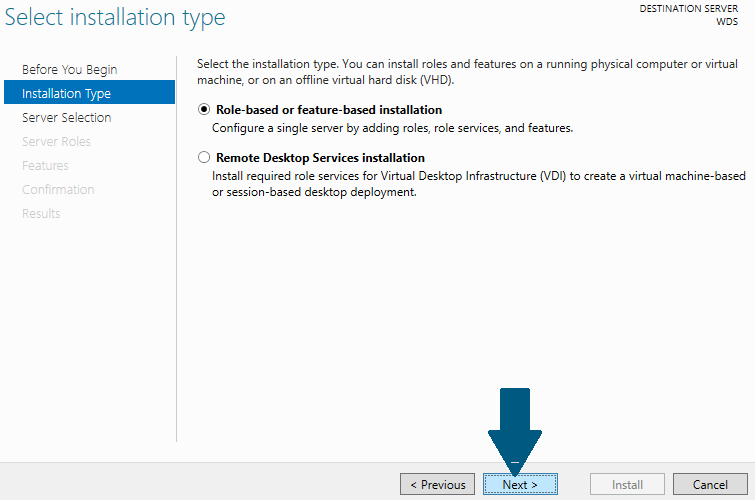
Step 3: Choose Role-based or feature-based installation and click Next.
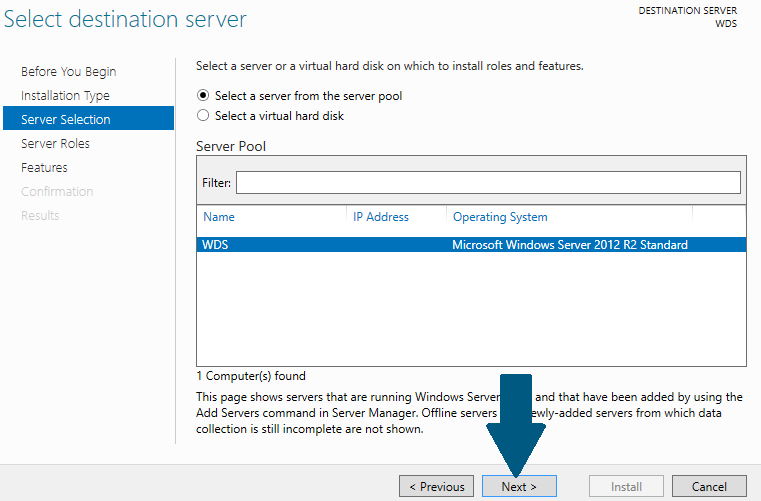
Step 4: Click Next.
Step 5: Expand File and Storage Services -> File and iSCSI Services -> File Server Resource Manager. Click Next.
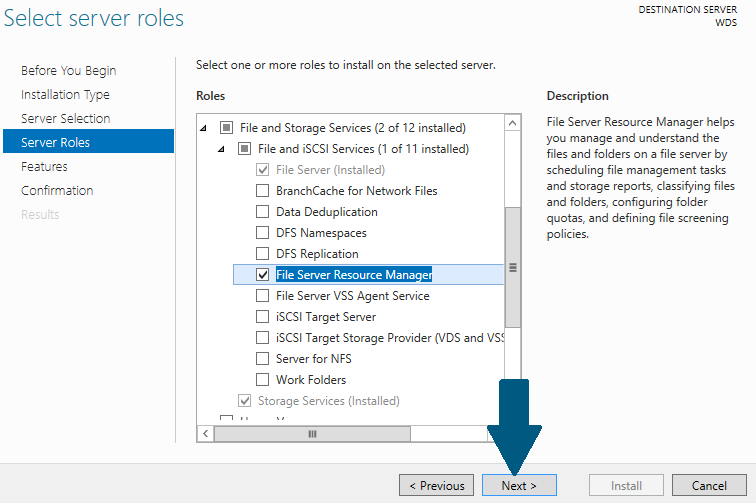
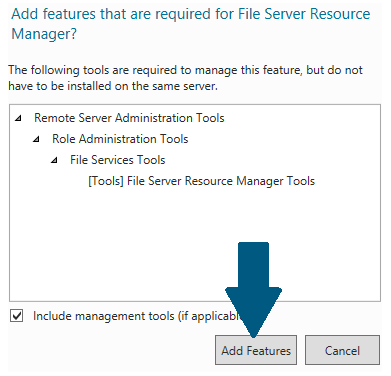
Step 6: Click Add Features.
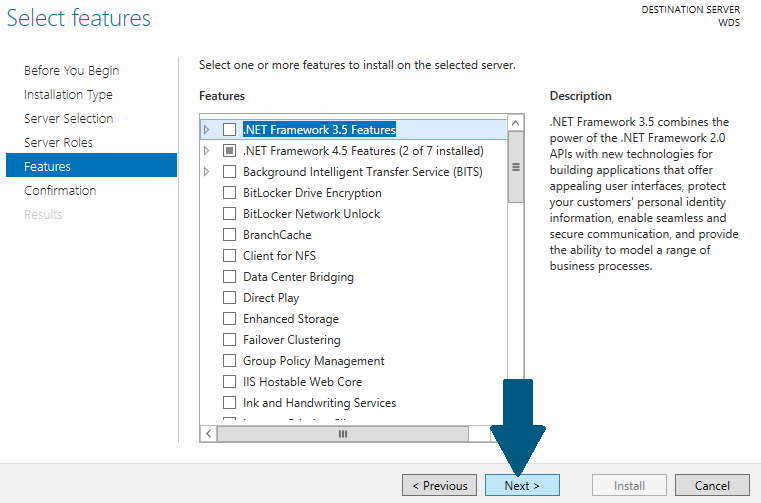
 Step 7: Choose .NET Framework and then Click Next.
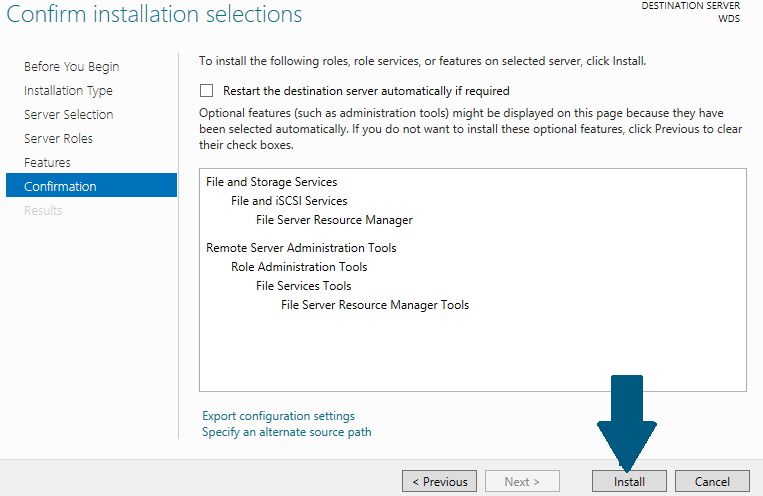
Step 8: Click Install.
Sharing a Folder using File and Storage Services
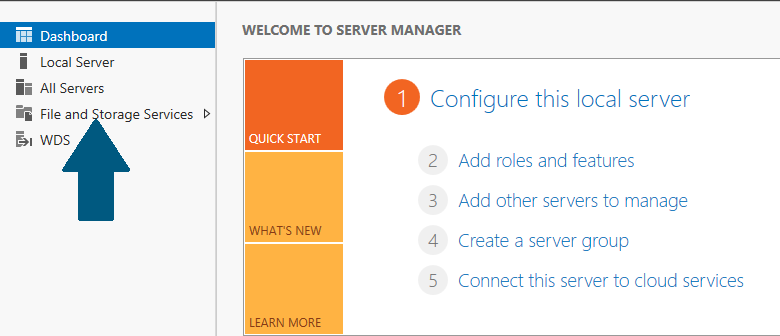
Step 1: Open server manager dashboard, click File and Storage Services.
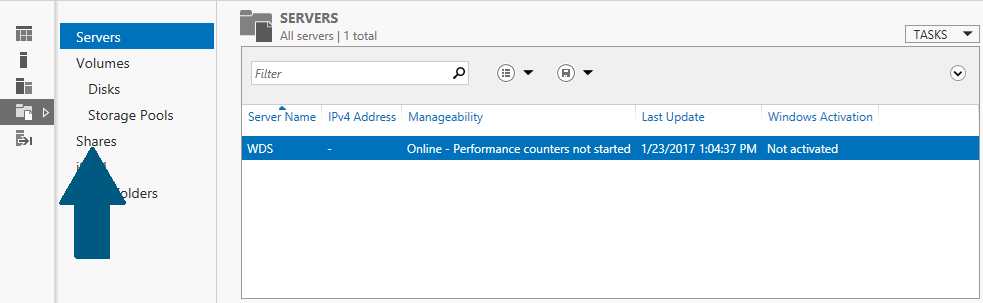
Step 2: Click Shares.
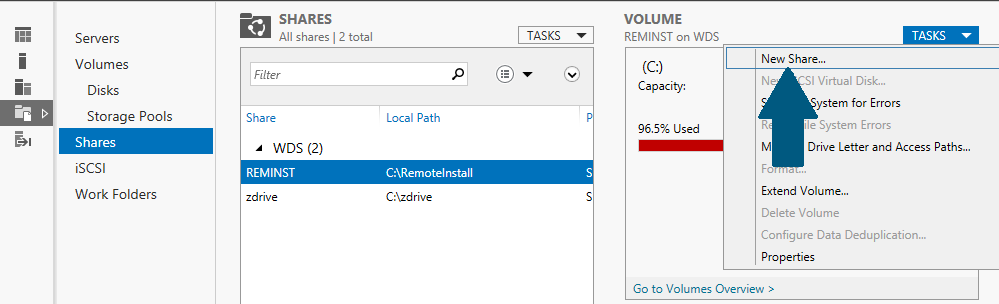
Step 3: Click Tasks -> New Share.
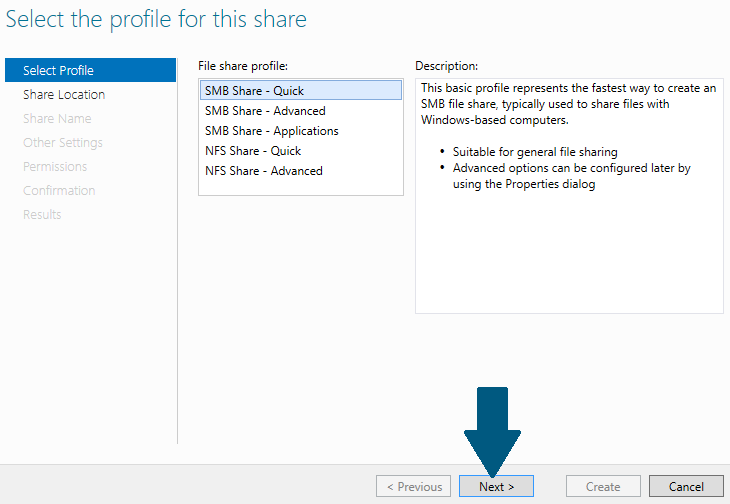
Step 4: Choose SMB Share - Quick. Click Next.
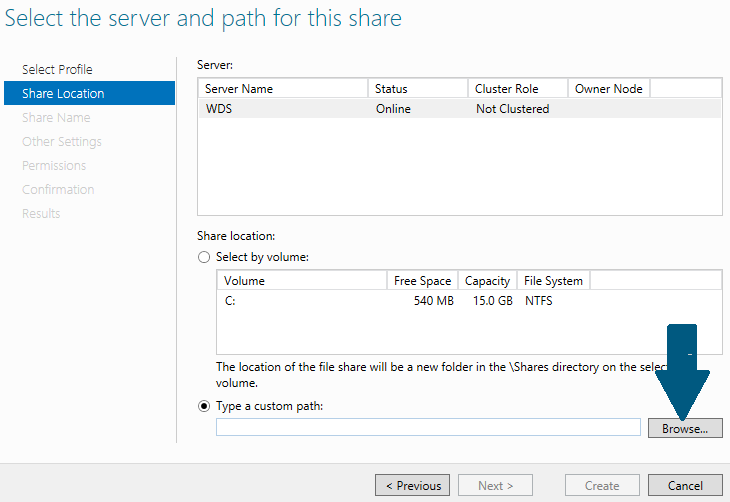
Step 5: Click Browse.
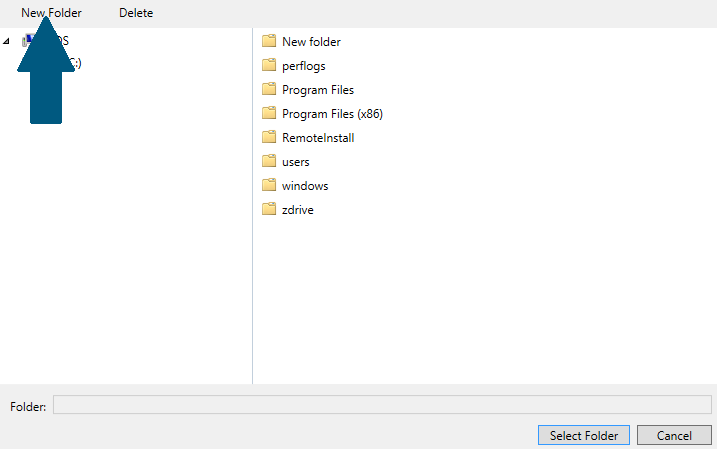
Step 6: Click New Folder and name it.
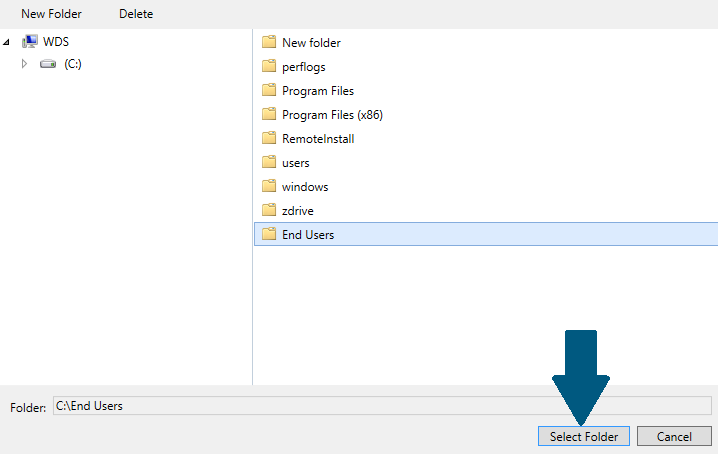
Step 7: Choose the folder created in step 6 and click Select Folder.
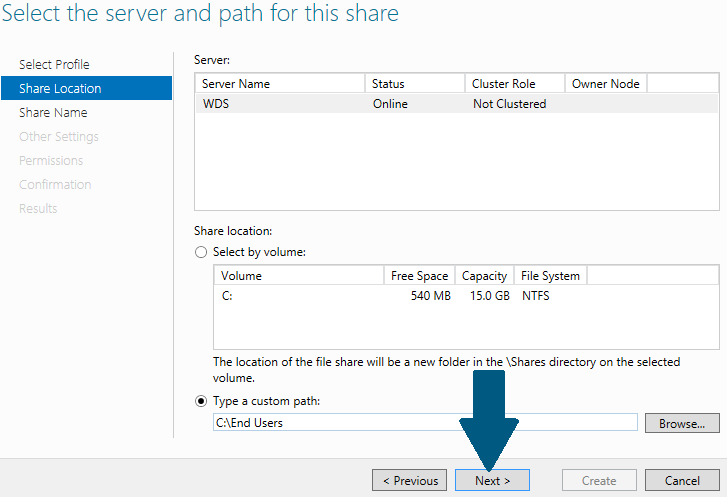
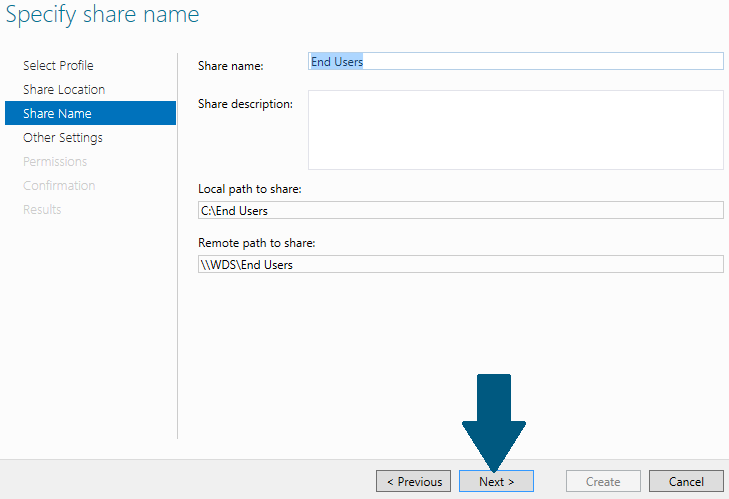
Step 8: Click Next.
Step 9: Click Next.
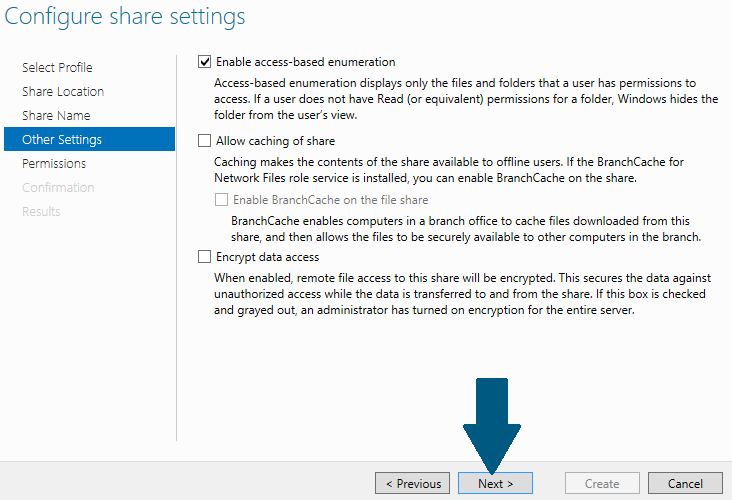
Step 10: Check Enable access-based enumeration and click Next.
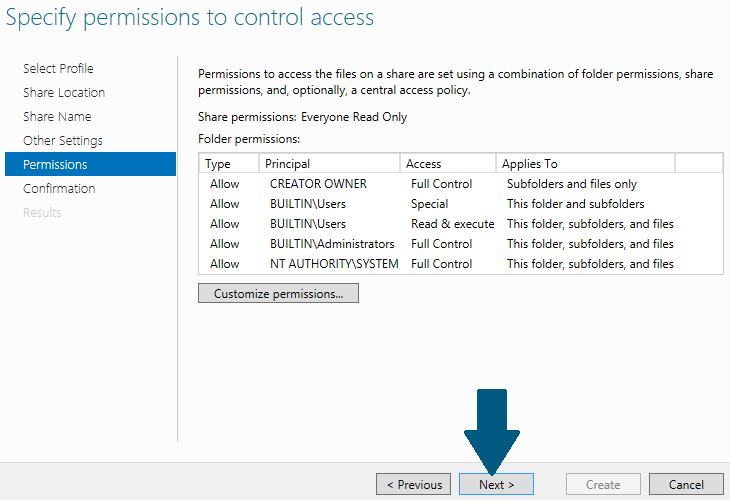
Step 11: Click Next.
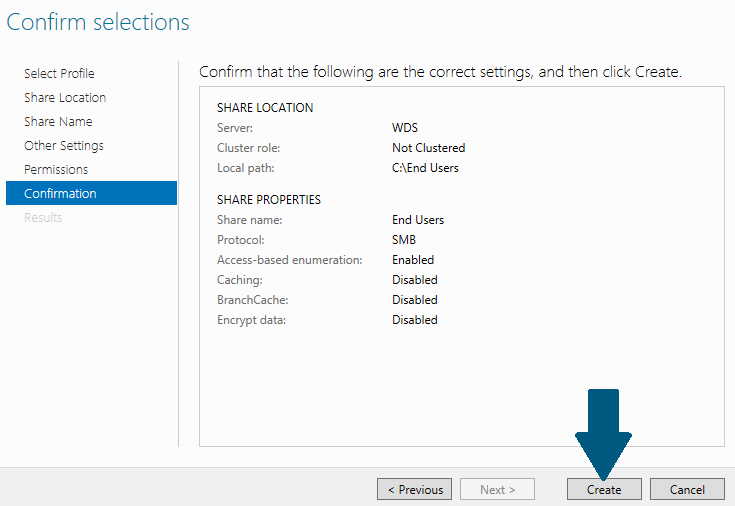
Step 12: Click Create.
Enabling Quota on Shared Folder
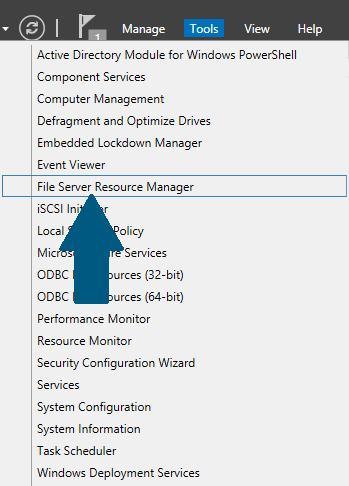
Step 1: Open server manager dashboard, click Tools -> File Server Resource Manager.
Step 2: Expand File Server Resource Manager -> Quota Management. Click Create Quota...

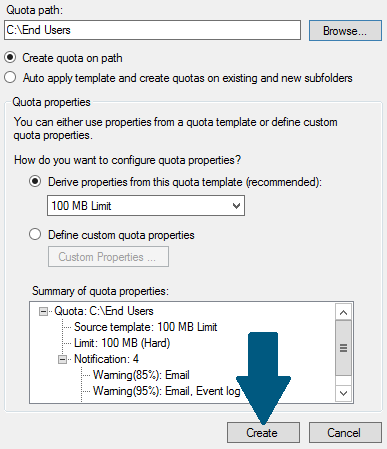
Step 3: Click Browse and provide the path of the shared folder.
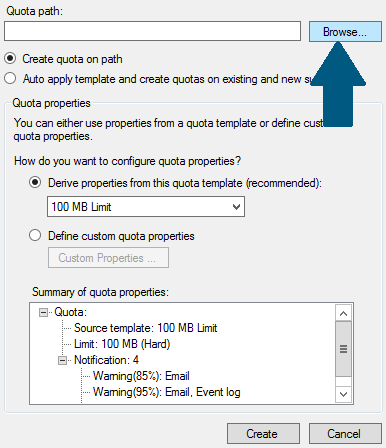
Step 4: Choose Drive properties from this quota template (recommended): and choose the template from the drop down. Click Create.
Conclusion Quota management is a useful feature which allows you to set a storage limit on a shared folder. When you finished this article, you might want to further explore a file screening provided by the File Server Resource Manager.
