Extra AD domains are not recommended because they are hard to administer. However, you may need an extra domain (child domain for this tutorial) in the following scenarios:
- The two companies have different hardware resources. Some prefer high quality and reliable hardware and some prefer to save money, it is preferable to have two separate domains on different hardware in this situation.
- The two companies have different IT support staff. Imagine a single domain, and suppose if a technician set a wrong permission unintentionally, it can cause whole AD data to be compromised.
In this article, I will see how to configure a child domain on Windows Server 2016 in a lab environment.
Prerequisites
It is mandatory to have a parent domain already configured for this tutorial to work. But there are more prerequisites.
- An administrator account has strong password.
- A static IP is configured.
- A firewall is turned off.
- Latest updates from Microsoft are installed.
- DNS server settings in TCP/IPv4 are correct and they are pointing to DNS of parent domain controller.
Add a Child Domain on Windows Server 2016
Step 1. Open server manager dashboard and click Add roles and features.
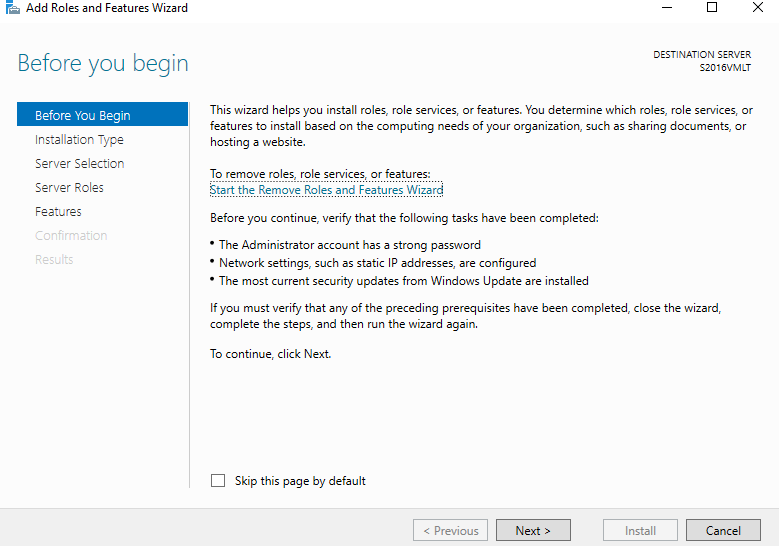
Step 2. Read prerequisites and click Next.
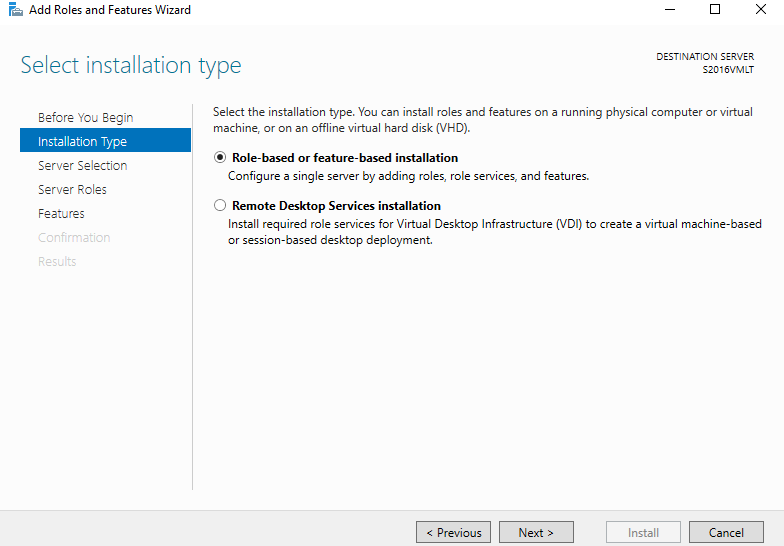
Step 3. Choose Role-based or feature-based installation and click Next.
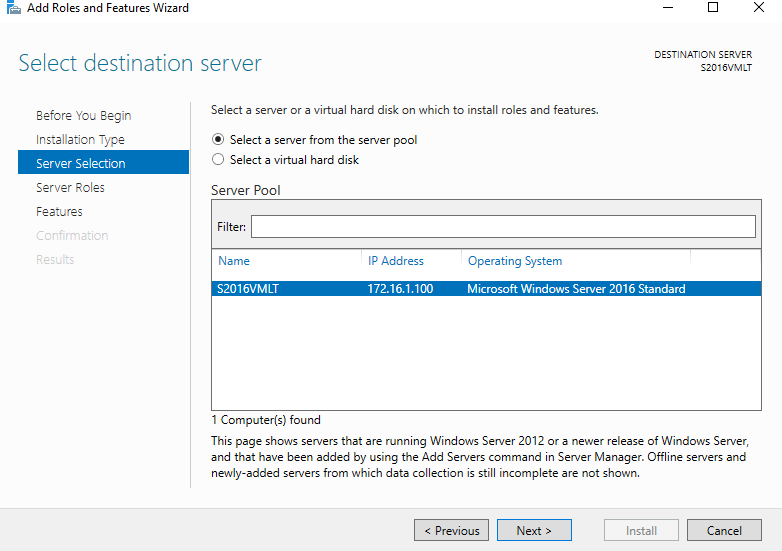
Step 4. Choose desired destination server on which you want to install the role and click Next.
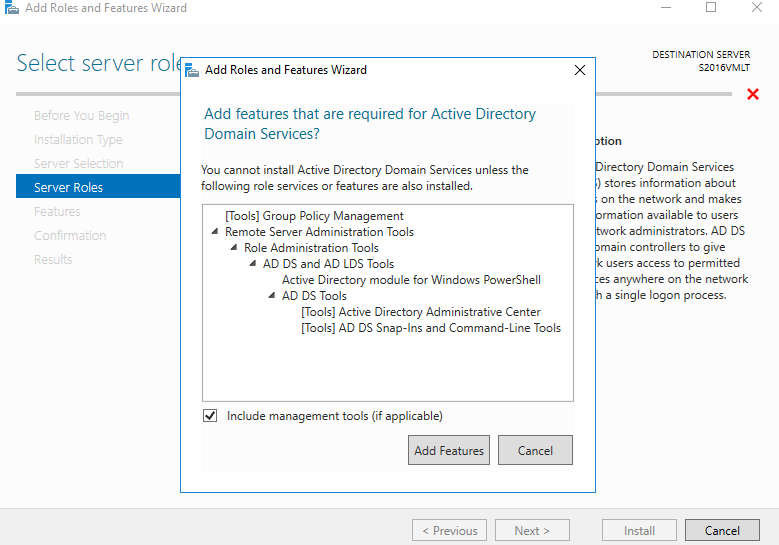
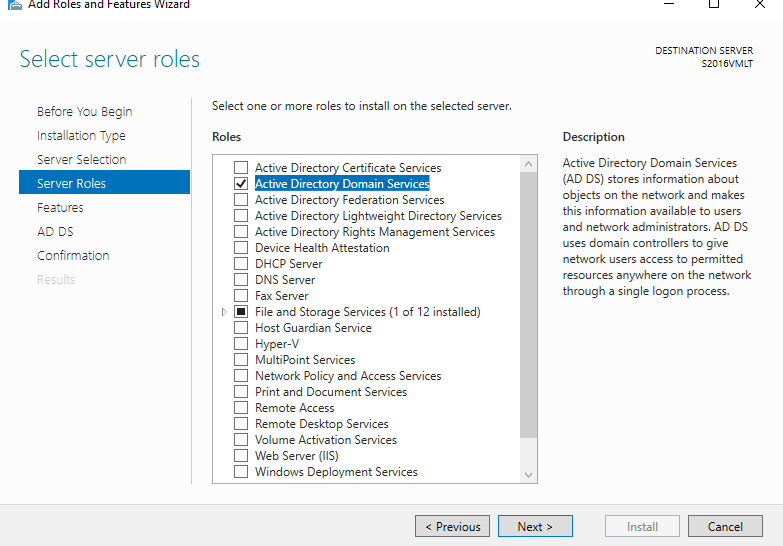
Step 5. Choose AD Domain Services from server roles. As soon as you choose, a new will window pop up. Click Add Features.
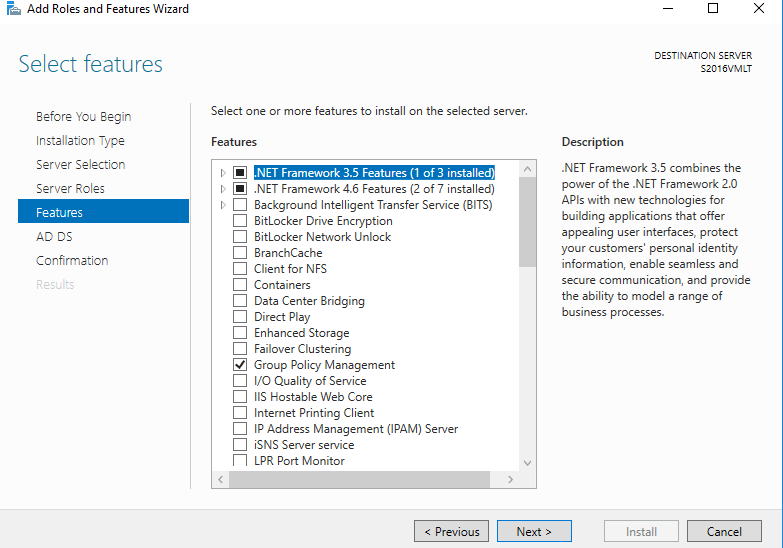
Step 6. Click Next.
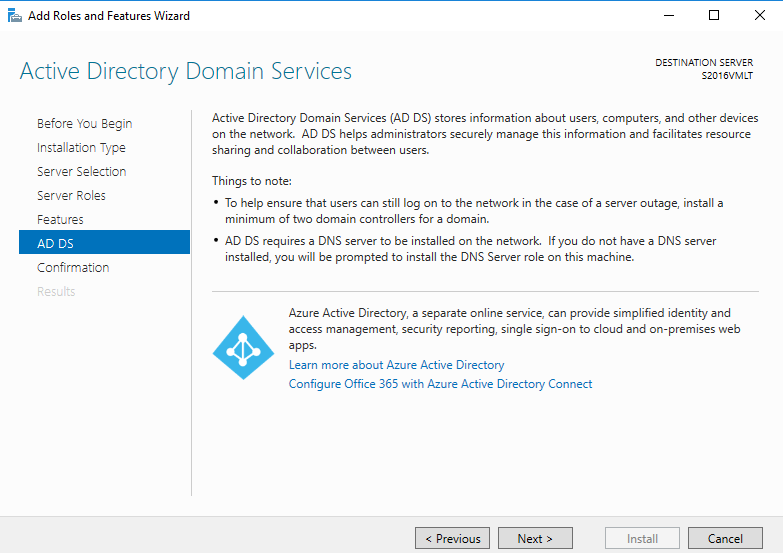
Step 7. Click Next.
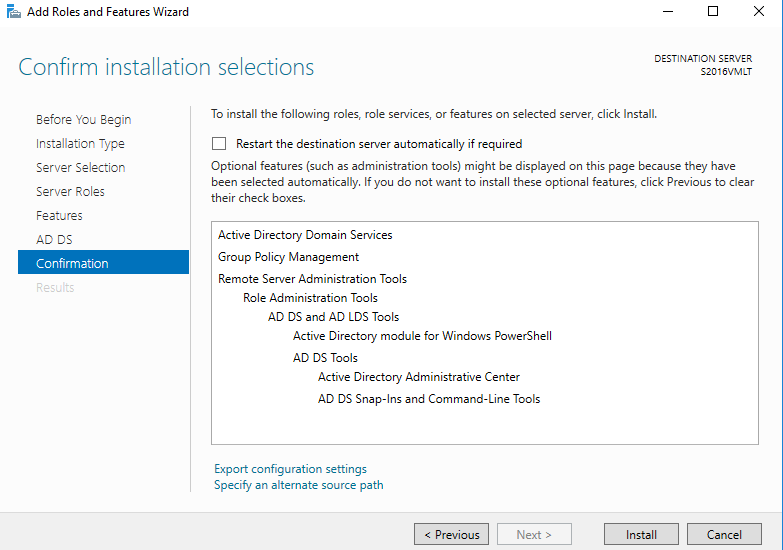
Step 8. Click Next.
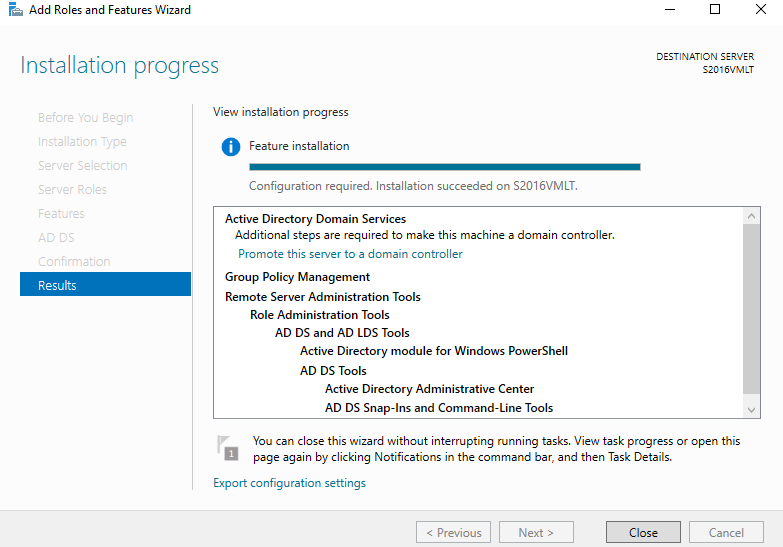
Step 9. Click Install and wait for an installation to finish (This may take several minutes to complete).
Step 10. Click Promote this server to a domain controller.
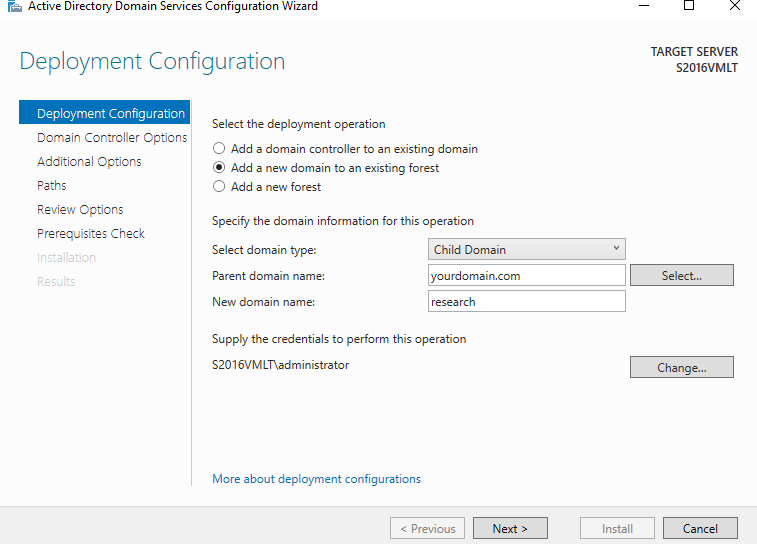
Step 11. Choose "Add a new domain to an existing domain", "Child Domain" from domain type, and provide a parent and new domain name. Click Change to provide the credentials of a user which is part of enterprise domain admins group. Click Next.
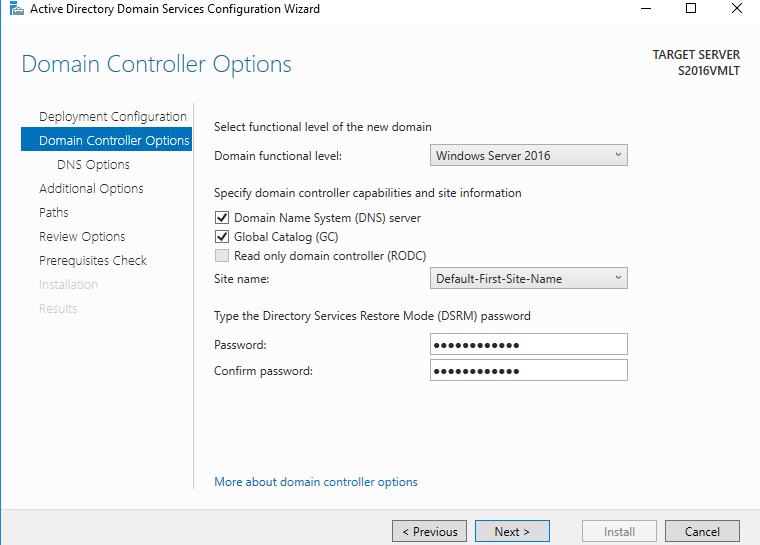
Step 12. Choose Domain Name System (DNS) server and Global Catalog (GC). Provide DSRM password and click Next.
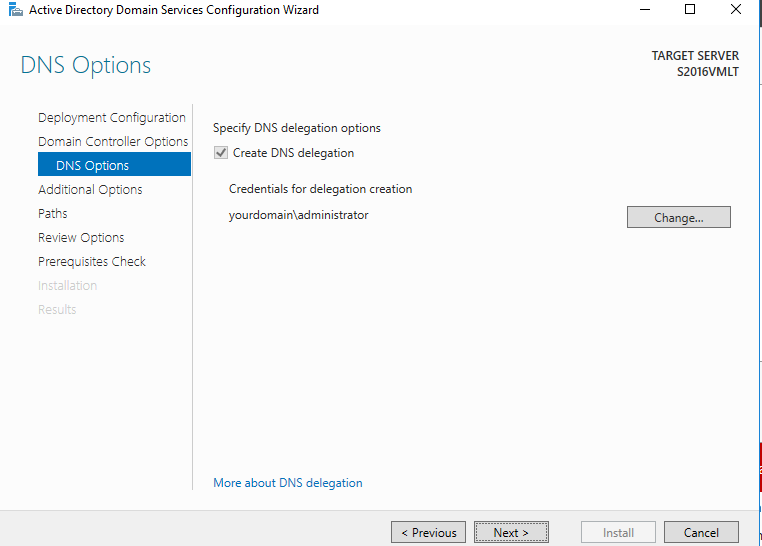
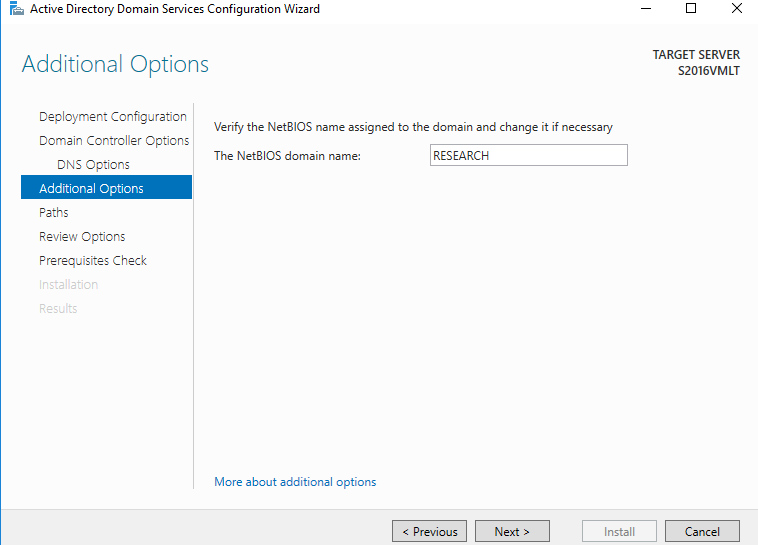
Step 13. Leave default selection and click Next.
Step 14. Click Next.
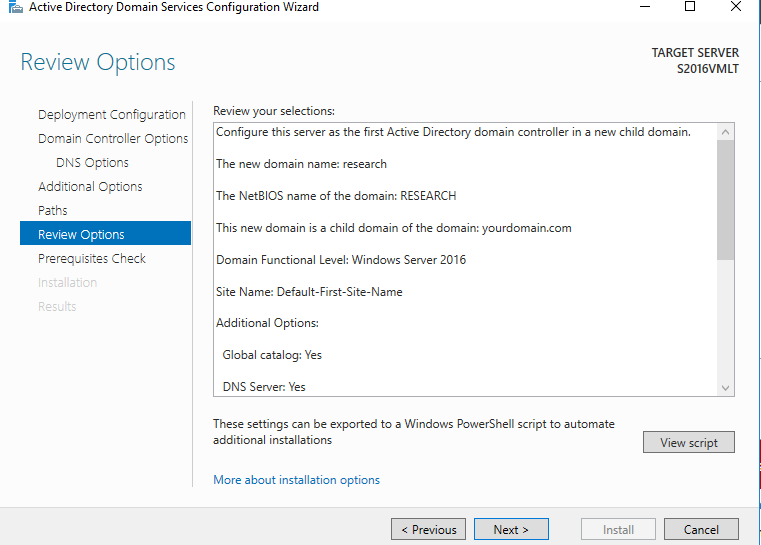
Step 15. Click Next.

Step 16. Click Next.
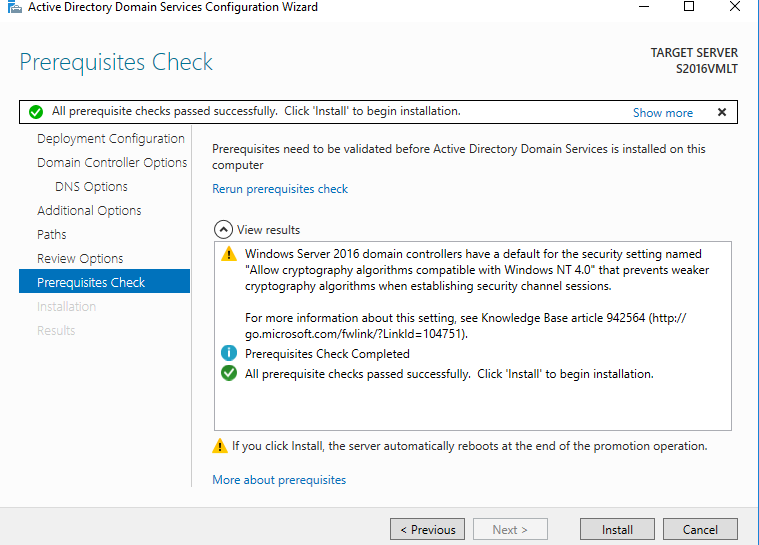
Step 17. Click Install and wait for configuration to finish. This may take several minutes to complete.
Once a configuration finishes, a system is rebooted. Upon reboot, you can login with domain admin credentials to newly added child domain.