Step 1: Right click a computer icon located on a task-bar and scroll to Open Network and Sharing Center and click it.
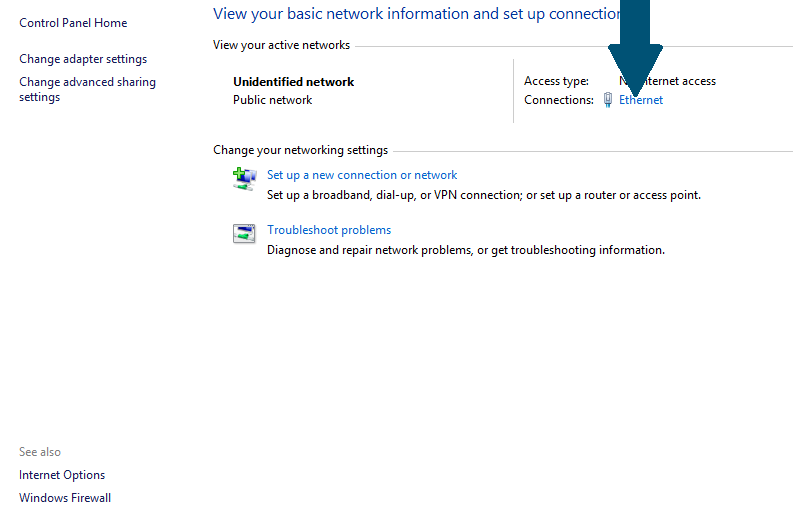
Step 2: Click Ethernet
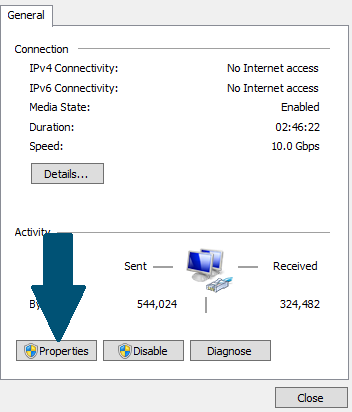
Step 3: Click on Network Properties
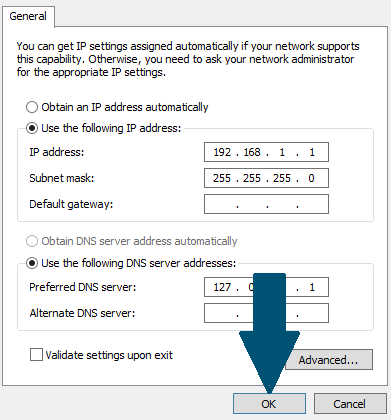
Step 4: Provide IP address, subnet mask, and preferred DNS server and click OK to finish changing IP settings on your local machine
Missing a step. Between Step 3 and Step 4, after clicking Properties, you have to select Internet Protocol version 4 (IPv4) THEN click Properties again. Should probably include a note that if the IP edit area is grayed out you have to change the radio button setting from “Obtain IP Address Automatically” to “Use the Following IP Address” and a note about Static vs Dynamic IP’s if you change this. Also, remind them to get the Subnet and Gateway settings of their existing settings before changing this screen as the box will reboot and you may not be able to reach it again if using RDP.