We have configured a Read-Only Domain Controller (RODC) Windows Server 2016 using server manager in another tutorial already. In this post, we will again configure RODC Windows Server 2016 but using PowerShell this time.
Prerequisites
I assume you have at least one writeable DC in your environment. Following are some other prerequisites you need to meet.
- An administrator account has strong password.
- A static IP is configured.
- Firewall is turned off.
- Latest updates from Microsoft are installed.
- DNS server IP address in TCP/IPv4 is correct and should be pointing to writeable DC. Resolving domain names from command prompt must work.
Installing the AD Domain Services Role
The first step is to install the AD Domain Services AD DS role. Execute the following PowerShell cmdlet. This may take several minutes to complete so please be patient
install-windowsfeature AD-Domain-Services
When you are done, you will have something similar on PowerShell screen.

Promoting the Server to Read-Only Domain Controller
Next step is to promote the server to Read-Only Domain Controller (as you click in Promote this server to the domain controller in server manager). Execute the following cmdlet:
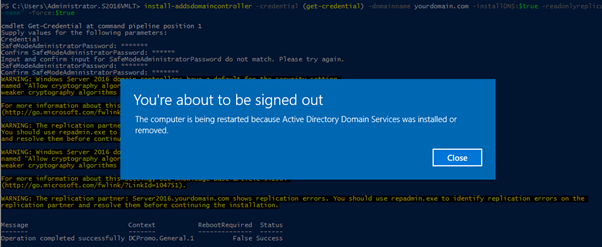
Install-ADDSDomainController -Credential (Get-Credential) -DomainName <domainName> -InstallDNS:$true -ReadOnlyReplica:$true -SiteName "Default-First-Site-Name" -Force:$true
You will be prompted for following credentials during execution of above cmdlet.
- DSRM (Directory Services Restore Mode) password
- AD user credentials, provide those credentials of an account who have permission to promote the server to a domain controller
When cmdlet finishes its execution, a server will be rebooted automatically. You can login with a domain account or an account having permission to administer RODC.
Next we will see how to configure credential caching and prepopulate passwords on RODC using PowerShell.