
Introduction
JAVA_HOME is an operating system environment variable that stores the location of the java installation folder. Every time a java program or application is run, this variable is invoked. You need to set up the JAVA_HOME variable correctly to run your java program otherwise you will encounter this error message “Error: JAVA_HOME is not defined correctly.”.
In this tutorial, you will learn different methods to set up the JAVA_HOME variable and different configuration options that are available to you while setting up this system variable.
Prerequisites
Linux-based system
Terminal access
A user account with sudo privileges.
Note: The commands in this tutorial are executed on the Ubuntu 20.04 system. All the methods mentioned in this tutorial are also valid for any other Linux distribution.
Check for the Java Compiler
Before setting up the JAVA_HOME variable, You need to confirm the installation of the java compiler and its version.
To check the version of your installation, run the following command.
javac --version

You can see the version number in the output.
If you encounter the message “Command ‘javac’ not found”, it means that your system does not have any java compiler installed.

In that case, run the following command to install the java from the default package.
sudo apt install default-jdk
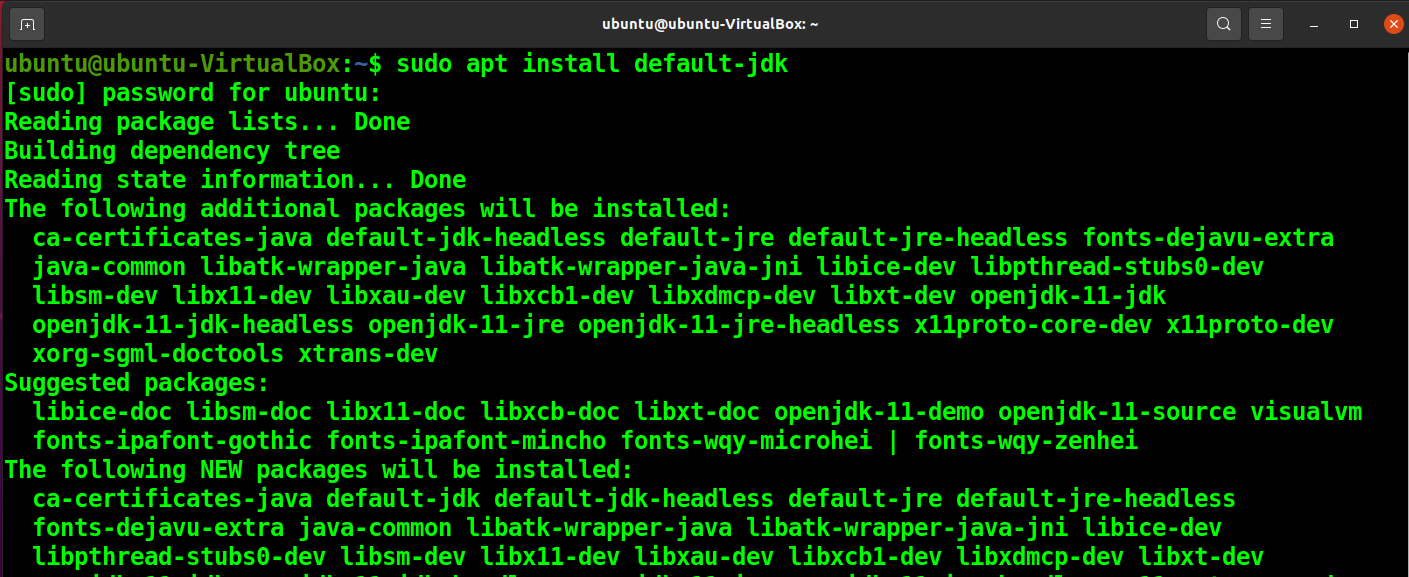
If you want to install java in Linux with a different version, then you have to mention it explicitly in the installation command.
Locate the Java Compiler
Once you have the confirmation of installation and version of the java compiler. It's time to dig deeper and find the java installation folder. There are two ways to find the installation folder.
The first one is to use the following ‘which’ command.
which javac
The issue with this method is that the ‘which’ command does not provide a direct folder path but a link to the folder. To find the actual path you have to use the list command multiple times to reach the actual folder.
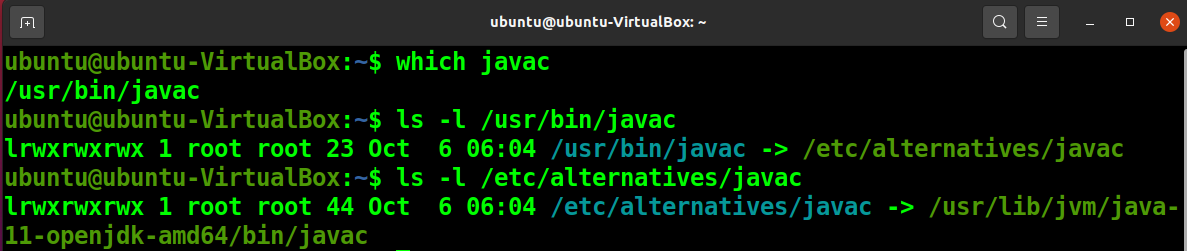
Once you reach a file path with a pattern like “/usr/lib/jvm/java-11-openjdk-amd64/bin/javac” you can stop and remove ‘’/bin/javac’ from the path to get your java variable value.
Or you can save the hassle and run the following ‘readlink’ command with a few command substitutions to get the folder path directly.
readlink -f `which javac` | sed "s:/bin/javac::"

Once You get the folder path, copy this path.
Set Up JAVA_HOME variable Temporarily
To set up the JAVA_HOME variable for the current terminal session, run the following command.
export JAVA_HOME=/usr/lib/jvm/java-11-openjdk-amd64
Note: Make sure to change the file path with your java folder path.

You can use the following command to verify that the JAVA_HOME variable has been set up correctly.
echo $JAVA_HOME
This method will only set up the JAVA_HOME variable temporarily. Once the terminal/session terminates, the JAVA_HOME variable will be reset to null.
Set Up JAVA_HOME variable Permanently for Single User
To make this change permanent, You have to add this change in the bashrc file.
Back-Up the Bashrc File
Before making a change in the bashrc file, run the following command to make a backup of your bashrc file.
cp ~/.bashrc ~/.bashrc.bak

Edit Bashrc File From the Terminal
You can append the bashrc file with the JAVA_HOME variable from the terminal with the following command.
echo "export JAVA_HOME=/usr/lib/jvm/java-11-openjdk-amd64" >> ~/.bashrc

The following command will display the last lines of the bashrc file. You can see that the JAVA_HOME variable has been added.
tail -3 ~/.bashrc

Now you can run the source command or restart the terminal to activate the changes.
source ~/.bashrc
Next, display and verify the change of the JAVA_HOME variable is persistent.

Open and Edit Bashrc File
To edit the bashrc file directly, first open the file with the nano editor.
nano ~/.bashrc

Go to the end of the file and paste the following line with your java folder path.
export JAVA_HOME=/usr/lib/jvm/java-11-openjdk-amd64
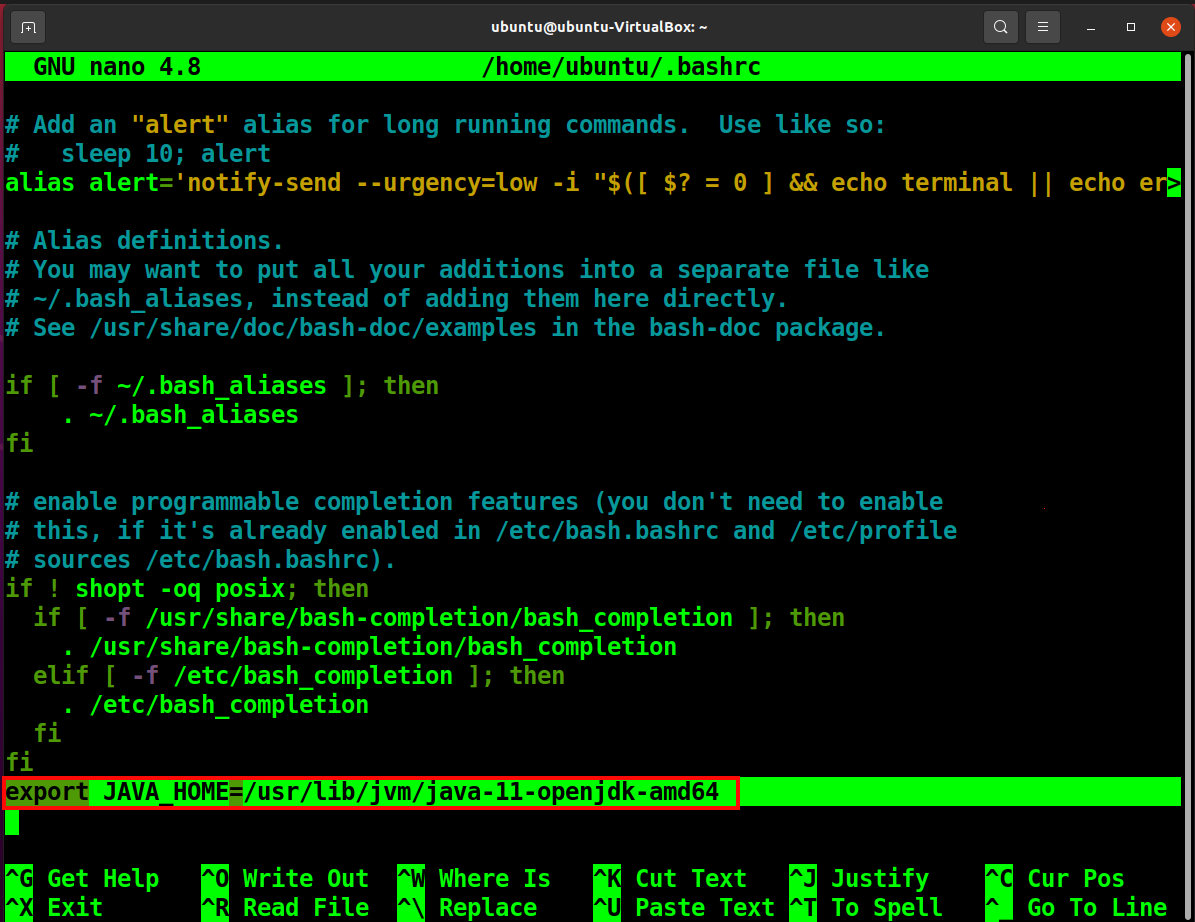
Now press Ctrl+O and then Ctrl+X.
Restart your terminal and display the JAVA_HOME variable to verify the changes.

Set Up JAVA_HOME variable Globally
To set up the JAVA_HOME variable across all users, You need to edit the /etc/bashrc file. Open the file with the nano editor with the following command.
sudo nano /etc/bashrc file

Append the following line in the /etc/bashrc file.
export JAVA_HOME=/usr/lib/jvm/java-11-openjdk-amd64
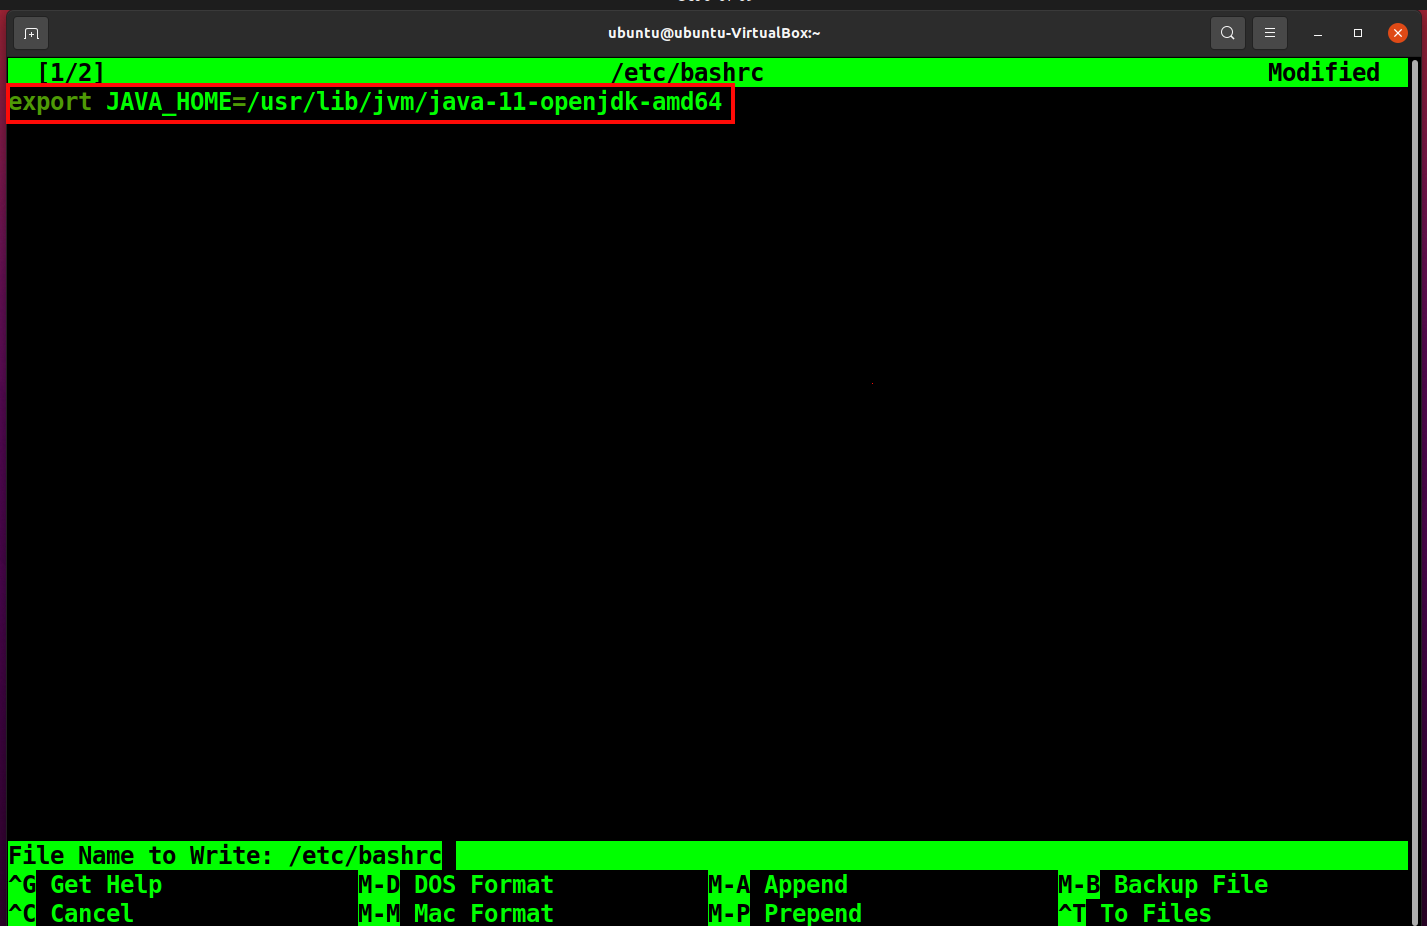
Now press Ctrl+O and then Ctrl+X.
Restart your terminal and display the JAVA_HOME variable to verify the changes.

Conclusion
JAVA_HOME variable is essential for running any java program. In this article, you have learned multiple ways to set the JAVA_HOME variable and every method's limitations. So you can set up the JAVA_HOME variable according to your preferences.