It is a good practice to provide a meaningful and user-friendly name to your machine once you finished installing a new and fresh copy of Windows 10. Here is how you can do it step-by-step.
Change the Windows 10 Computer Name
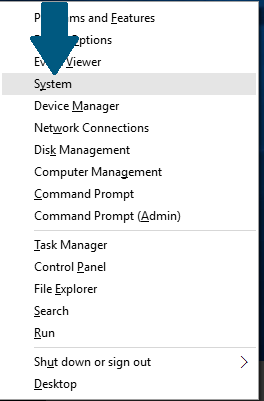
Step 1: Press and hold the Windows icon key and X on your keyboard and click on System
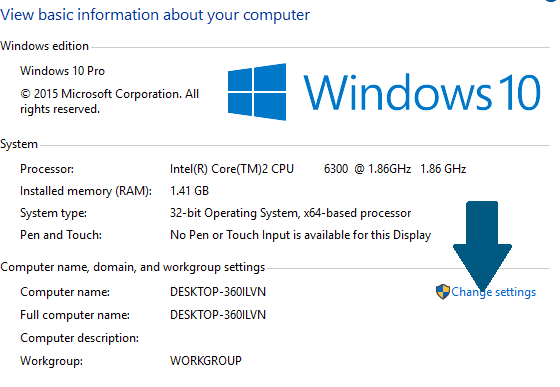
Step 2: Click on Change settings
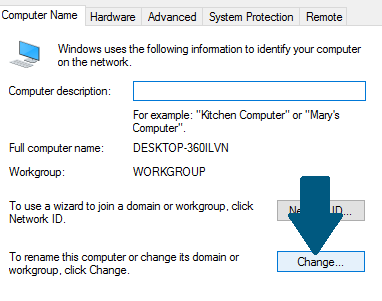
Step 3: On the Computer Name tab, Click Change
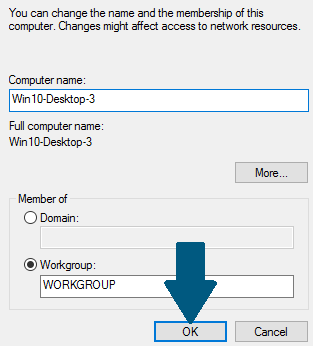
Step 4: Provide the computer name and click OK
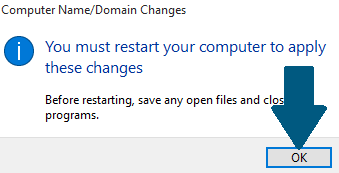
Step 5: Restart the system so that the changes can take effect. Click OK
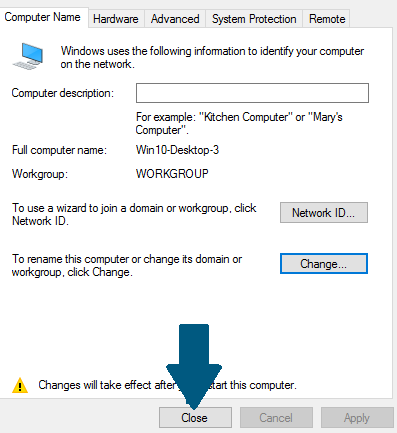
Step 6: Click Close o close the computer name dialog.
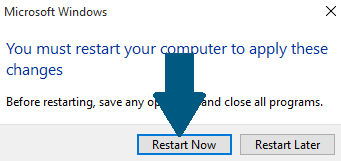
Step 7: Click on Restart Now. The machine will be restarted and the changes will be applied