Windows is the most guided operating system in the world. That is, you can strengthen your PC's security to keep it safe both online and offline. This article will walk you through the whole process of enabling or disabling Windows 10 secure sign-in.
3 Ways to enable or disable Windows 10 Secure login
You can enable or disable Windows 10 secure sign-in by the following methods:
- Through Netplwiz
- Through Local Security Policy
- Through Registry Editor
To enable or disable Windows 10 Secure Sign-In through Netplwiz, follow this procedure step by step.
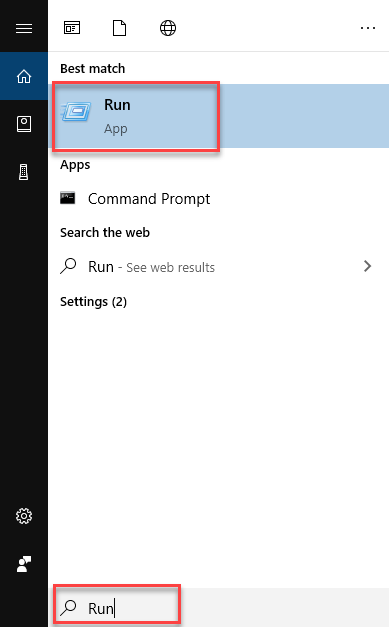
Click the Search button. Type Run in the search bar and choose the Run option as the following image is showing.

As soon as you will choose the Run option, the following dialogue box will appear.
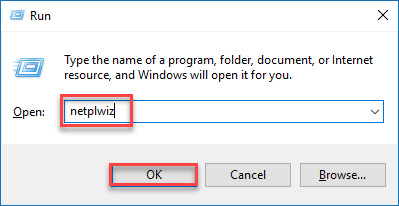
Type netplwiz in the Open textbox and click the OK button as highlighted in the above image. As soon as you click the OK button, the following dialogue box will appear.
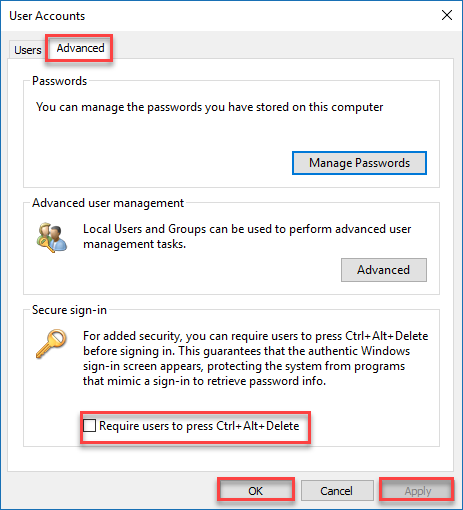
Choose the Advanced tab and check the checkbox named Require users to press Ctrl + Alt + Delete. Then click Apply and OK button as highlighted in the above image.
To enable or disable Windows 10 Secure Sign-In through Local Security Policy, follow this procedure step by step.
Click the Search button. Type Run in the search bar and choose the Run option as the following image is showing.
As soon as you will choose the Run option, the following dialogue box will appear.
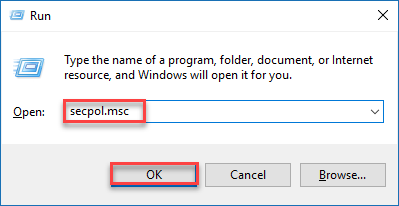
Type secpol.msc and click the OK button as highlighted in the above image. As you click the OK button, the following screen will appear.
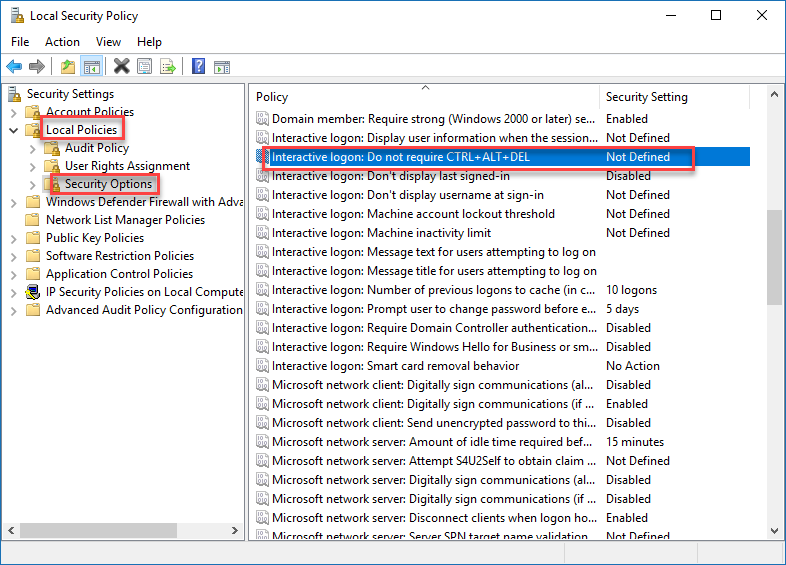
Navigate through the following path as highlighted in the above image.
Local Policies -> Security Options
Look for the option named Interactive logon: Do not require CTRL + ALT+ DEL and double click on it. As you will double click the option, the following dialogue box will appear.
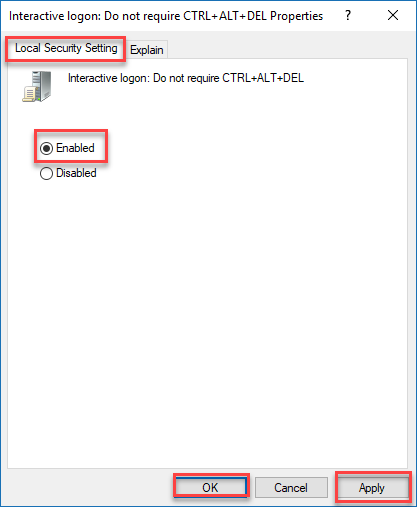
Click the tab named Local Security Settings. Select the Enabled radio button and click the Apply and OK button as highlighted in the above image.
To enable or disable Windows 10 Secure Sign-In through Registry Editor, follow this procedure step by step.
Click the Search button. Type Run in the search bar and choose the Run option as the following image is showing.

As soon as you will choose the Run option, the following dialogue box will appear.
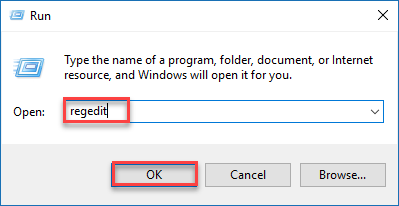
Type Regedit in the Open textbox and click the OK button as highlighted in the above image. As soon as you will click the OK button, the following screen will appear.
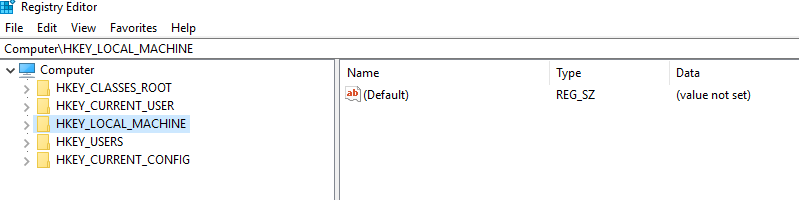
Navigate through the following path.
HKEY_LOCAL_MACHINE -> SOFTWARE -> Microsoft -> Windows NT -> CurrentVersion -> Winlogon
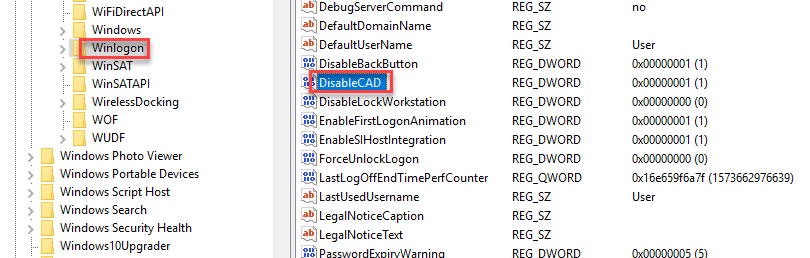
Double click on the option named DisableCAD as highlighted in the above image. The following dialogue box will appear.
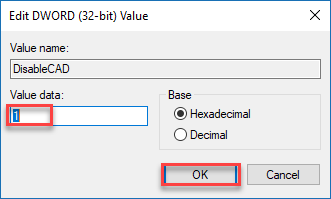
Type 1 in the Value data text box and click the OK button as highlighted in the above image. Restart Windows 10 to apply changes.