A Printer is one of the most important devices for an offic network and being a system administrator you should be able to deploy it. This tutorial will walk you through the steps to install and configure a print server on your windows Server 2012 R2 machine.
Prerequisites
Following are the requirements for this tutorial:
- The Administrator account must have a strong password.
- A static IP is configured.
- The latest windows updates are installed.
- The firewall is turned off.
Installing the Print Server
Step 1: Open the server manager dashboard from the task bar. Click on 'Add roles and features'.
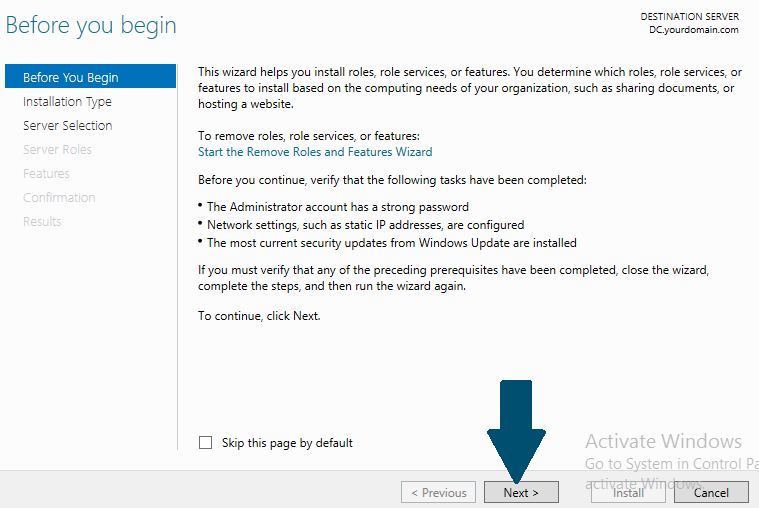
Step 2: Click on 'Next'.
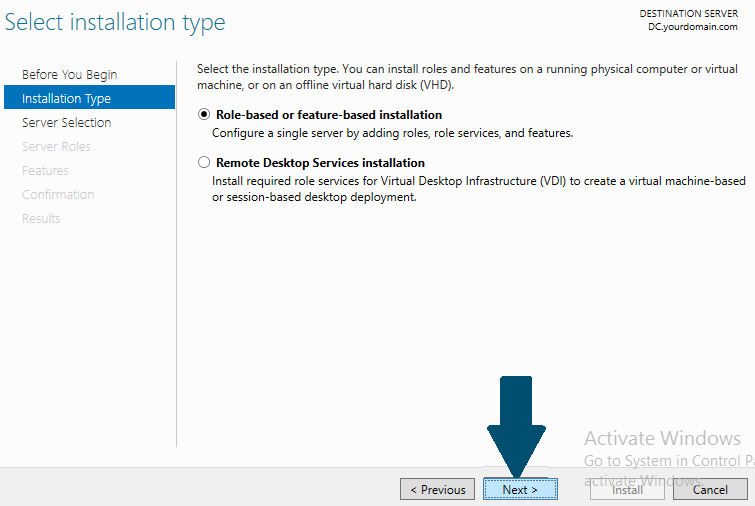
Step 3: Choose Role-based or feature-based installation and click Next.
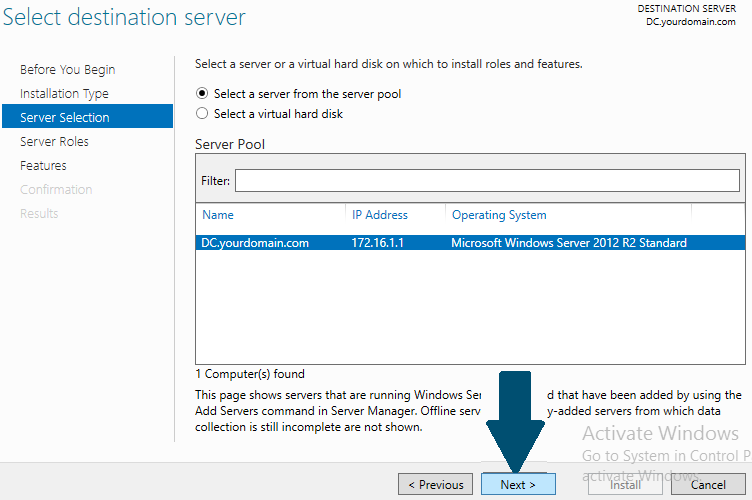
Step 4: Choose the destination printer server for this configuration and click Next.
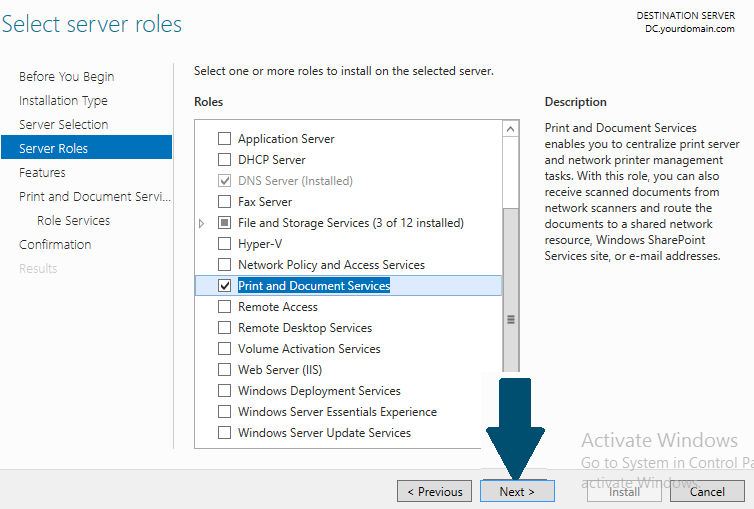
Step 5: Choose Print and document services from server roles and when a new window appear, click Add Features.

Step 6: Click Next.
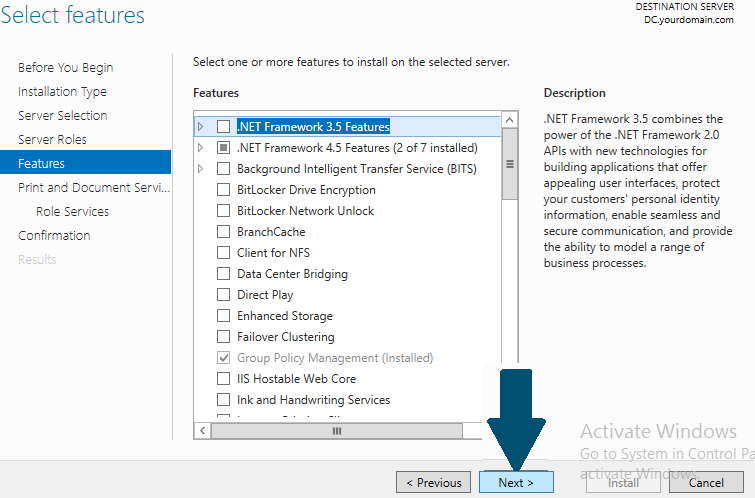
Step 7: Leave the default selections and click Next.
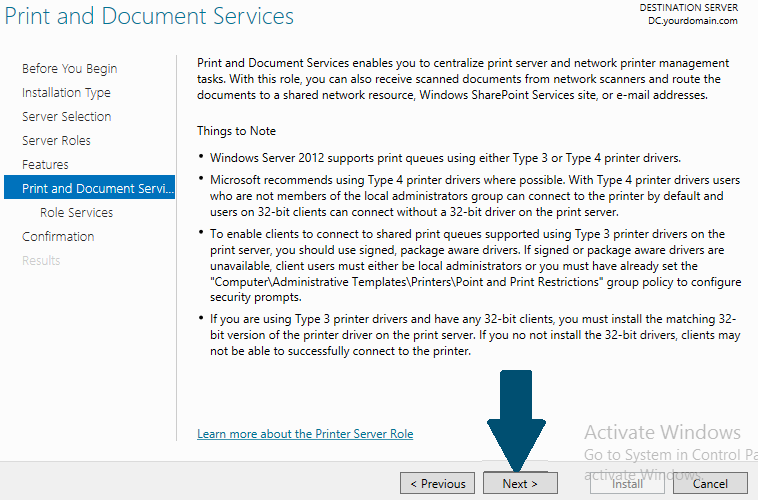
Step 8: Click Next.
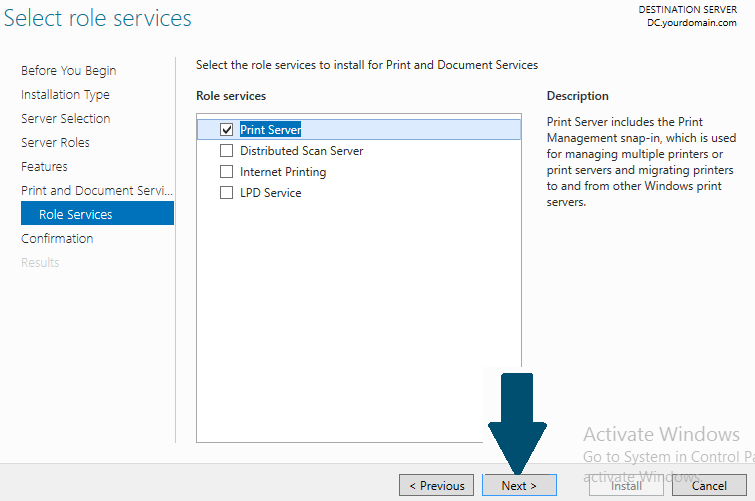
Step 9: Choose Print Server and click Next.
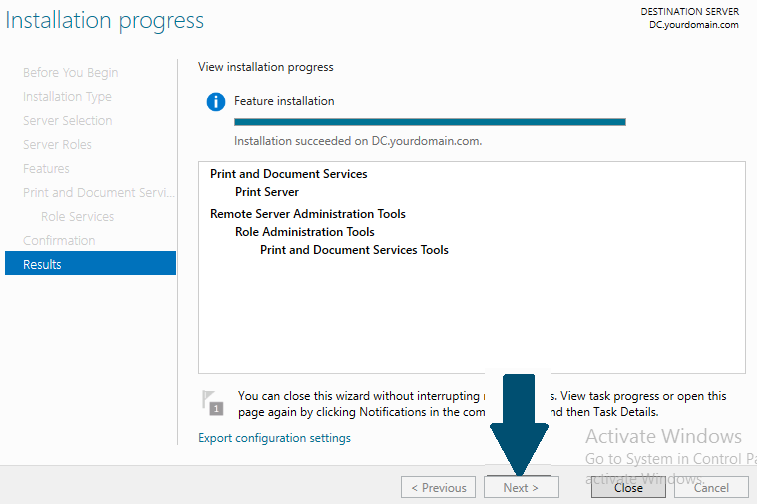
Step 10: Click on Install

Step 11: Click: Close after successful installation.
Configuring the Print Server
Step 1: Open the print server management console. Right-click on Printers located under your print server machine and click Add Printer.

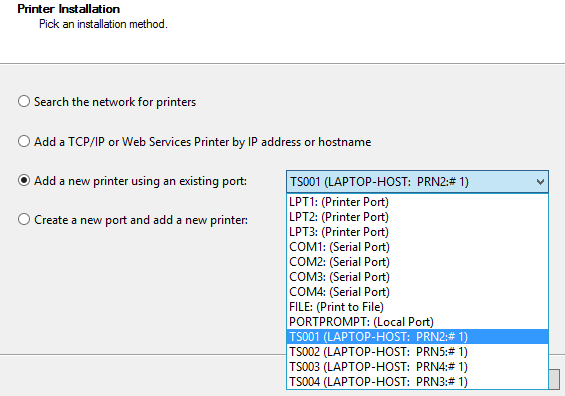
Step 2: Attach the printer to your computer. Choose the right port where your printer is connected.
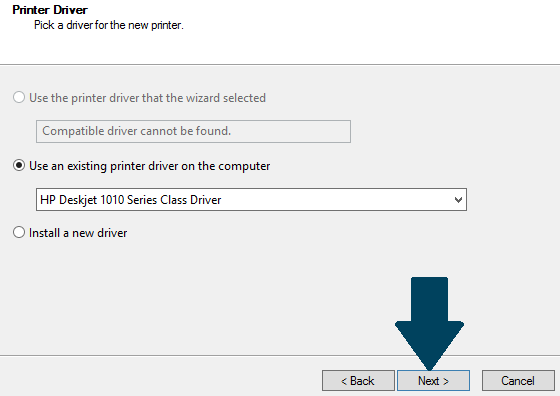
Step 3: Choose "Use an existing printer driver on the computer" if you have an existing printer drivers otherwise choose "Install a new driver" and follow the wizard. Click Next.
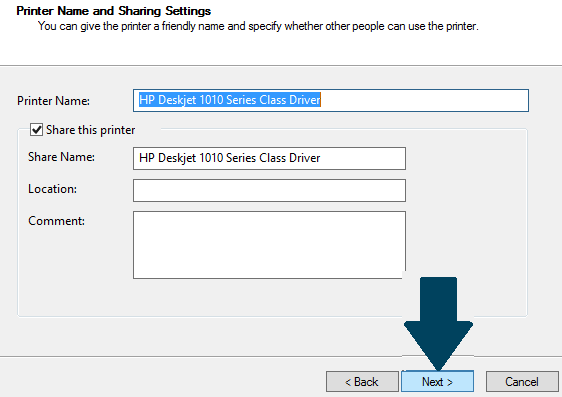
Step 4: Give a friendly name to your printer and share it with other users on network. Click Next
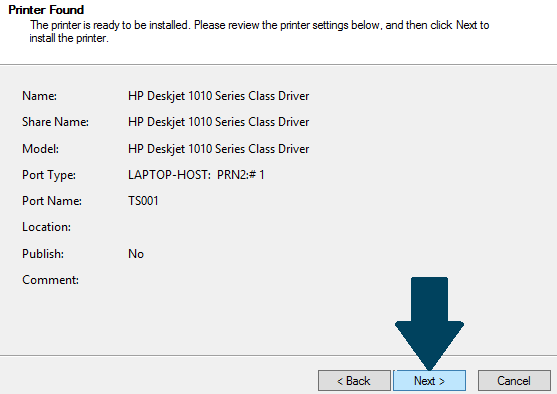
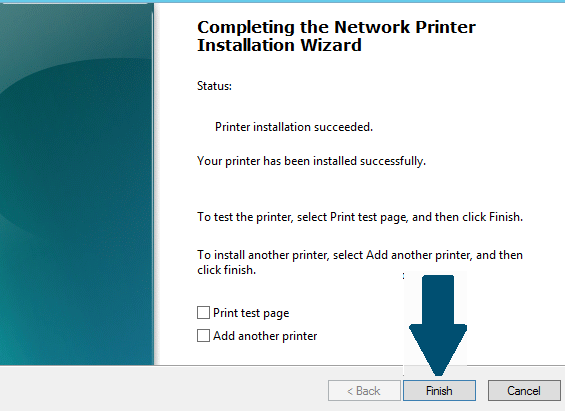
 Step 5: Click Next to finish the printer installation.
Step 6: Click Finish.
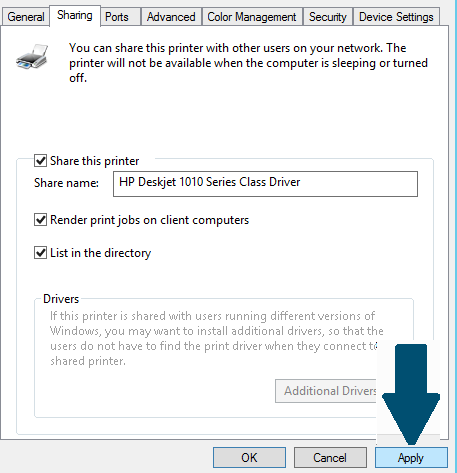
Step 7: Again, go to printer management console and right click on the printer icon. Click Manage Sharing. Go to sharing tab and check mark both options as shown in figure. Click Apply and then OK.
You have successfully configured and deployed your print server. This printer will be visible to other users on your network.
