Windows has significantly altered the user interfaces for the clock, calendar, and battery. While the new design is appealing and improves on the design of Windows 10, the old theme in Windows 7 and 8 can still be restored if desired. Returning to the old battery UI also allows you to switch between the power supply systems faster. In this article, we will guide you through the whole procedure to restore old clock, calendar, and battery on the Windows 10 taskbar.
Restore old clock & calendar on the Windows 10 taskbar
To restore the old clock and calendar on the Windows 10 taskbar, follow this procedure step by step:
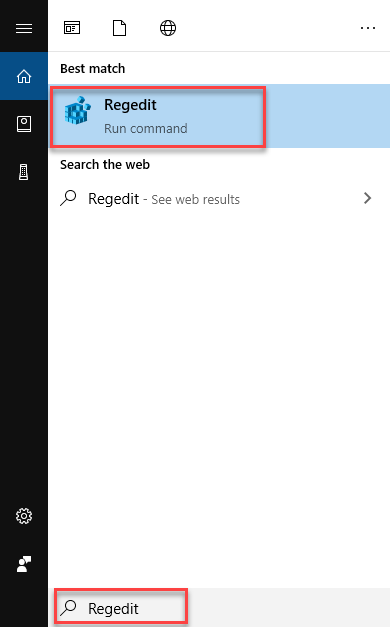
Click the Search button. Type Regedit in the search bar and select the option as below image is showing:
As soon as you will select the Regedit option, the Registry Editor will open like this:

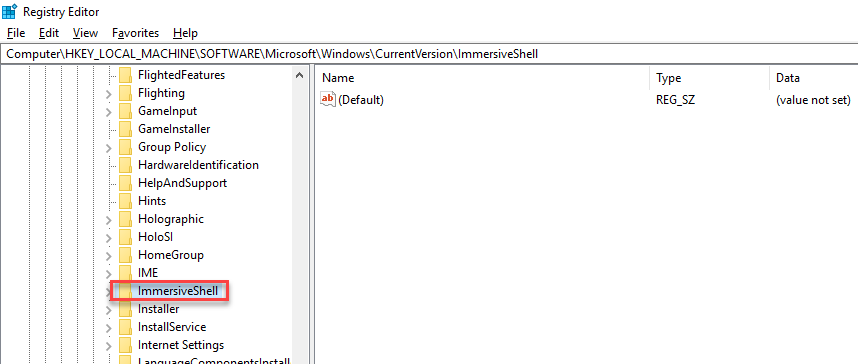
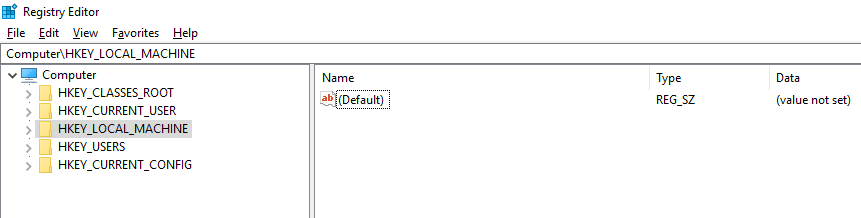
Now navigate through the following path from the left side of the screen.
HKEY_LOCAL_MACHINE\SOFTWARE\Microsoft\Windows\CurrentVersion\ImmersiveShell
As you go through the path, the following screen will appear:
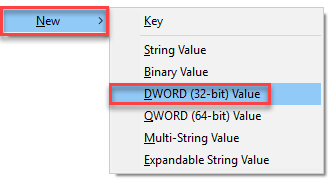
After this, right click in the empty space of the screen and select New -> DWORD (32-bit) Value as follows:
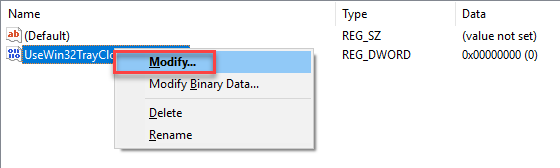
Rename the newly added field as UseWin32TrayClockExperience like this:

Right click on the added field and select the Modify option like this:
A dialogue box will appear as follows:
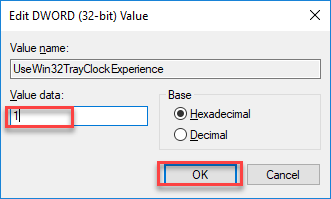
Change the Value data as 1 and click the OK button. The old clock and calendar will appear by clicking on the date and time.
Restore old battery on the Windows 10 taskbar
To restore old battery on the Windows 10 taskbar, follow this procedure step by step:
Click the Search button. Type Regedit in the search bar and select the option as below image is showing:

As soon as you will select the Regedit option, the Registry Editor will open like this:
Now navigate through the following path from the left side of the screen.
HKEY_LOCAL_MACHINE\SOFTWARE\Microsoft\Windows\CurrentVersion\ImmersiveShell
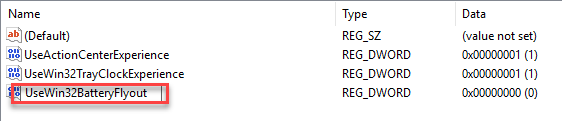
As you go through the path, the following screen will appear:

After this, right-click in the empty space of the screen and select New -> DWORD (32-bit) Value as follows:

Rename the newly added field as UseWin32BatteryFlyout like this:
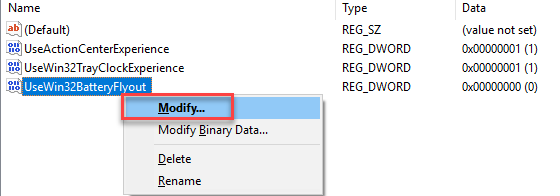
Right-click on the added field and select the Modify option like this:
A dialogue box will appear as follows:
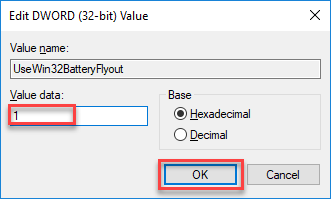
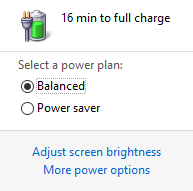
Change the Value data as 1 and click the OK button. The old battery will appear by clicking on the battery icon.