All of the Windows 10 users are familiar with its feature of automatic update. Automatic update installs an update or a security patch as soon as it finds any of your applications or features getting obsolete. This feature also saves you from all kinds of security threats. The user can turn this feature on or off according to his own choice. If this feature is turned off, then the users will have to install everything manually which can prove to be a burden on them.
Irrespective of whether this feature is turned on or off on your computer system, you can always have a look at your update history in order to know which updates are currently installed on your computer system. In this article, we will explain to you the methods through which you can check Windows 10 update history using PowerShell.
Checking Windows 10 Update History Using PowerShell
In order to check Windows 10 update history using PowerShell, you can make use of any of the following two methods:
Method # 1: Get Update History with PowerShell Command
In this method, we will tell you how you can check the update history using a PowerShell command in Windows 10. For doing this, you will need to proceed as follows:
Press Win+ X in order to launch the Power User menu. This menu is shown in the following image:

You need to launch the PowerShell with administrative privileges so click on the Windows PowerShell (Admin) option from the Power User menu as highlighted in the image shown above.
As soon as you will click on it, PowerShell Admin window will appear on the screen as shown in the image below:

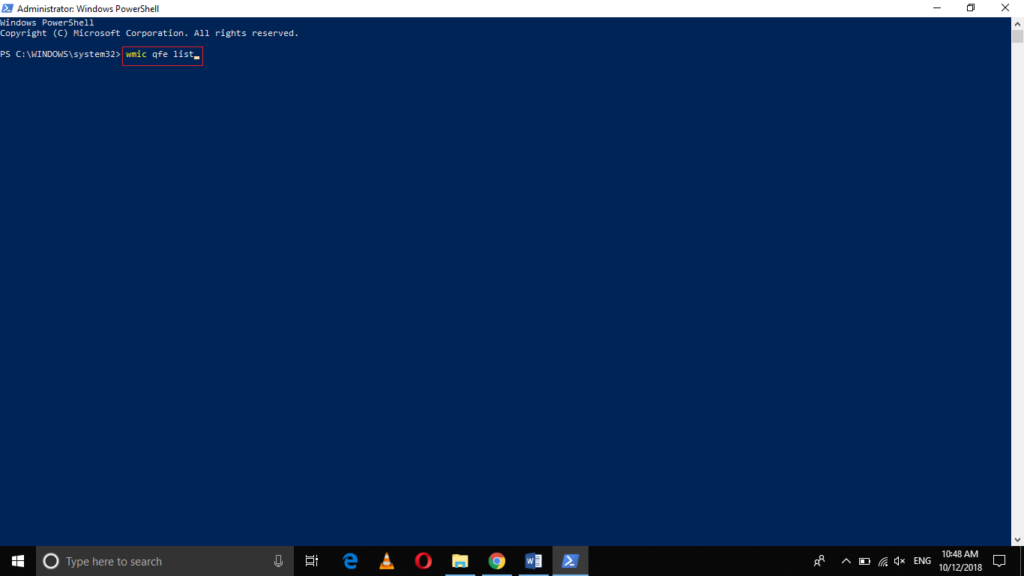
Now type the command:
wmic qfe list
in your PowerShell. This command is highlighted in the following image:
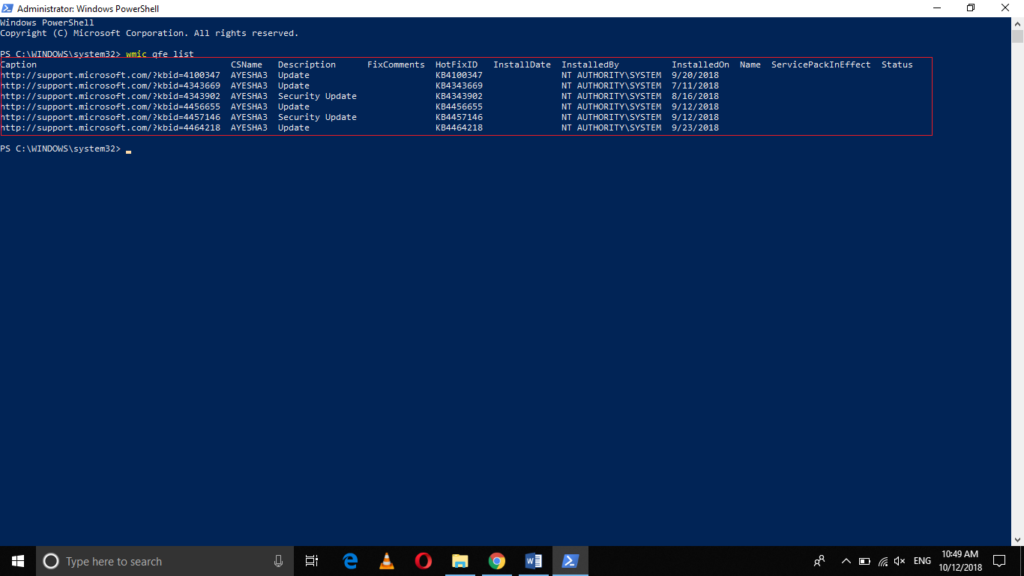
After typing this command, press the enter key.
As soon as you will press enter, your Windows 10 update history will appear in your PowerShell window as highlighted in the image shown below:
Method # 2: Show Windows Hotfix History in PowerShell
In this method, we will tell you how you can list the hotfix history using a PowerShell command in Windows 10. Hotfixes are in fact the security patches that are there to fix the issues with Windows 10. For doing this, you will need to perform the following steps:
Type PowerShell in the search section of your taskbar and right click on the search result in order to launch a menu as shown in the following image:
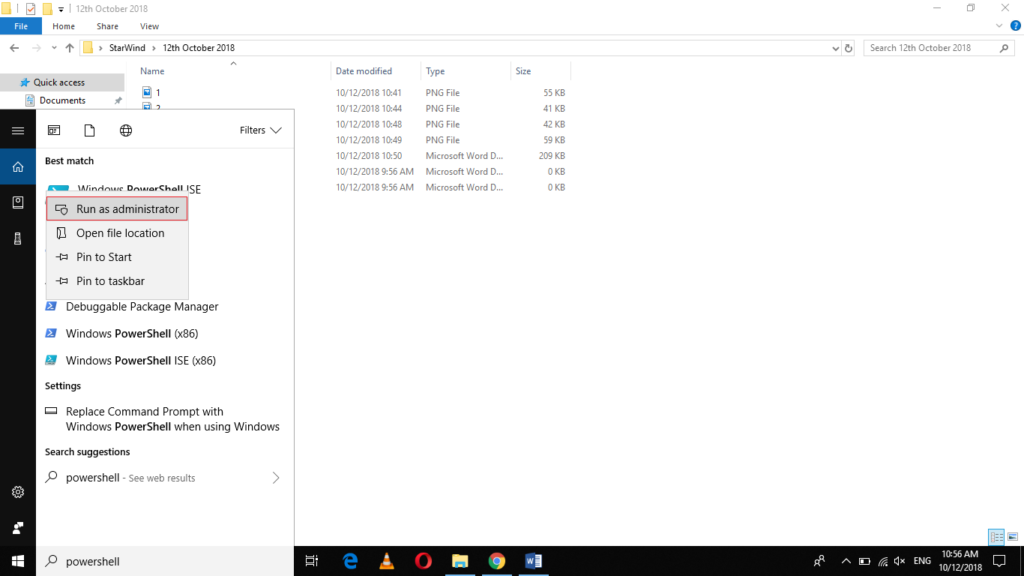
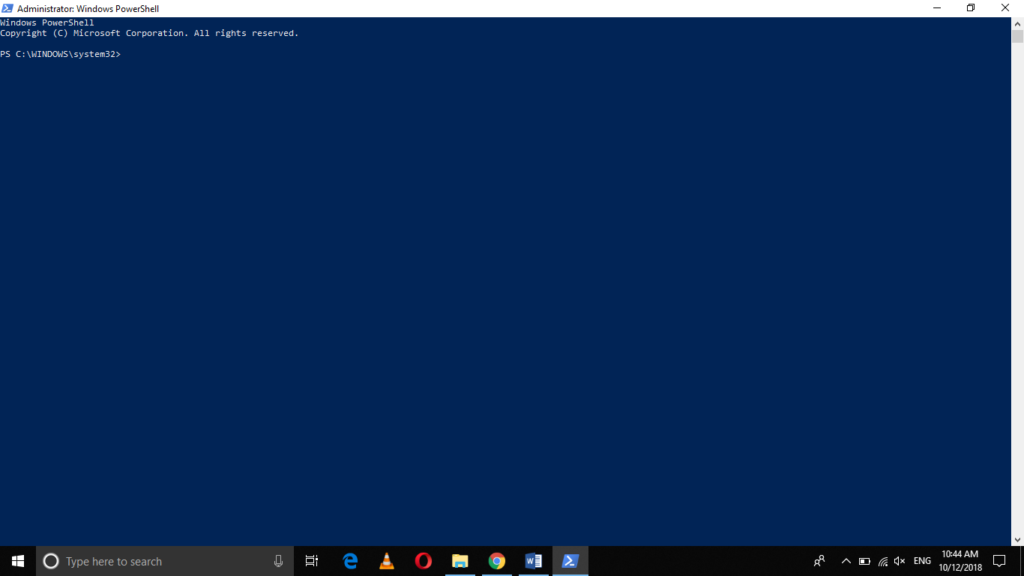
Click on the Run as Administrator option as highlighted in the image shown above in order to launch the PowerShell with administrative privileges. The newly opened PowerShell Admin window is shown in the image below:
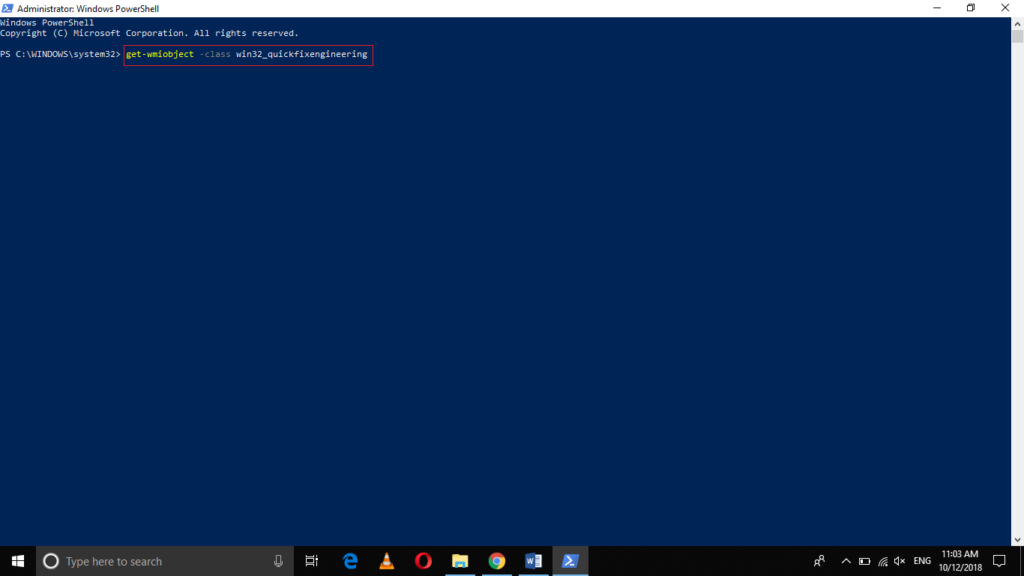
Now type the command:
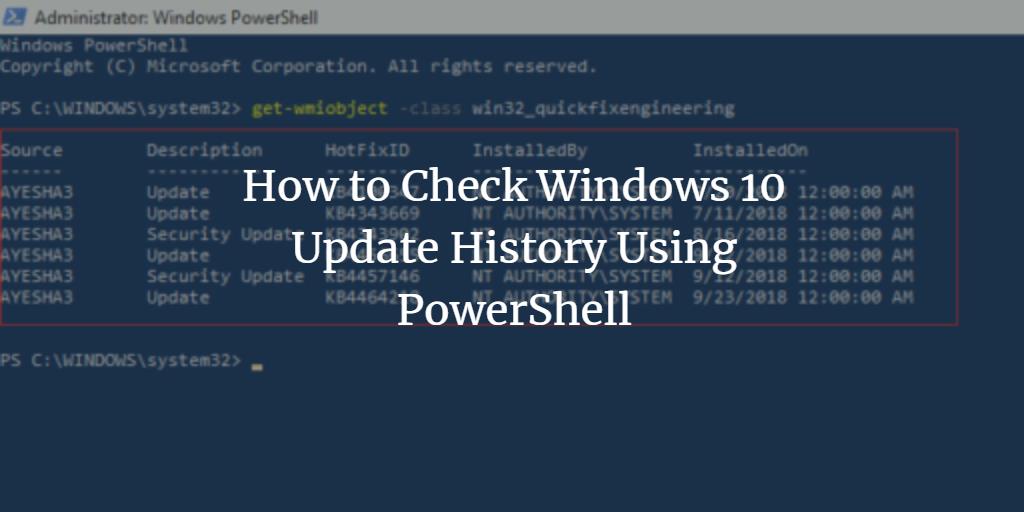
get-wmiobject -class win32_quickfixengineering
in your PowerShell. This command is highlighted in the image shown below:
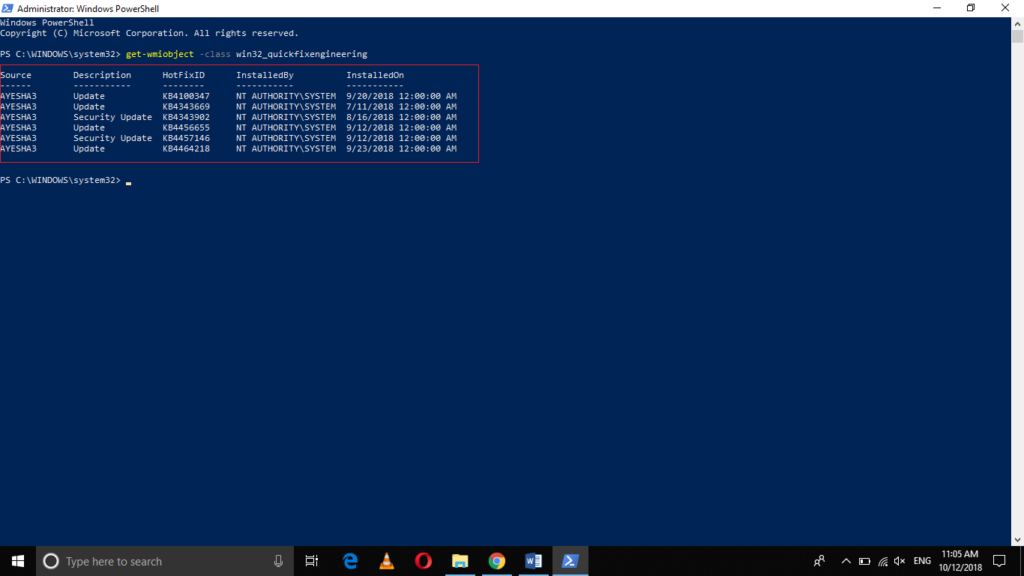
After typing this command, press the enter key.
As soon as you will press the enter key, the hotfix update history will be displayed on your PowerShell window as highlighted in the following image:
Conclusion
By following any of the two methods listed above, you can easily check the Windows 10 update history using PowerShell. In this way, you can always keep an eye on all the updates and hotfixes that are currently installed on your computer system and you can know which other updates and hotfixes you will need in order for your computer system to work properly.
