With the PowerShell command line from Windows 10, you can easily add applications to automatically activate a VPN link when they are launched. Automating this function ensures that you won’t even have to consider connecting to a VPN while you are using those devices. In this article, we will guide you through the whole procedure to Auto-connect to a VPN in Windows 10 for different applications.
Auto-connect to a VPN in Windows 10 for different applications
To Auto-connect to a VPN in Windows 10 for different applications, follow this procedure step by step.
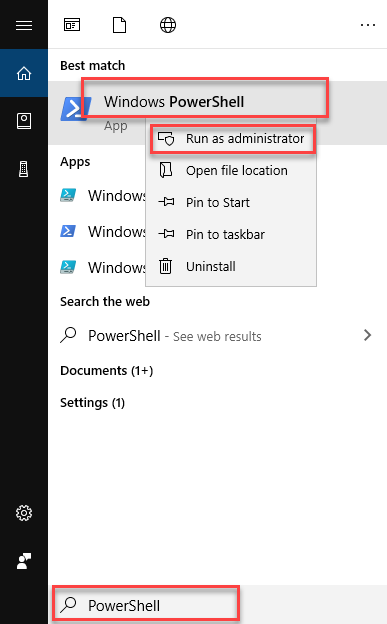
Click the Search button on the taskbar. Type PowerShell in the search box and then right click the Windows PowerShell option. A menu will pop out, click the Run as administrator option as the following image is showing.
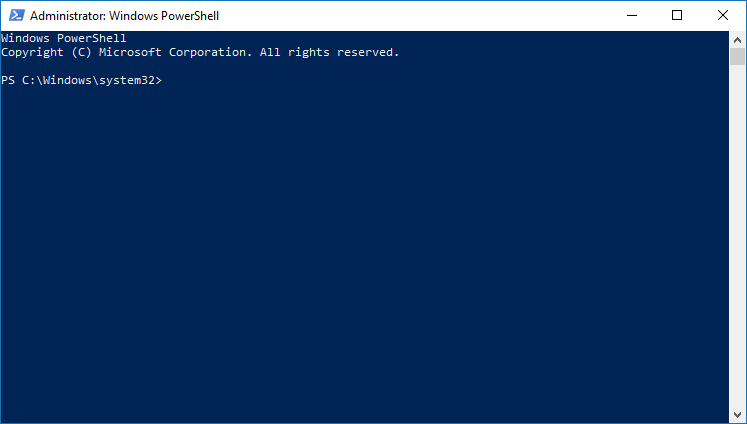
As you click the Run as administrator option, the following editor will appear.
Now type the following command into the PowerShell editor.
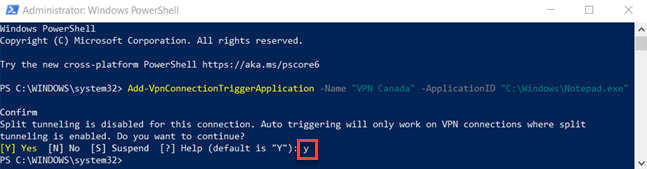
Add-VpnConnectionTriggerApplication -Name "<VPNConnection>" –ApplicationID "<AppPath>"
Press the Enter key as the following image is showing.

Type the Y as the following image is showing.
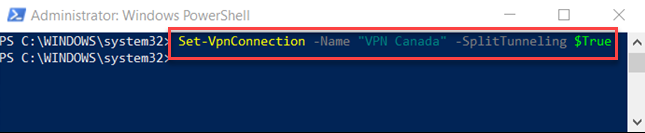
For the auto-trigger to connect to the VPN without human interference, you must allow split tunnelling. Type Set-VpnConnection -Name "<VPNConnection>" -SplitTunneling $True command into the PowerShell editor. Then replace the name of the VPN with "<VPNConnection>”. After that, press the Enter key as the following image is showing.
If you unintentionally close the application and do not wish to stop the connection, you can set a timeout buffer to restart the request.
Type the Set-VpnConnection-Name "<VPNConnection>" -IdleDisconnectSeconds <IdleSeconds> command into the PowerShell editor and press the Enter key. Replace <VPNConnection> with your connection name and <IdleSeconds> with the amount of seconds you have to wait for the contact to end.

Now, Windows will wait 10 seconds when the application closes before terminating the VPN connection.
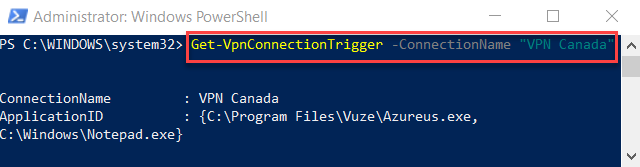
To see which applications auto-trigger a VPN, type the following command into the PowerShell editor.
Get-VpnConnectionTrigger -ConnectionName <VPNConnection>
Replace <VPNConnection> with VPN connection name and then press the Enter key as the following image is showing.
To remove VPN auto triggering, type the following command into the PowerShell editor.
Remove-VpnConnectionTriggerApplication -Name "<VPNConnection>" –ApplicationID "<AppPath>"
Replace the <VPNConnection> with your connection’s name and <AppPath> with the path of the application you want to mention as the following image is showing.

Then type Y and press the Enter key as highlighted in the above image. For every application, you want to remove from the list, repeat this command or step.
Conclusion
By following this procedure, you will be able to auto-connect to a VPN in Windows 10 for different applications.
