There are two methods for configuring DNS on Windows Server 2016. One is using PowerShell and the other method is using GUI which is slightly longer, but easier and doesn't require commands to be typed. I will show you the GUI method here.
Prerequisites
- Static IP is configured
- Firewall is turned off
- Latest updates from Microsoft are installed
- Administrator account has strong password
Install Windows DNS Server
Step 1: Open the server manager dashboard.
Step 2. Click on Add roles and features.
Step 3. Read the pre-requirements and click Next.
Step 4. Choose Role-based or feature-based installation and click Next.
Step 5. Choose destination server for DNS role and click Next.
Step 6. Choose DNS server from server roles. As soon as you choose the role, a new window will pop up. Click Add features.
Step 7. Keep clicking Next through rest of pages and complete the installation process
Creating Forward Lookup Zone
Step 1. Open server manager dashboard.
Step 2. Click Tools -> DNS
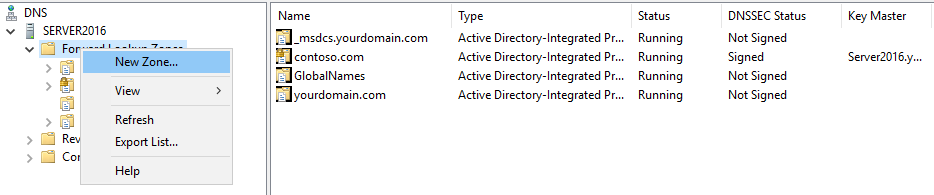
Step 3. In DNS manager console, expand DNS server. Right-click Forward Lookup Zones.
Step 4. Click New Zone.
Step 5. Click Next.
Step 6. Choose primary zone and uncheck "Store the zone in AD".
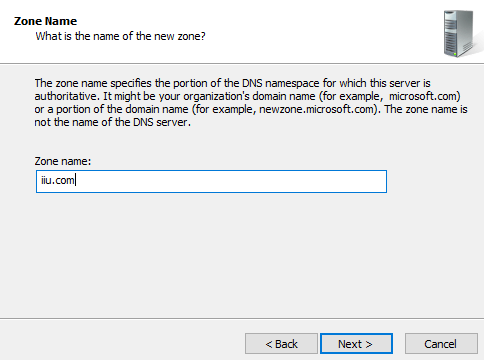
Step 9. Provide the zone name and click Next.
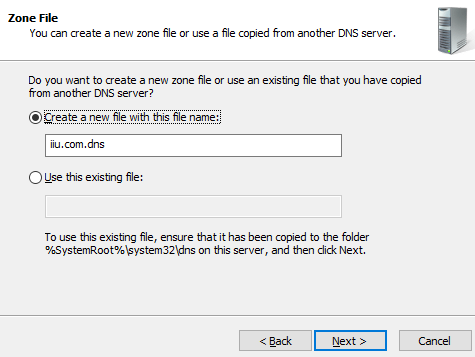
Step 10. Choose "Create a new file with this ...." and click Next.
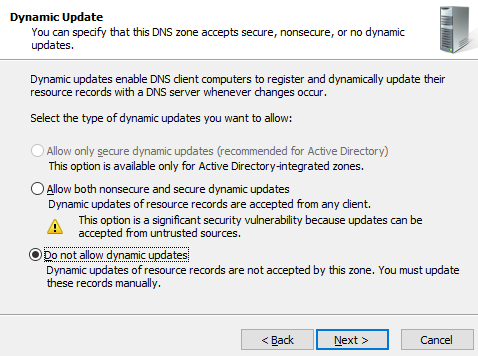
Step 10. Choose "Do not allow dynamic updates".
Step 11. Click Finish.
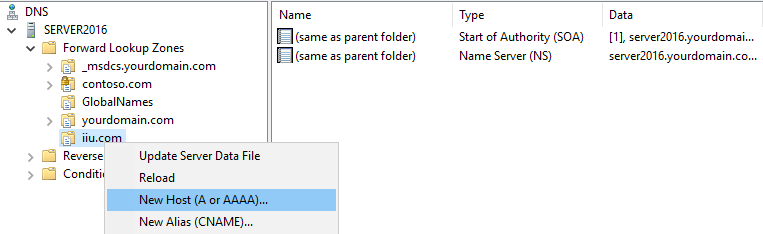
Adding Host Record in a Forward Lookup Zone
Step 1. Open DNS manager console and right-click your forward lookup zone where you would like to create a host record.
Step 2. Click New Host (A or AAAA).
Step 3. Provide the name (and this will become FQDN in the form support.mydomain.com), and IP address.
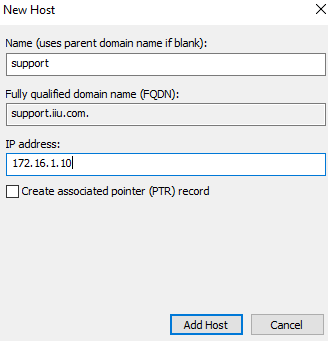
Step 4. Click 'Add Host' and you are done.
