The gunzip command is a widely used command for uncompressing files which are made using the gzip utility. It decompresses files with the.gz or .tgz file extension. The command removes the compressed file. After decompression, the files retain their original extension.
Gzip is a popular file compression algorithm that keeps the file’s original mode, ownership, and date while reducing the file size.
In this tutorial, we look at examples of the Linux gunzip command.
Syntax
The syntax for the gunzip command is:
$ gunzip [option] [filename]
Decompress files using the Gzip Command
To start off, the gzip command is also used for decompressing files with the.gz extension.To achieve this, use the -d option
The syntax is:
$ gzip -d file.gz
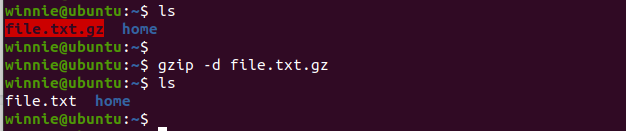
Verify the file has been decompressed using the ls command. Note that the original compressed file disappears.
Decompress files using the gunzip command
Gunzip is another command that can be used to decompress a file.
The syntax of the command is:
$ gunzip filename.gz
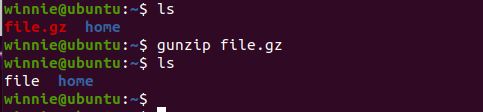
As we saw with gzip, the original compressed file is not retained after decompression.
Keep both the compressed file and the decompressed one
The gunzip command decompresses a file and removes the extension by default. Use the gunzip command with the -k option to keep both the decompressed file and the original compressed copy.
$ gunzip -k file.gz
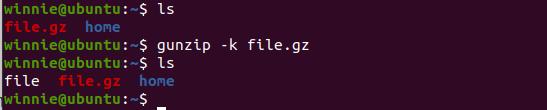
From the output above, we now have two files, file, and file.gz.
Display the Contents of the Compressed file without uncompressing
The gunzip command can be used to display the details of a compressed file without uncompressing it. This applies to only a text file. Use the syntax:
$ gunzip -c file.gz
The contents of file.gz are now displayed in the terminal.

Display Information About the Compressed File
To display more information about a compressed file, use the following gunzip command:
$ gunzip -l file.gz

The -l option comes in handy when dealing with large files or a device with limited disk space. It allows you to check whether the disk you're decompressing the file to has sufficient space.
The command above gives the following information:
- Compressed size
- Uncompressed size
- Ratio
- Uncompressed name
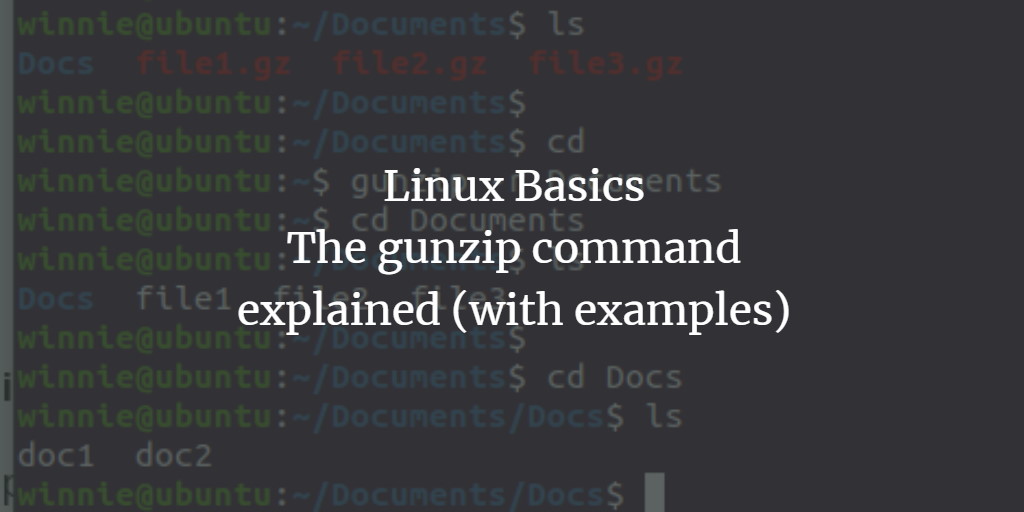
Decompress multiple files Recursively using gunzip
To uncompress all the files contained in a folder, append the gunzip command as follows:
$ gunzip -r [folder_name]
For example, I have the following Documents folder that contains files and another folder:
Documents
file1.gz
file2.gz
file3.gz
Docs
-> doc1.gz
-> doc2.gz
Decompress all the files with the command:
$ gunzip -r Documents
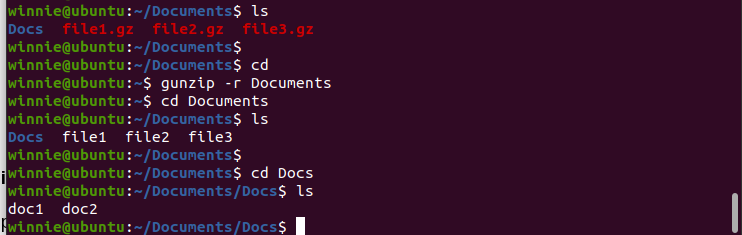
All files in the Documents folder have been decompressed.
Enforce decompress when errors occur
Sometimes decompression with gunzip can cause errors. These errors prevent decompression. In the event of errors or warnings, we can provide the -f force option, which will complete decompression.
$ gunzip -f file.gz
Check Whether a Compressed File Is Valid
To test if a file was compressed using gzip, execute the command with the -t option:
$ gunzip -t file.gz
You will get a message if the file is not valid. If it is valid there will be no output from the command.
Display verbose output of the decompress operation
You can display verbose output, such as decompression percentage filename. Use -v flag as shown:
$ gunzip -v file.gz

Conclusion
You now know how to uncompress files using the gunzip command. Visit the Gnu gzip documentation page for more information about gnuzip command.