
Gradle is a build automation tool that is built on the ideas of Apache Ant and Apache Maven. Gradle replaces the XML form used by Apache Maven for defining the project settings with a Groovy-based domain-specific language (DSL).
Gradle is using a Groovy-based DSL, which is more convenient for developers. This DSL also provides for dependency management, automatic downloading and documentation. It can be used to compile the source code, run tests and generate reports on the same project in a single command-line.
While Gradle is primarily a build tool, it can also be used as a general-purpose task runner. It provides the ability to create native software packages in Windows EXE installer, and dmg packages.
Gradle does not provide dependency management since it can load plugins to support various source code management tools, but Gradle has a rich API that allows you to create custom tasks or even new plugins. There are also various community-provided plugins available for different types of dependency management.
The Gradle tool is written in Java, but it can work with any language as long as there are plugins available for the respective language.
Linux users will be happy to know that Gradle is available natively for Linux. Gradle has many advantages over Maven, including faster incremental builds due to the use of Ivy dependency management, which actually makes it possible for developers to avoid using maven-release-plugins. The release process itself becomes less painful.
This article is for those of you who are Linux users and want to install Gradle on Debian 10. It will outline the steps necessary to complete this installation. This guide is tested on Debian 11, but the steps should also work on any other Debian-based distros.
Also, note that this guide is tested on a machine with 2 CPU cores and 4 GB of RAM. While it may be possible to complete the installation on older machines, older hardware would require some adjustments to be made.
Prerequisites
Before you start with this guide, you will need Debian 10 installed on your system. In addition to a working installation of Debian 10, you will also need a sudo enabled user account. It is advisable that the user account be a member of the sudo group.
Step 1: Updating the System
The first step in this guide will be to update your system and make sure all the packages are up-to-date. This is done by executing the following command.
sudo apt update
Step 2: Installing Java
Gradle is written in Java so that you will need the JRE installed on your system. The JRE contains code that is used to execute Java applications. Gradle Tooling uses various tasks (java, ivy) which require the presence of JRE on your system.
The OpenJDK package contains a Java Runtime Environment(JRE), so this will be the best option. Run the following command to install the OpenJDK package.
sudo apt install -y default-jdk
Once the installation is complete, you should have Java installed on your system. Run the following command to check if the java command is available for use.
java -version
You should get an output similar to the one shown below.

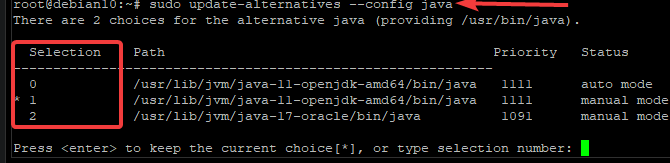
If you have installed multiple Java versions on your system, and you want to switch to a different java version as the default version, run the following command.
sudo update-alternatives --config java
This will list down all the available Java alternatives and prompt you to select which one you would like to use as your system default. Make your choice and press Enter.
Now that you have verified that Java is installed, it is time to install Gradle.
Step 3: Installing Gradle
In this step, we will be installing Gradle using the Gradle Binary-only zip file. First, you need to download the Gradle zip file.
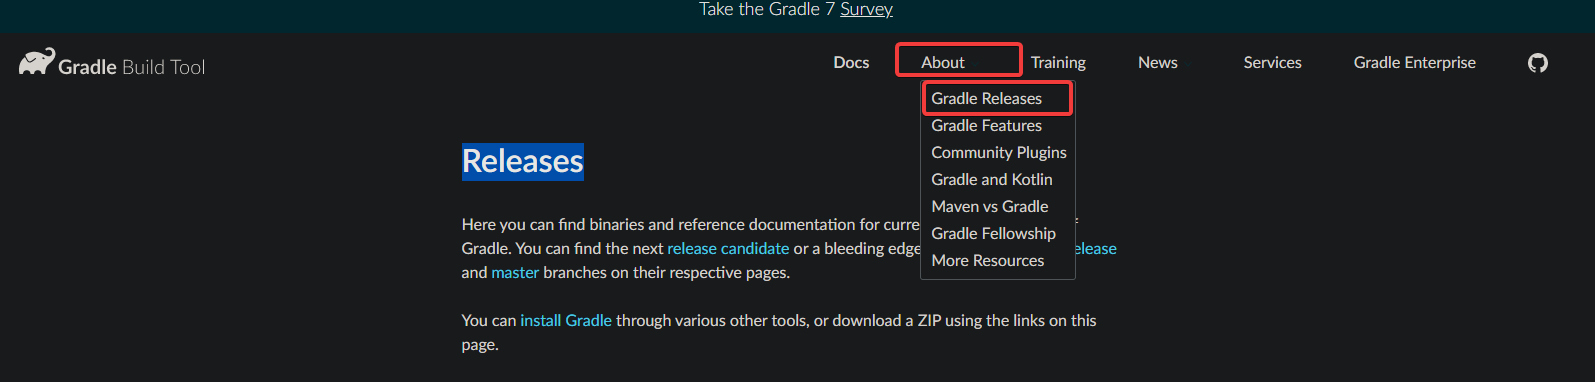
Open your web browser, navigate to the Grade releases page, click About, click on the Gradle Releases tab.
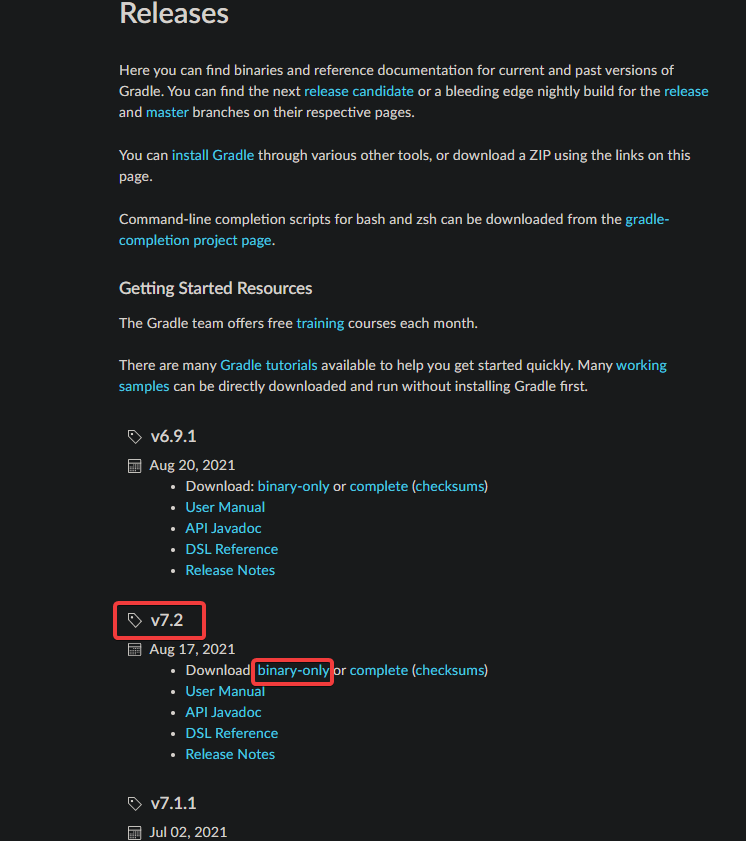
You will be taken to a new page containing the Gradle zip file. Grab the latest release binary zip file. As of writing this article, the latest version is Gradle v7.2. This is what we will be using in this article. Right-click on binary-only and copy the link address.
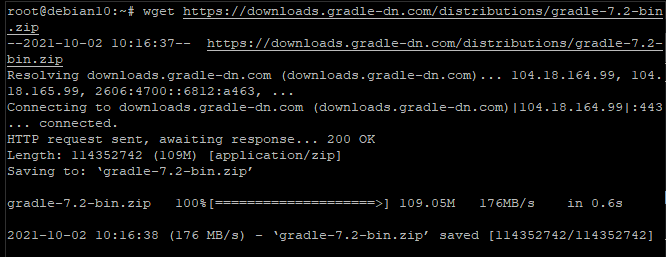
Once copied, go to your terminal and type the following command.
wget https://downloads.gradle-dn.com/distributions/gradle-7.2-bin.zip
This command will show the downloading progress in the form of a percentage.
Wait for the zip file to download. Once done, extract it to the /opt directory. This can be done using the following command.
unzip gradle-7.2-bin.zip -d /opt/
Use the ls command to check if the extracted file is in the correct directory. You should see a gradle-* file in there.
ls /opt/
We can now delete the zip archive as we no longer need it. Use the rm command to do that.
rm gradle-7.2-bin.zip
Now, we will configure the PATH environment variable.
echo "export PATH=/opt/gradle/bin:${PATH}" | sudo tee /etc/profile.d/gradle.sh
sudo chmod +x /etc/profile.d/gradle.sh
source /etc/profile.d/gradle.sh
This command will append the Gradle installation directory to the PATH environment variable. This, in turn, will enable the Gradle commands, such as Gradle to be executed without specifying the full path to them.
Next, we need to verify that Gradle was successfully installed by running it with the v flag.
gradle -v
You should get an output similar to the one shown below.

Congratulations! Gradle installation is complete on your system. For more information about Gradle, refer to its official documentation.
Conclusion
In this guide, you have learned how to install Gradle on a Debian 10 system, as well as configure the PATH environment variable to make it easier for you to execute Gradle commands from anywhere in your terminal sessions. Happy gradling!