Django is a free and open source Python web framework used for developing dynamic websites and applications. It is used for developing complex and database-driven Python applications.
Django follows the MVC (Model-View-Controller) architecture, which allows developers to write less code and create a new website in a short time. Django can be installed on any operating system that runs Python, including Windows, macOS, Linux/Unix, and Solaris.
In this tutorial, you'll install and configure the Python Web Framework Django on an Ubuntu 22.04 server. You will set up Django Web Framework with the POstgreSQL database system and the Nginx web server. This guide shows you two methods for installing Django and how to create a project/application with Django.
Requirements
For this tutorial you need the following prerequisites:
- An Ubuntu 22.04 system - You can use Ubuntu 22.04 Desktop or Server.
- A non-root user with sudo/root administrator privileges.
- A local domain name for the Django installation - You can do this via the /etc/hosts file on your local machine.
Installing the dependencies
To begin, you will now install some Python dependencies for the Django Web Framework. These include "pythopn3-dev", "python3-venv" for creating the Python virtual environment and "libpq5" as the PostgreSQL driver for Python.
Before you get started, run the following apt command to update and refresh your package index.
sudo apt update
After the package index is updated, install the dependencies using the apt command below.
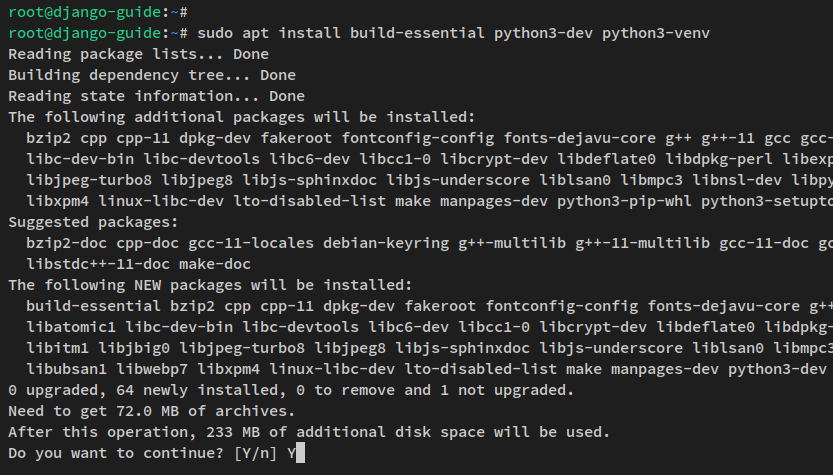
sudo apt install build-essential python3-dev python3-pip python3-venv libpq5 libpq-dev git
When prompted for confirmation, type y to confirm and press ENTER to continue. Now the installation of the package dependencies begins.
In this step, you have installed the Python dependencies for the Django Web Framework. In the next steps, you will install and set up the PostgreSQL database server.
Installing and configuring the PostgreSQL server
The Django Web Framework in Python supports multiple databases such as MySQL/MariaDB, PostgreSQL and SQLite (default database). For the production environment, you should consider using PostgreSQL or MySQL/MariaDB for your Django application.
Having already installed the basic dependencies, you now need to install and configure the PostgreSQL database server on your Ubuntu system.
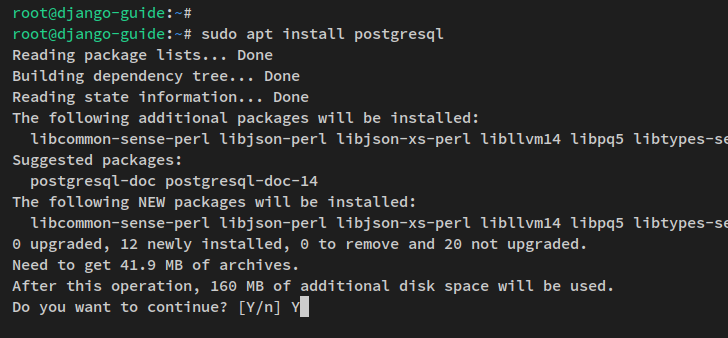
Run the following apt command to install the PostgreSQL database. Type y when prompted and press ENTER to proceed with the installation.
sudo apt install postgresql
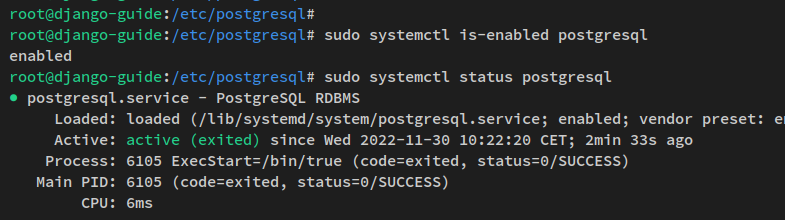
After PostgreSQL is installed, "postgresql" will automatically run and activate. Check the PostgreSQL service with the following systemctl command.
sudo systemctl is-enabled postgresql
sudo systemctl status postgresql
You will get the following output: The PostgreSQL service is currently running and enabled, which means that the service will automatically run at boot time.
Now that PostgreSQL is running, you need to set up the password for the default PostgreSQL user"postgres" and create a new PostgreSQL database and a new user for the Python Django Web Framework.
Execute the following command to set up the password for the default user "postgres". Be sure to change the password"P@ssw0rd" with a new, secure password.
sudo -u postgres psql -c "ALTER USER postgres WITH PASSWORD 'P@ssw0rd';"
Next, use the following command to create a new PostgreSQL user/role. In this example, you will create a new user"django". You will also be prompted to set a new password. Enter the password for the new PostgreSQL user"django".
sudo -u postgres createuser -P django
Now run the following command to create a new PostgreSQL database"djangodb" with the default owner"django".
sudo -u postgres createdb -O django djangodb

After you create the PostgreSQL database and user, check the list of databases and users for PostgreSQL.
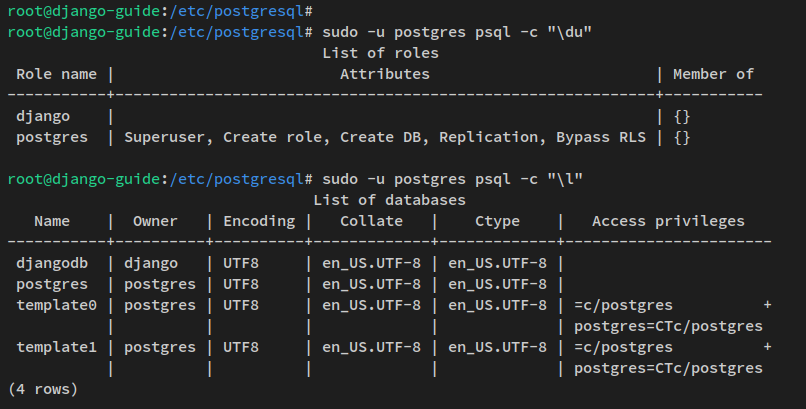
Run the following command to check the list of users and the list of databases. The"\du" query is used to display the users available in PostgreSQL and the "\l" query is used to list the available databases.
sudo -u postgres psql -c "\du"
sudo -u postgres psql -c "\l"
You should get the following output - the new PostgreSQL database "djangodb" and the new PostgreSQL user "django" are created.
Now you have completed the installation of the PostgreSQL database server and created the new database and user for your Django project. In the next steps, you will start installing Django on the Ubuntu 22.04 system.
Installing the Python Django Web Framework
In this guide, you will learn two methods to install the Django Web Framework:
- Install Django via Pip - With this method, you install Django via the PyPI repository. This will install the latest stable version of the Django Web Framework for your development.
- Install Django via Git - This method allows you to install the latest version or development version of Django. You download the source code of Django via Git and then install it locally using the pip command.
Now let's start with the installation of Django.
Installing Django via pip
For each Django installation, you need to set up the Python virtual environment. This allows you to install Django in a separate environment within your system. This is very useful, especially if you are working on multiple projects.
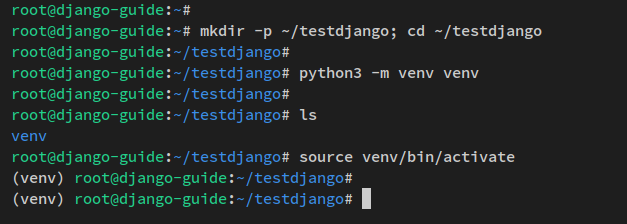
First, create a new directory"testdjango" and move your working directory there.
mkdir -p ~/testdjango; cd ~/testdjango
Now create a new Python virtual environment venv with the following command. You should now have the new directory"venv" in your working directory. In the virtual Python environment there are some executable binaries of Python, Pip and many more.
python3 -m venv venv
Next, activate the Python virtual environment with the following command.
source venv/bin/activate
After the Python virtual environment is activated, your shell prompt will change as follows - at the beginning of the prompt you should see the name of your Python virtual environment, e.g."venv".
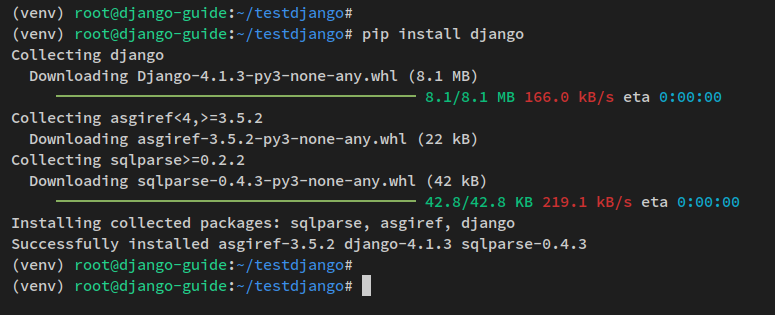
Now run the following pip command to install the latest version of the Django Web Framework. This will download Django from the PyPI repository and install it in your current Python virtual environment.
pip install django
Below you can see a similar output that you will get during the installation.
Also, you can install a specific version of Django via pip using the following command.
pip install django==4.x.x
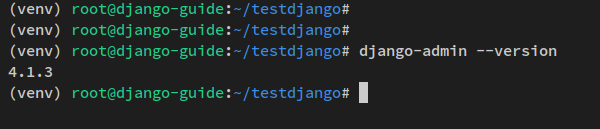
After Django is installed, run the following command to verify the Django version.
django-admin --version
python manage.py --version
You will get an output like the following screenshot - Django v4.xx is installed via pip and the PyPI repository.
Finally, enter the "deactivate" command to log out and exit the Python virtual environment.
Installing Django via Git
In the second method, you install the latest version of Django or the development version via Git. You download the Django source code, set up a new Python virtual environment, and then install Django from the downloaded source code.
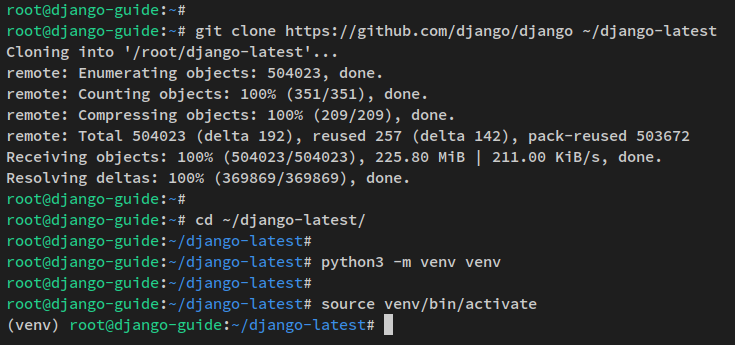
Download the Django source code to the"django-latest" directory using the Git command below.
git clone https://github.com/django/django ~/django-latest
Now move your working directory to the "django-latest" directory.
cd ~/django-latest
Create a new virtual environment venv with the following command. Then activate the virtual environment with the following command.
python3 -m venv venv
source venv/bin/activate
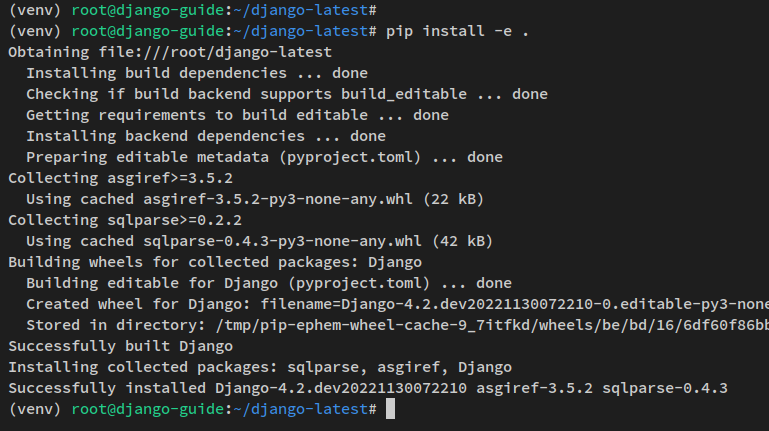
After the virtual environment is activated, run the following pip command to install Django from source. Be sure to run the command below in the django-latest root directory.
pip install -e .
When the installation is complete, you will get output like this.
Finally, run the following command to verify the Django version. You will get the Django Dev version you just installed.
django-admin --version
python manage.py --version
At the time of writing, Django Dev 4.2 is installed.

Enter the"deactivate" command to exit the virtual environment and log out.
At this point, you've learned two methods for installing the Django Web Framework: installing Django via pip command from the PyPI repository and installing Django via Git from the Github repository.
In the next steps, you will create a new project with Django and configure your project with PostgreSQL database and Nginx web server.
Create your first project with Django
In this step, you will learn how to create the first project with Django Web Framework. You'll start a new project and set it up with PostgreSQL as the database. Then you'll start configuring Django, such as setting up the admin user, creating static files, and launching the Django project.
To get started, run the following command to create a new project directory "testproject" and move the working directory there. Then create a new Python virtual environment venv.
mkdir -p ~/testproject; cd ~/testproject
python3 -m venv venv
Activate the venv virtual environment with the command below.
source venv/bin/activate

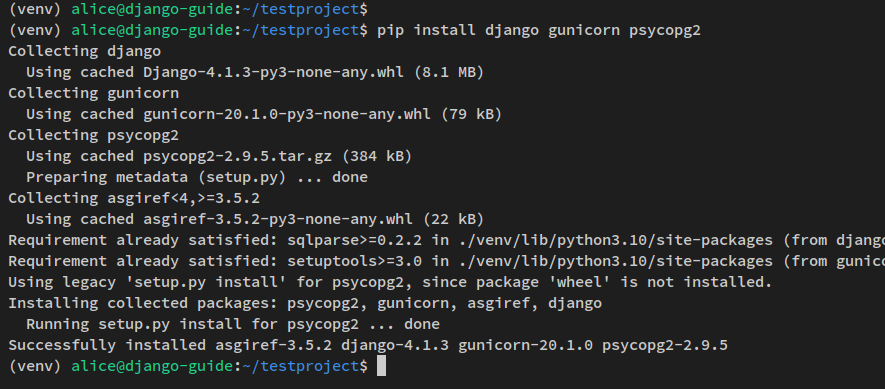
After the virtual environment is activated, run the pip command below to install Django with some additional packages like "gunicorn" which is used to run the Django application and"psycopg2" as the PostgreSQL database driver for Python.
pip install django gunicorn psycopg2
Below you can see the output you get during the installation.
Once you have installed Django, Gunicorn and the psycopg2 package, you can next create the Django project.
Run the command "django-admin" to create a new project "demosite" in the current working directory.
django-admin startproject demosite .
You should now get a new directory "demosite" in your current working directory and the Python script "manage.py" to manage your Django project.
Next, run the following command to create the Django Secret. Be sure to save the generated secrets in your temporary notepad/editor.
python3 -c 'from django.core.management.utils import get_random_secret_key; print(get_random_secret_key())'

Next, open the Django configuration file"demosite/settings.py" with the nano editor command below.
nano demosite/settings.py
Change the default configuration with the lines below.
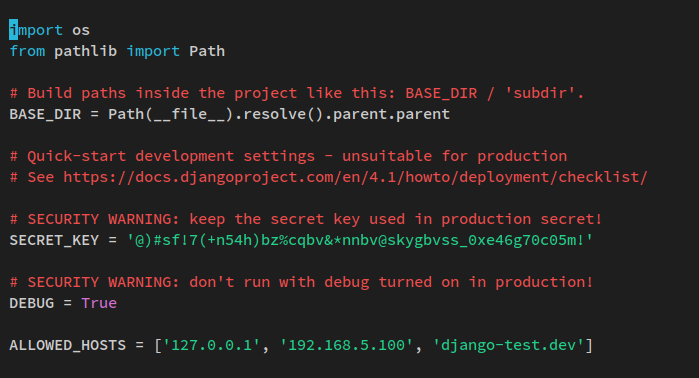
import os
...
SECRET_KEY = '@)#sf!7(+n54h)bz%cqbv&*nnbv@skygbvss_0xe46g70c05m!'
...
ALLOWED_HOSTS = ['127.0.0.1','192.168.5.100','django-test.dev']
...
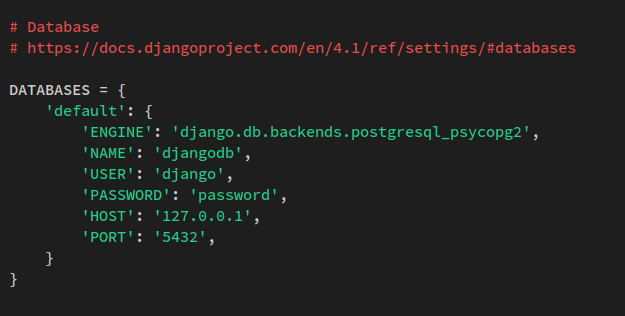
DATABASES = {
'default': {
'ENGINE': 'django.db.backends.postgresql_psycopg2',
'NAME': 'djangodb',
'USER': 'django',
'PASSWORD': 'password',
'HOST': '127.0.0.1',
'PORT': '5432',
}
}
...
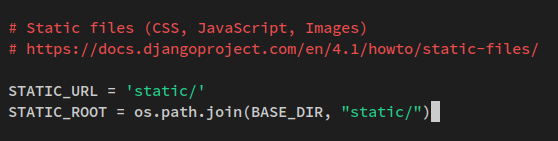
STATIC_ROOT = os.path.join(BASE_DIR, "static/")
Below you will find the detailed configurations used for this project:
- Import the additional Python module "os" into the Django project.
- Set the "SECRET_KEY" with the generated secret key. You can use the SECRET_KEY you generated.
- Add the server IP addresses and the local domain name to Django. This will make your Django project accessible through these IP addresses and domain names.
- Change the "DATABASES" configuration with the PostgreSQL details you created. Make sure you change the database "ENGINE" with the PostgreSQL database driver.
- Finally, specify the directory where the static files for the Django project will be stored.
Save the file and exit the editor when you are done.
Django configuration - add the os module, set up the SECRET_KEY and set up ALLOWED_HOSTS.
Set up the database details for the Django project.
Set up the static directory.
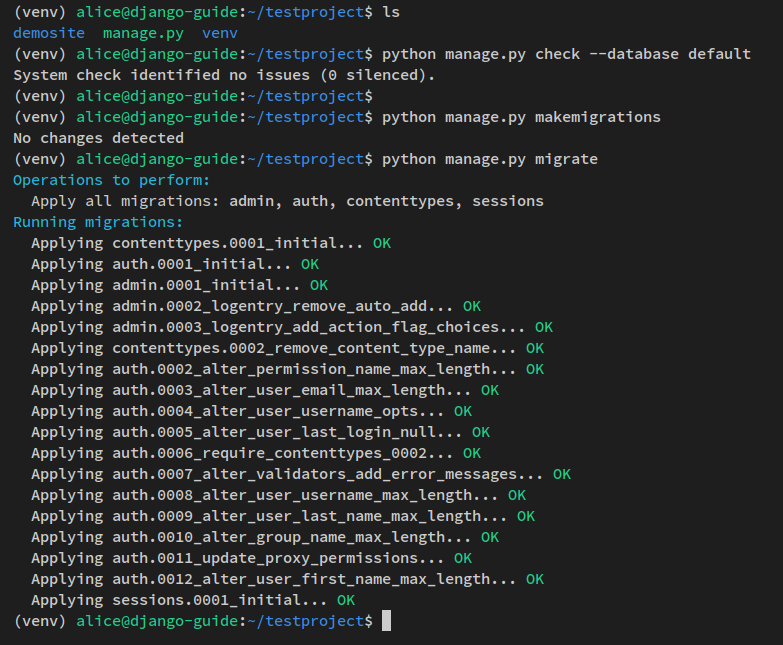
Next, run the command below to verify the database details configuration. Make sure there are no problems.
python manage.py check --database default
Now migrate the database using the following command.
python manage.py makemigrations
python manage.py migrate
During the database migration you will get the following output.
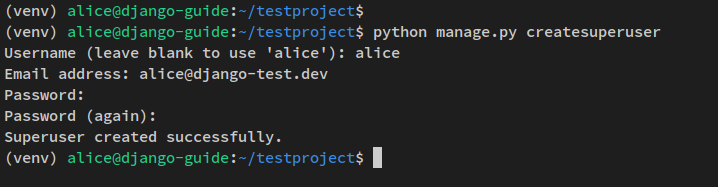
Next, run the following command to create a new Django admin user for your project. You will then be prompted to set up the admin user and password.
python manage.py createsuperuser
Enter the new admin user, email address, and password for your Django project. When the process is complete, you will get the output"Superuser created successfully".
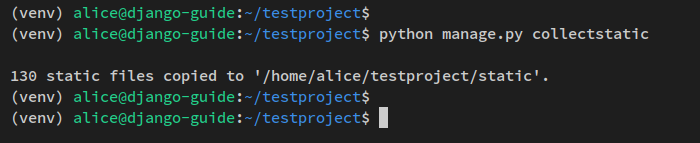
Finally, run the following command to create static files for your Django project. The static files for your Django project should be available in the static directory.
python manage.py collectstatic
When the Django configuration is complete, you can start the project.
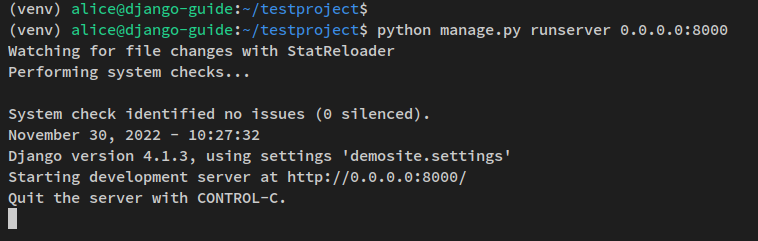
Run the following command to start your Django project. This will run Django on port 8000.
python manage.py runserver 0.0.0.0:8000
Below you can see the output you will get after running the command.
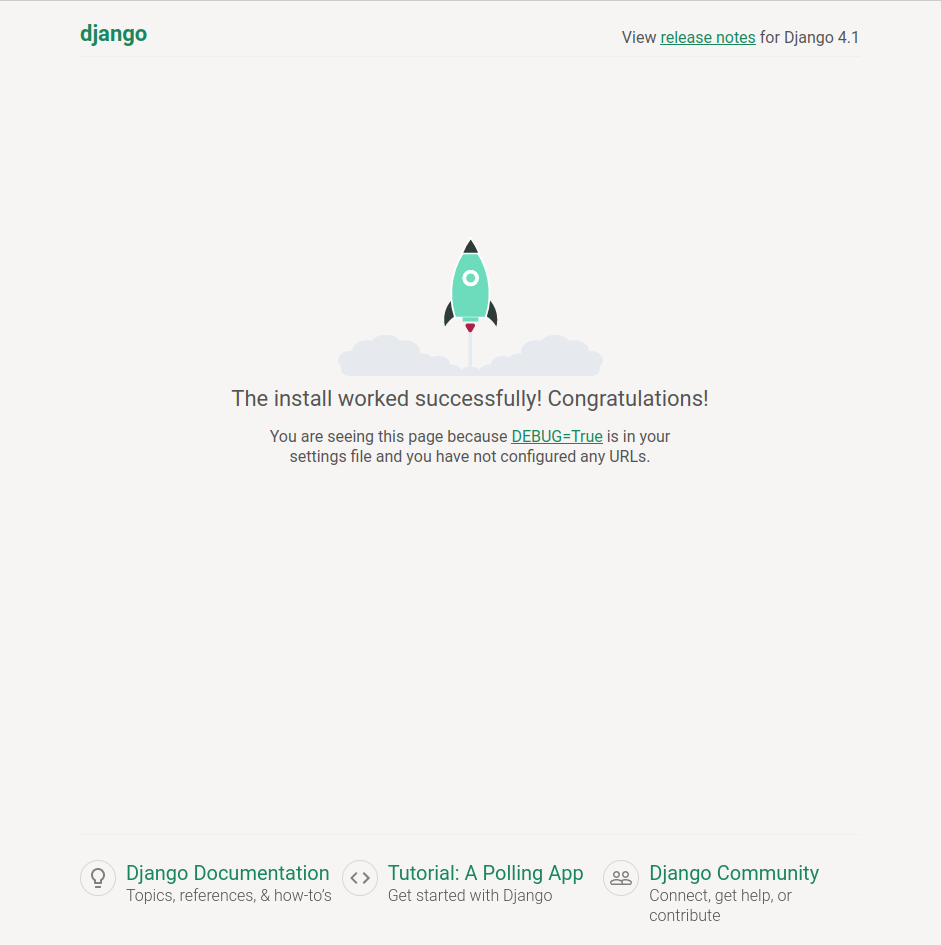
Now open your web browser and call the IP address of the server followed by port "8000" (i.e.: http://192.168.5.100:8000). You will see the default index page of the Django project.
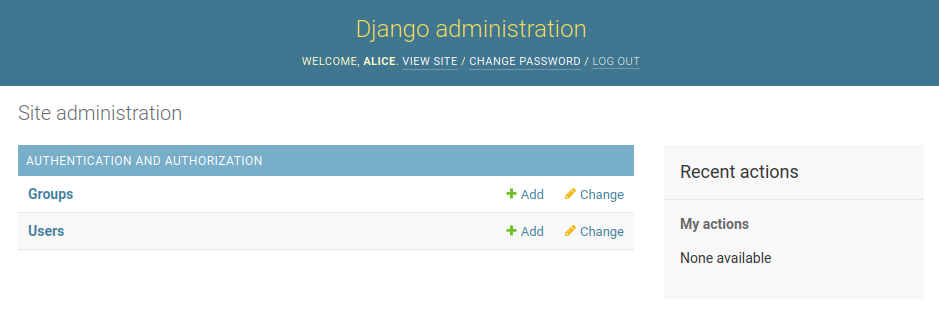
Next, go to the Django admin page with the path URL "/admin" and log in with your Django admin user and password.

After logging in, you should see the default Django admin dashboard.
Now go back to your terminal server and press"Ctrl+c" to kill the processes.
Now you have created a Django project with PostgreSQL as database backend, configured the Django admin user, migrated static files and learned how to run the Django project from the command line.
In the next steps, you'll learn how to run Django as a Systemd service using Gunicorn.
Running Django as Systemd with Gunicorn
In this step, you will set up the Systemd service to run the Django project. This way you can easily manage the Django project using the systemctl utility.
Create a new systemd socket file "/etc/systemd/system/gunicorn.socket" using the nano editor command below.
The systemd socket entities are used to run applications/services that listen on an IP address and port or use a UNIX domain socket. In this example, the Django socket is executed and monitored in the/run/gunicorn.sock file.
sudo nano /etc/systemd/system/gunicorn.socket
Add the following lines to the file.
[Unit]
Description=gunicorn socket
[Socket]
ListenStream=/run/gunicorn.sock

[Install]
WantedBy=sockets.target
Save the file and exit the editor when you are done.
Next, create a new service file "/etc/system/system/gunicorn.service" with the nano editor command below.
sudo nano /etc/systemd/system/gunicorn.service
Paste the following lines into the file. Make sure you change the project directory and the path of the gunicorn binary to the correct path.
[Unit]
Description=django gunicorn daemon
Requires=gunicorn.socket
After=network.target
[Service]
User=alice
Group=www-data
WorkingDirectory=/home/alice/testproject
ExecStart=/home/alice/testproject/venv/bin/gunicorn \
-t 3000 \
--access-logfile - \
--workers 3 \
--bind unix:/run/gunicorn.sock \
demosite.wsgi:application -w 2

[Install]
WantedBy=multi-user.target
Save the file and exit the editor when you are done.
Next, use the chmod command below to change the ownership of the"testproject" directory to the "www-data" group.
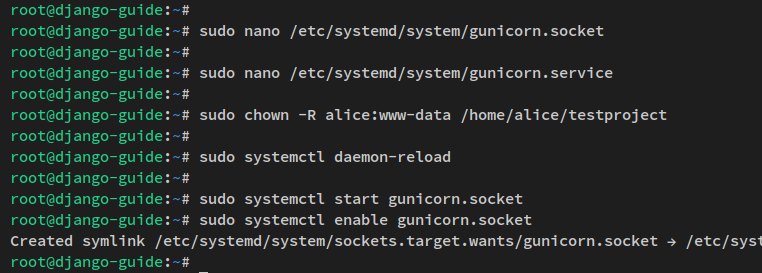
sudo chown -R alice:www-data /home/alice/testproject
Then run the systemctl command to reload the systemd manager and apply the changes.
sudo systemctl daemon-reload
Finally, start and activate the service and socket units with the systemctl command below.
sudo systemctl start gunicorn.socket
sudo systemctl enable gunicorn.socket
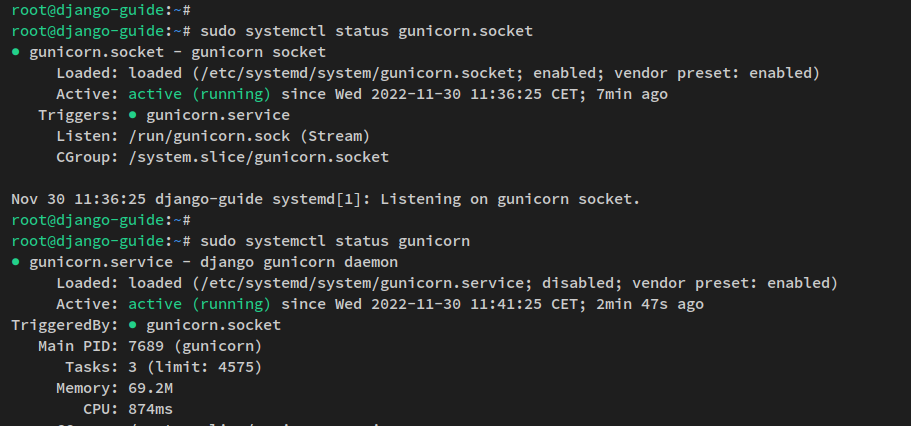
Now check"gunicorn.socket" and"gunicorn.service" with the following systemctl command. You will get the output that the gunicorn service and socket are running and both are enabled.
sudo systemctl status gunicorn.socket
sudo systemctl status gunicorn
Now your Django project is running under the UNIX socket "/run/gunicorn.sock". You can check the UNIX socket daemon with the curl command (see below).
curl --unix-socket /run/gunicorn.sock 127.0.0.1
You should now get the HTML codes for the Django default index on your terminal.
In the next step, you will install and set up Nginx as a reverse proxy for your Django project.
Installing Nginx as a reverse proxy
In this step, you will install and configure Nginx as a reverse proxy for the Django project/application. You create a new Nginx server block to be used as a reverse proxy for Django, running on the UNIX socket"/run/gunicorn.sock".
In this example, the local domain"django-test.devel" is used, which can be configured via the file "/etc/hosts".
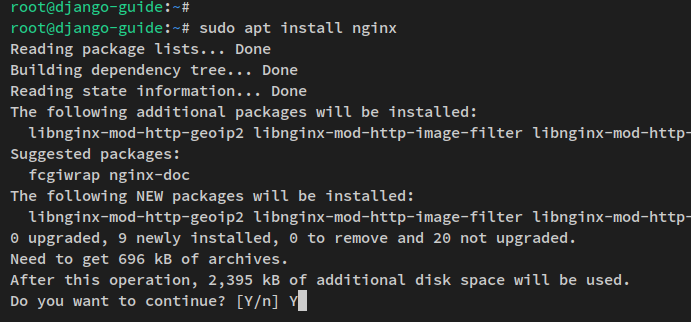
Now run the following apt command to install the Nginx web server.
sudo apt install nginx
Type y when prompted and press ENTER to continue.
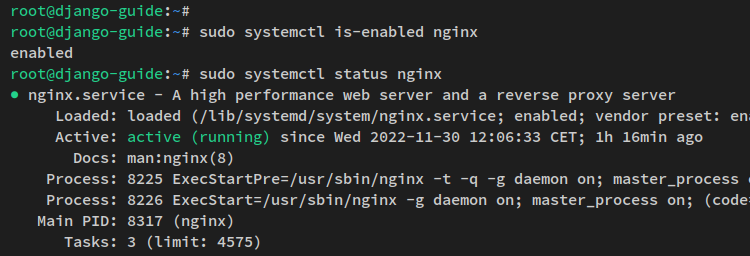
After Nginx is installed, run the following systemctl command to check the Nginx service and make sure it is enabled and running.
sudo systemctl is-enabled nginx
sudo systemctl status nginx
You will then get an output like the following screenshot.
Next, create a new Nginx configuration for the virtual host"/etc/nginx/sites-available/django.conf" using the nano editor command below.
sudo nano /etc/nginx/sites-available/django.conf
Paste the following lines into the file, making sure to replace the domain name with your local domain. In this example, you will run Django with the domain"django-test.devel".
server {
    listen 80;
    server_name django-test.devel;
location = /favicon.ico { access_log off; log_not_found off; }
try_files $uri @django;
location /static {
alias /home/alice/testproject/static/;
}

location @django {
proxy_set_header Host $http_host;
proxy_set_header X-Real-IP $remote_addr;
proxy_set_header X-Forwarded-For $proxy_add_x_forwarded_for;
proxy_set_header X-Forwarded-Proto $scheme;
proxy_pass http://unix:/run/gunicorn.sock;
}
}
Save the file and close the editor when you are done.
Now run the following command to enable the server block configuration ''. Then check the Nginx configuration to make sure you have the correct configuration.
sudo ln -s /etc/nginx/sites-available/django.conf /etc/nginx/sites-enabled/
sudo nginx -t
If the Nginx configuration is correct, you will get the output"Test is successful - syntax is ok".
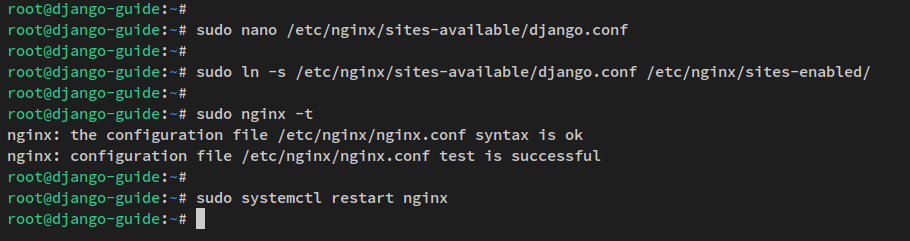
Finally, run the following systemctl command to restart the Nginx service and apply the changes.
sudo systemctl restart nginx
Now your Django project is accessible from the local domain. In this example, the Django project is accessible through the domain "django-test.devel" running under the Nginx reverse proxy.
Accessing the Django project
On your local machine, open the "/etc/hosts" file using the nano editor command below. When prompted for the password, enter the password for your user.
sudo nano /etc/hosts
Set the new domain for your Django project according to the following pattern. Be sure to change the IP address of the server and the local domain.
192.168.5.100 django-test.devel
Save the file and close the editor when you are done.
Now go back to the web browser and enter the local domain for your Django installation (e.g.: http://django-test.devel/). You should now get the default Django project index page.

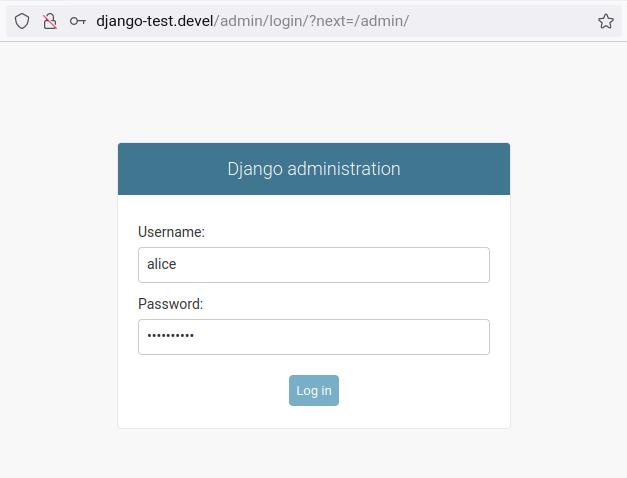
Next, navigate to the Django admin dashboard "/admin" and you should get the Django login page.
Enter your admin username and password and click "LOGIN".
If your username and password are correct, you will see the Django admin dashboard.
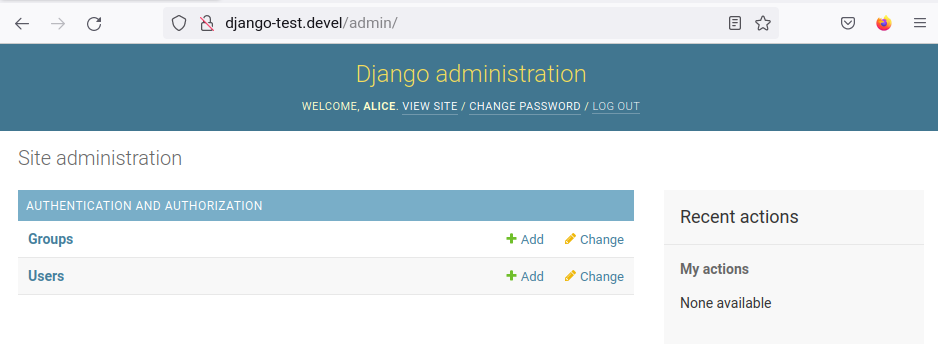
You have now completed the installation of the Django Web Framework with PostgreSQL as the database system and Nginx as the reverse proxy on an Ubuntu 22.04 server.
Conclusion
Congratulations! You have now installed Django Python Web Framework on an Ubuntu 22.04 server. You've installed Django with PostgreSQL as the database backend and configured Nginx as a reverse proxy via Gunicorn. Now you can learn more about Django with the official Django documentation.