
I recently installed Ubuntu on my desktop computer. Everything was working fine, except that I was not able to capture screenshots using the 'Insert/Print Screen' key on my Dell keyboard. While googling the issue, I stumbled upon a workaround that solved my problem.
The workaround was to create a custom keyboard shortcut. If you are also facing a similar screenshot-related problem, or want to know in general how to create custom keyboard shortcuts in Ubuntu, you'll be glad to know that's what we'll be discussing here.
How to create a custom keyboard shortcut
For this, first head to the System Settings menu, and then click the Keyboard icon there.
![]()
In the window that appears, open the Shortcuts tab.
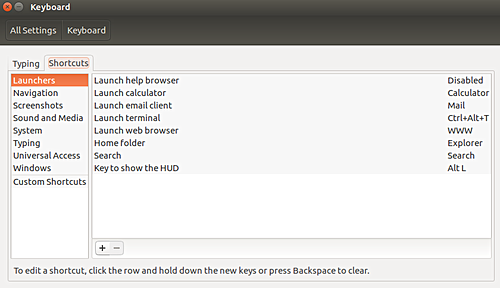
Here, click the Custom Shortcuts option at the bottom left, followed by a click on the '+' icon at the bottom. You'll see that a small window will appear where you can provide the shortcut details.
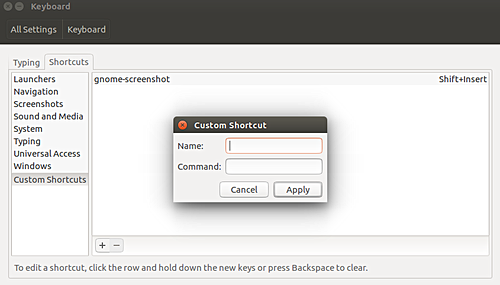
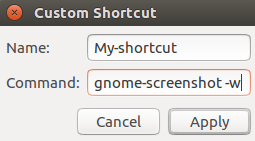
Fill in the shortcut name, and the command you want this shortcut to execute. For example, I entered the following details:
Click the 'Apply' button, and the shortcut will be created. But it will be disabled by default.
![]()
To enable it, click over the Disabled text, and then press a key combination of your choice (this key-combination will trigger the command that this shortcut corresponds to). For example, I pressed Alt+Insert.
![]()
Once done, your custom shortcut is ready. You can use it for whatever purpose it is intended for.