
Even in this day and age of high-speed PCs, many people use detachable or linked drives, which may be cumbersome and inconvenient to navigate, especially when we have to wait for each new thumbnail to load into File Explorer. Fortunately, it is simple to speed up file browsing in file explorer by totally removing thumbnails. In this post, we will walk you through the whole process of turning off file thumbnails in Windows 10.
Disable Thumbnails for Files on Windows 10
To disable thumbnails for files on Windows 10, follow this procedure step by step.
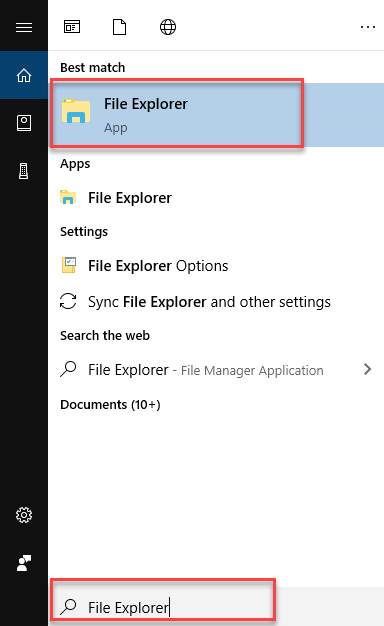
Click the Search button on the taskbar. Type File Explorer in the search box and then click the File Explorer as the following image is showing.
As soon as you click the File Explorer option, the following screen will appear in front of you.
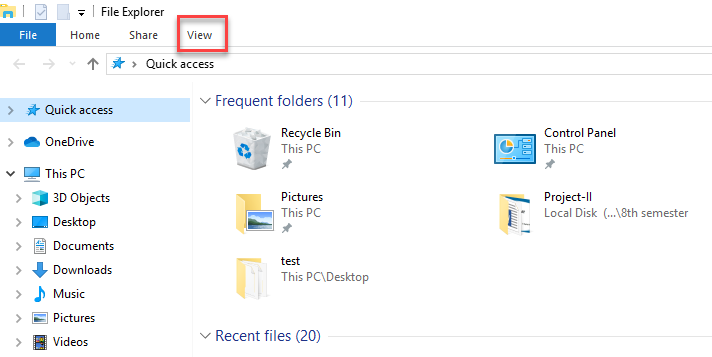
Click the View tab from the top ribbon on the File Explorer screen as highlighted in the above image. Another ribbon will appear under the first bar as the following image is showing.

Now click the Options option from this ribbon as highlighted in the above image. It will show another option as the following image is showing.

Now click the Change folders and search options option as highlighted in the above image. As soon as you click the Change folders and search options option, the following dialogue box will appear.

Click the View tab as highlighted in the above image. It will show the following options as this image is showing.
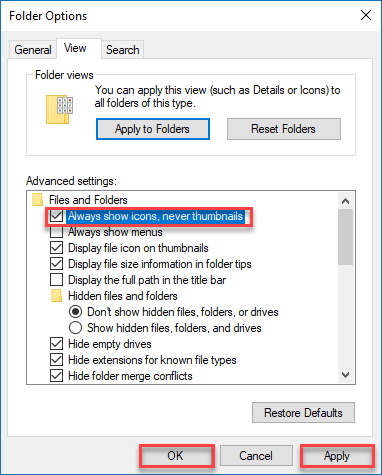
Check the Always show icons, never thumbnails checkbox. After that, click the Apply and then the OK button as highlighted in the above image.
Now thumbnails for all files will be disabled.