A scope is a range of IP addresses that DHCP leases out to clients when they make a DHCP request. You can add a new scope (either IPv4 or IPv6 ) by using the server manager or PowerShell. In this tutorial, we will add an IPv4 scope using server manager.
This tutorial assumes you have DHCP installed, configured and it is running on your network.
Add an IPv4 Scope in DHCP Server 2016
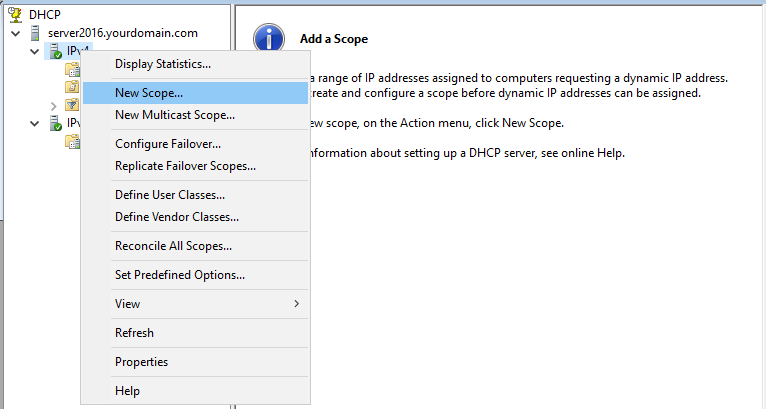
Step 1. Open DHCP management console. Right-click IPv4 and click New Scope...
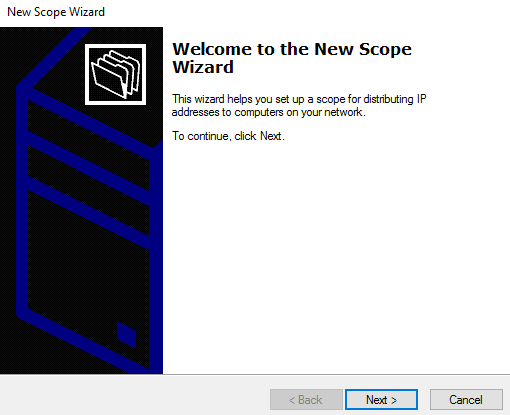
Step 2. Click Next to start the Wizard.
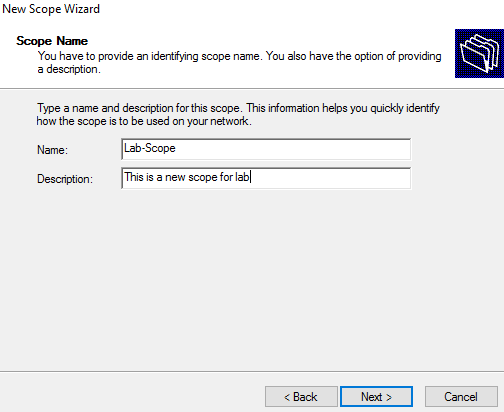
Step 3. Provide a name and description to new scope and click Next.
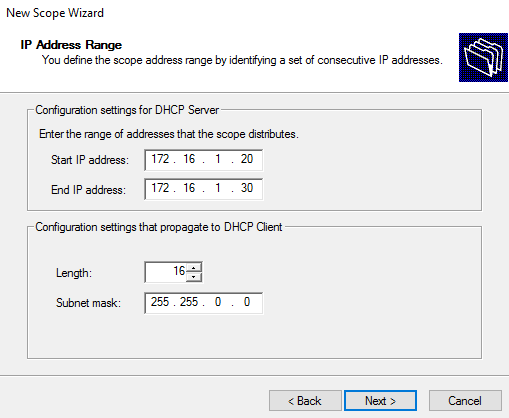
Step 4. Provide an IP address range (Start IP address and End IP address) and click Next.
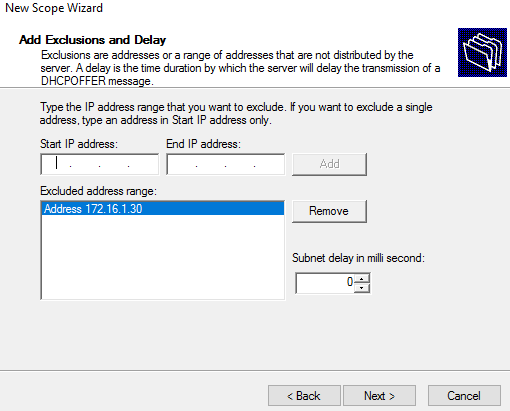
Step 5. Add IP address(es) you want to exclude from scope (if any) and click Next.
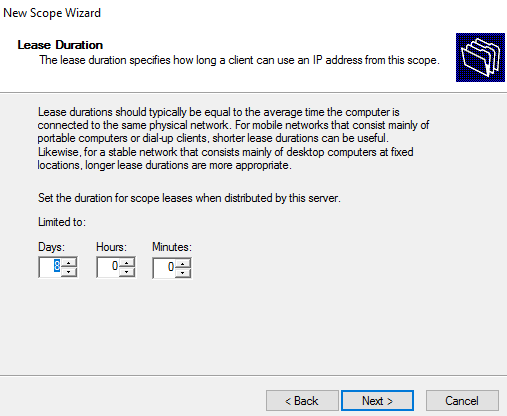
Step 6. Set the lease duration (default is 8 days) and click Next.
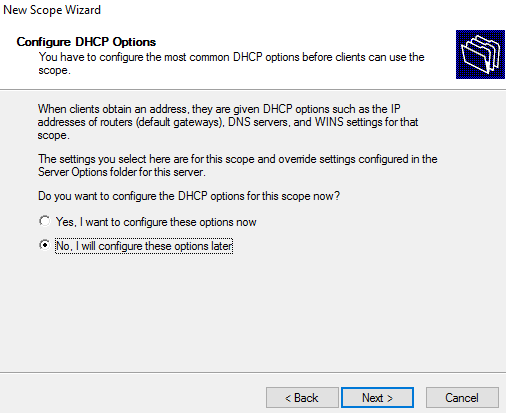
Step 7. Choose No, I will configure these options later and click Next.
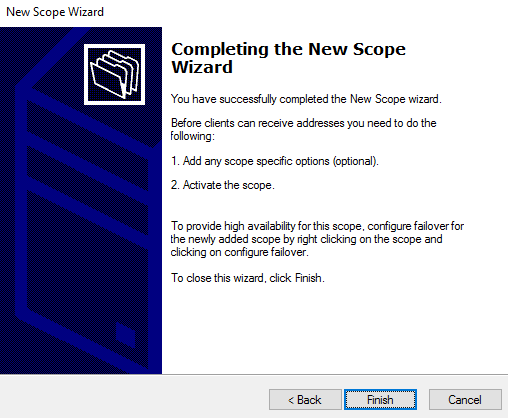
Step 8. Click Finish.
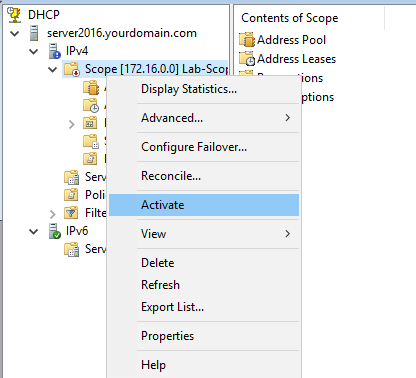
Step 9. Right-click the newly added scope and click Activate. You are done.