At times, you feel the need of saving your computer system from certain types of dangerous viruses and other security threats, which you may encounter while installing or updating certain programs on your computer. These malwares can harm your system in a very disastrous manner and can make it extremely difficult for you to recover your data once it is corrupted. To avoid this from happening, you can take certain preventive measures. One of which is to create limited user accounts.
A limited user account is such an account, which is given a limited access by default. It means that limited user accounts are not granted with the administrative privileges. Hence, a limited access account user is not allowed to install and uninstall programs, update, modify or delete system files according to his own choice. In this way, your system is protected because its ability to get itself in trouble while installing new features is taken away from it. Only an administrative account holder can perform such tasks. In this article, we will explain to you the method through which you can create limited user accounts in Windows 10.
Creating Limited User Accounts in Windows 10
For creating limited user accounts in Windows 10, you need to perform the following steps:
Type Settings in the search section of your taskbar and click on the results to launch a new settings window. The settings window is shown in the image below:
From the window shown above, click on the Accounts tab. The accounts window is shown in the following image:
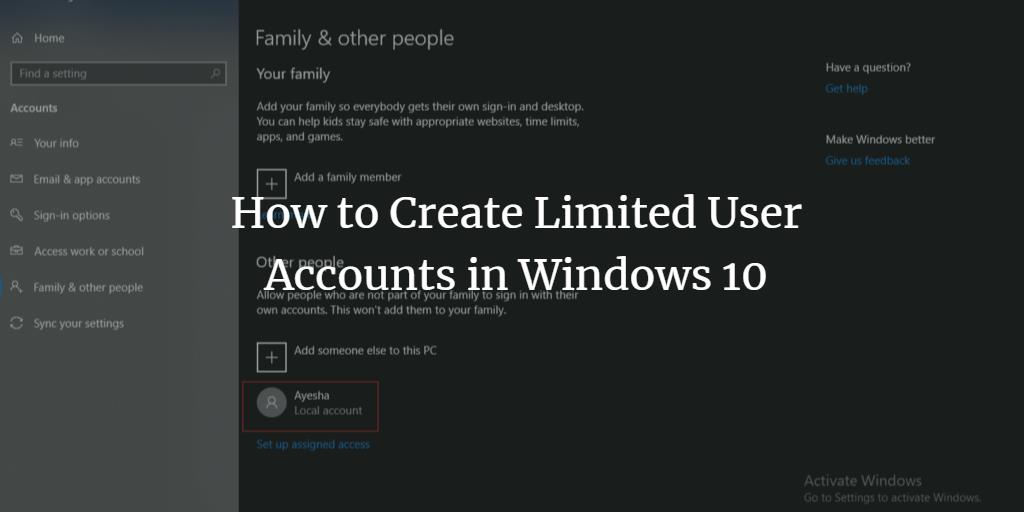
Now click on Family and other people located at the left side of the window.
As soon as you will click on it, the following window will pop up:
Now click on Add someone else to this PC. This option is highlighted in the following image:
As soon as you will click on this option, the following window will launch:
From here, click on I do not have this person’s sign-in information. This is shown in the following image:
When you will click on this option, the interface of the screen will change as follows:
From here, click on Add a user with a Microsoft account.
As soon as you will click on it, the following window will be displayed:
Now enter any username and password of your choice. You will be asked to enter the password twice to confirm it. You can also add a password hint and then click Next.
As soon as you will click Next, your newly created account will become visible in the Family and other people tab. In this example, I have created a limited user account with the name Ayesha. It is highlighted in the following image:
Your limited user account is now created. To use your newly created limited user account, you need to perform the following steps.
Click on the Windows icon located at the bottom left of your taskbar. It is highlighted in the image below:
Now from the cascading menu, click on the users icon which is shown in the following image:
Now select your newly created limited user account from the list as shown in the image below:
As soon as you will click on your limited user account, it will prompt you to enter the password of your limited user account. Just insert the password that you have set while creating your limited user account and then press enter. If you have forgotten your password, you can take help from the password hint that you provided for your own remembrance while creating the account. Once you successfully manage to enter the correct password, you can easily use your newly created limited user account or non-administrative account.
Conclusion
By following the above-mentioned method, now you can easily and conveniently create limited user accounts and disable your system to indulge in such activities that might cause harm to it. You can create as many limited access accounts or non-administrative accounts as you want. Such type of accounts are most helpful in organizations for whom their safety, security, and privacy is a major concern. The employers at such organizations can created limited user accounts for all their employees hence taking away their freedom to make modifications to the system files and rendering the system useless in case of any malware attacks. In this way, they can completely secure their computer systems.