This tutorial on how to disable the Control Panel in Active Directory on Windows Server 2012 R2 has the following two parts. It assumes you have already created an Organizational Unit (OU) for the users.
- Creating a GPO or Group Policy Object.
- Linking that GPO to an OU or Organizational Unit.
Creating a Group Policy Object
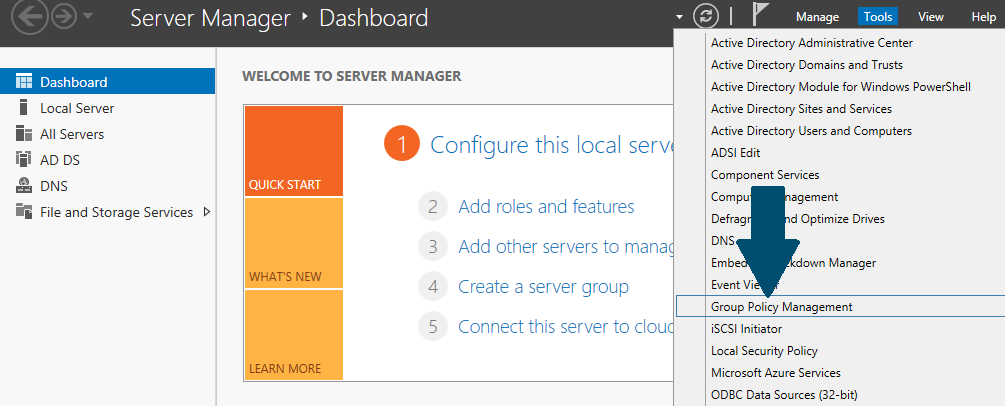
Step 1: Open server manager dashboard. Click Tools and scroll the menu. Click Group Policy Management.
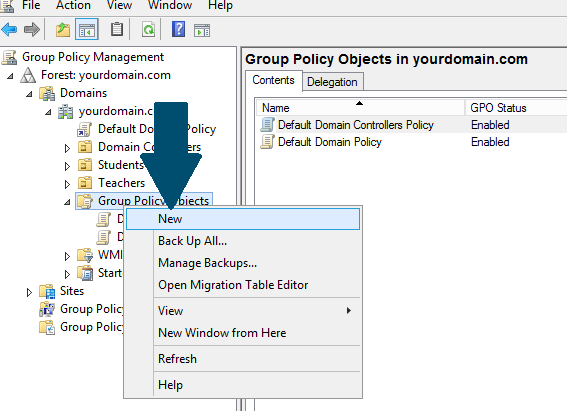
Step 2: Expand the node tree: <domain name>. Right-click Group Policy Objects and click New.
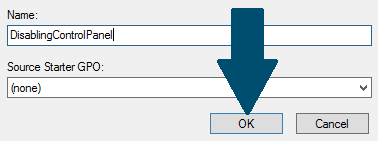
Step 3: Provide some meaningful name of GPO and click OK.
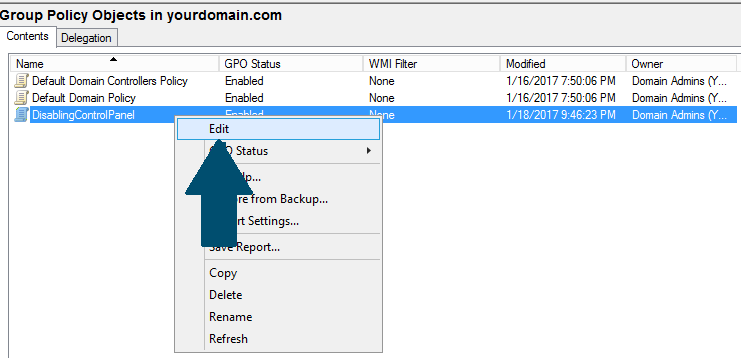
Step 4: Right-click the GPO you created in above step and click Edit.
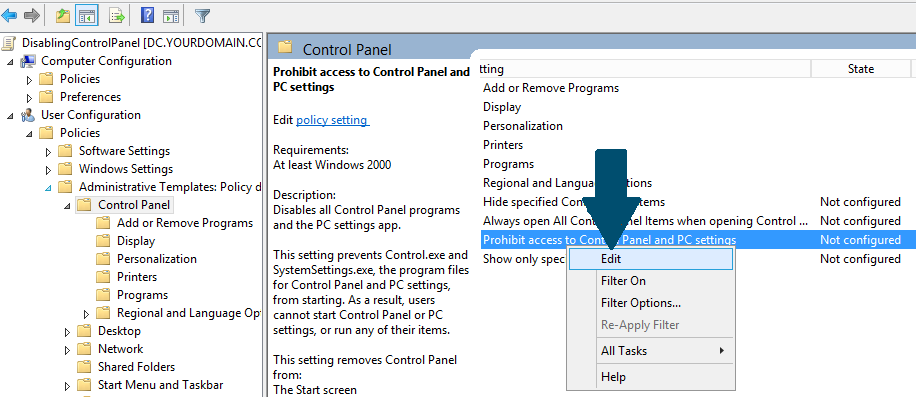
Step 5: Right-click Prohibit access to Control Panel and PC settings and click Edit.
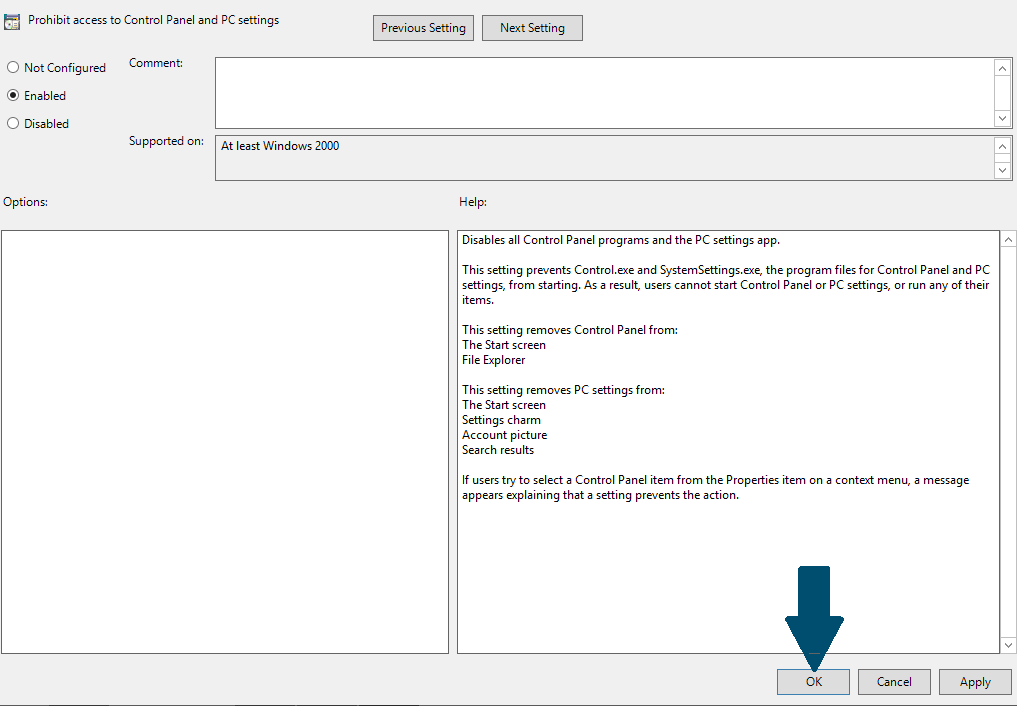
Step 6: Choose Enabled and click OK,
Linking the GPO to Users in an Organizational Unit
Step 1: Right-click the OU (In my case, it's student) on which you want to apply this policy of disabling control panel and click Link an Existing GPO.
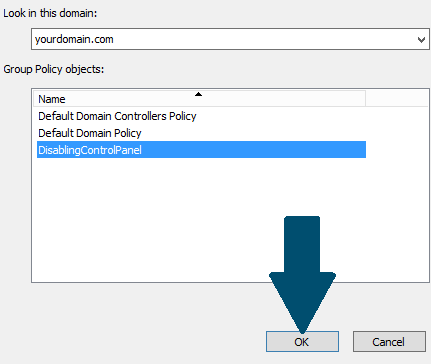
Step 2: Choose the GPO you created above and click OK. The policy has been applied to all users in that OU.
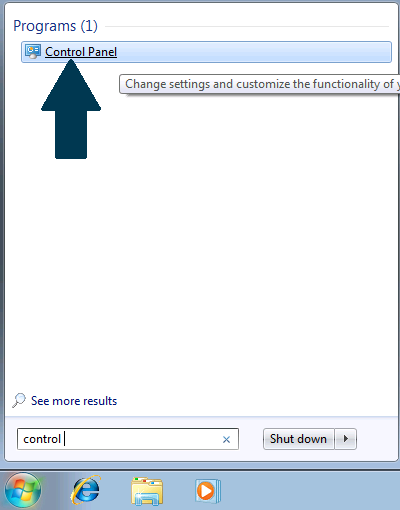
Step 3: Go to your client machine and login with any user from organizational unit. Try to open control panel.
Step 4: A message will pop up showing you that the restrictions have been in effect on this computer and the operation can not be completed. Click OK and you are done. Similarly, you can also link this GPO to other OU's and disable the users from opening control panel.