
MAC address stands for Media Access Control address and is a series of numbers used to uniquely identify a device within a network. The MAC address is used when communicating over the network at the data link layer. By default, when you purchase a device, it has a MAC address assigned to it by the manufacturer. However, this default MAC address can be changed. In the first part of this article, we will explain why you should change a device's MAC address, and in the second part of this article, you will learn how to change a device's MAC address in Windows 10. Have a look here at how to find the MAC address.
Why should we change the MAC address of a device in Windows 10?
As mentioned earlier, MAC address is a number assigned to a device or more specifically to a device's Network Interface Controller (NIC) to uniquely identify it over the network, but this number can be changed according to our own requirements. You can change the MAC address of a device for the following reasons:
- Nowadays, Internet Service Providers (ISPs) use MAC addresses to authenticate devices. Let's say that your NIC becomes defective and you need to replace it. When you replace your old NIC with a new NIC, your MAC address will automatically change because it is a number that is closely associated with the NIC. Your new MAC address will not be registered with your ISP, so you will lose your access to the Internet. In this case, the best and easiest thing you can do is to replace your current MAC address with the older one, so that your ISP can recognize it immediately and you can regain your access to the Internet.
- The second reason is that you may want to connect to a local network that allows only a limited number of devices and identifies these devices by their MAC address. You can gain access to such a network by simply changing your MAC address to the one that authenticates that network.
- Another important reason for changing a device's MAC address is privacy. Since your MAC address is publicly announced over the local network, anyone who knows your MAC address can perform illegal activities with your MAC address when you are not connected to that network.
Changing the MAC address of a computer in Windows 10
To change the MAC address of a computer in Windows 10, you can use one of the two methods listed below:
Method #1: Use the main user menu
To change the MAC address of your device using this method, you need to do the following:
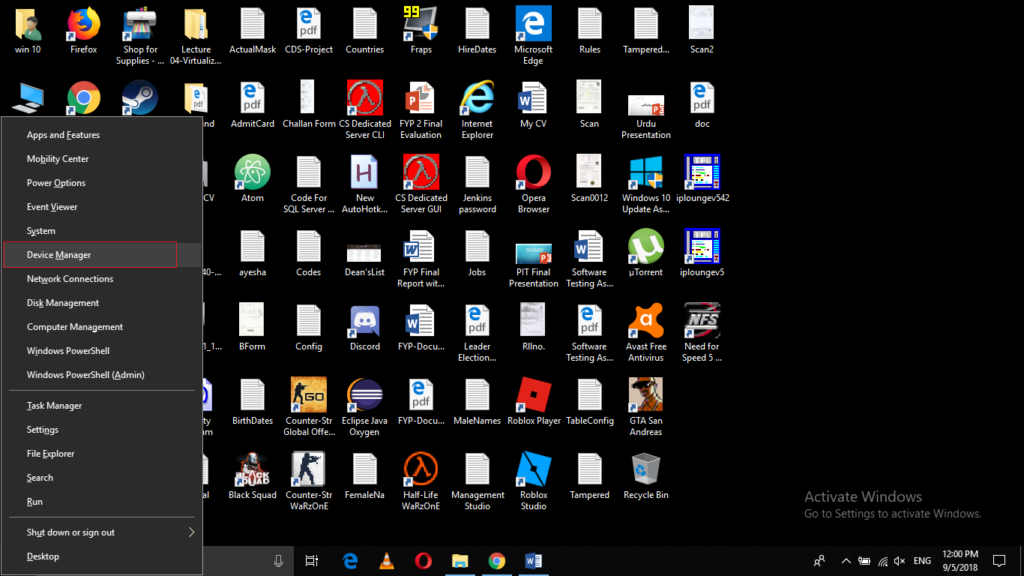
Launch the power user menu by pressing Win+ X.
Once the power user menu is launched, click Device Manager as highlighted in the following figure:
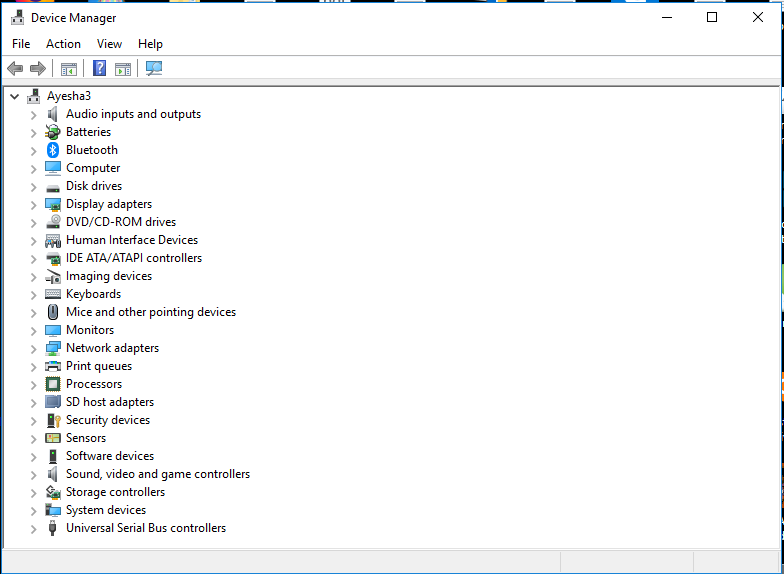
Once you click on it, it will open the Device Manager window which can be seen in the following image:
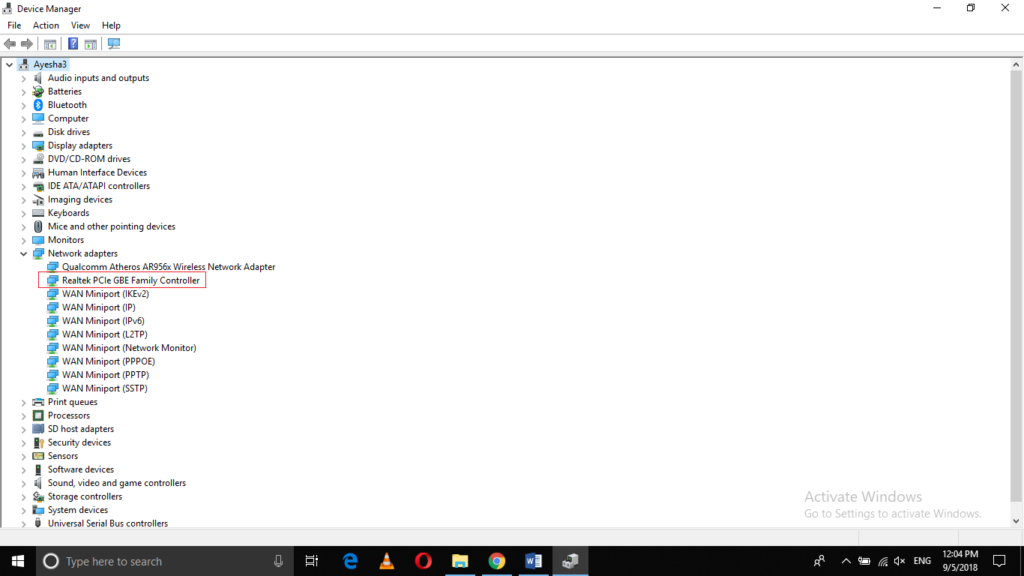
Click Network Adapters to expand it, and then right-click the particular network adapter whose MAC address you want to change, as highlighted in the following image:
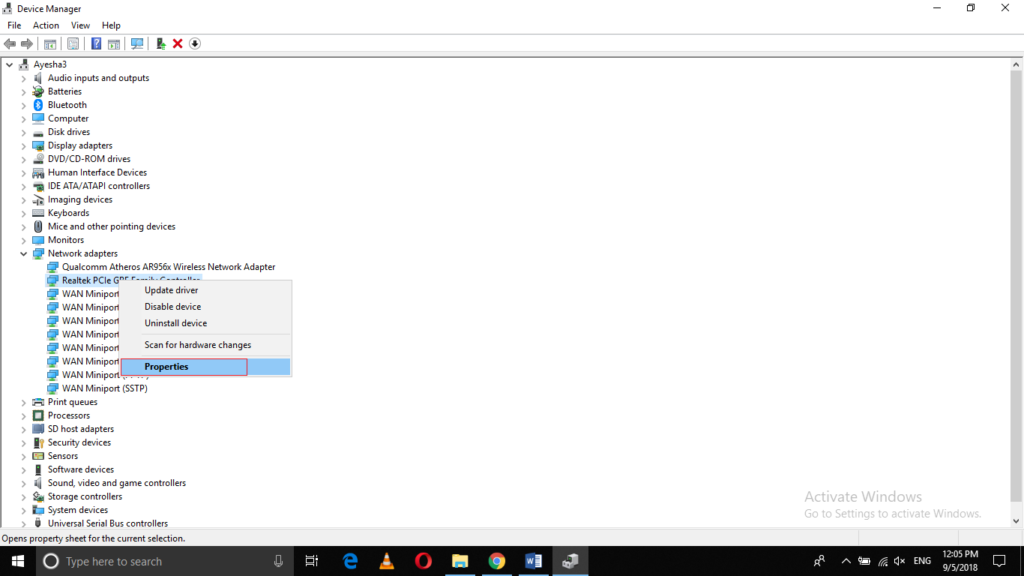
When you right-click on a network adapter, a menu opens. In this menu, click Properties.
The Properties window opens, which can be seen in the following image:
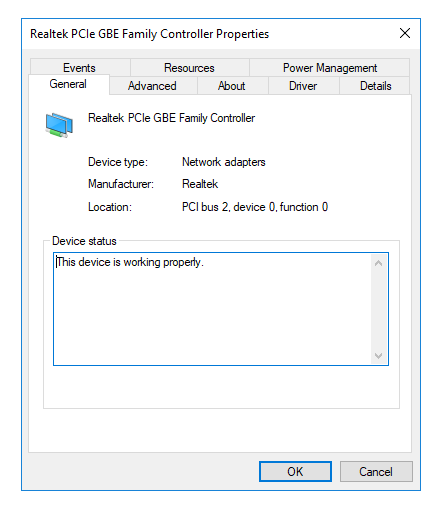
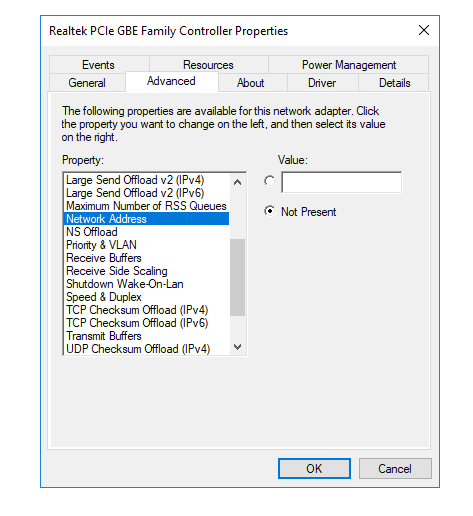
Now click on the Advanced tab and then select Network Address, as shown in the following image:

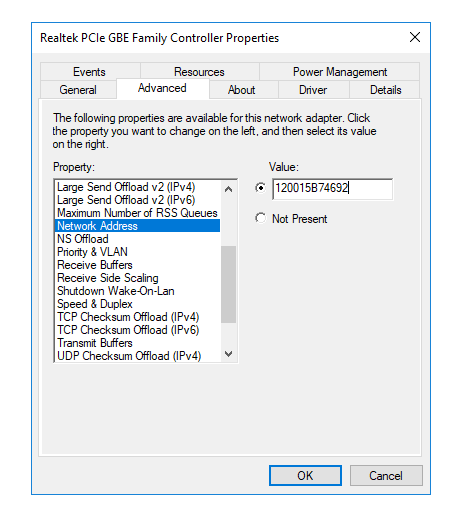
Select the Value radio button to assign a new MAC address, and then type any value in the corresponding text box, as shown in the figure below. Remember that a MAC address consists of six pairs of hexadecimal digits, and you must enter these digits without spaces or hyphens, as shown in the following figure:

Finally, click OK to continue.
Method #2: Use Control Panel to set MAC address
To change the MAC address of your device using this method, you need to follow the steps below:
Type Control Panel in the search area of your taskbar and click the search result to open a new Control Panel window, as shown in the following figure:
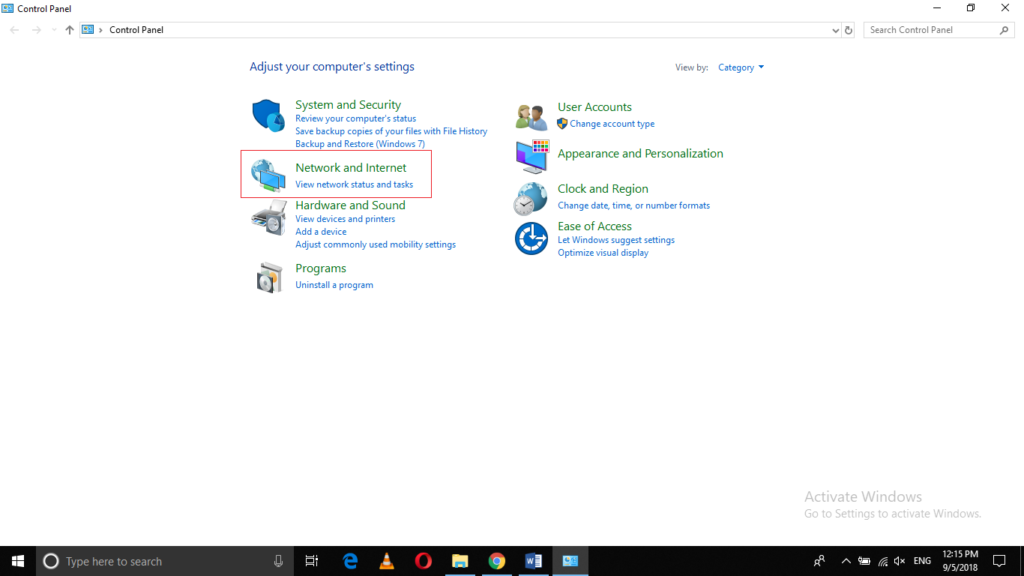
Click on the Network and Internet tab, as highlighted in the image above. The Network and Internet window can be seen in the following image:
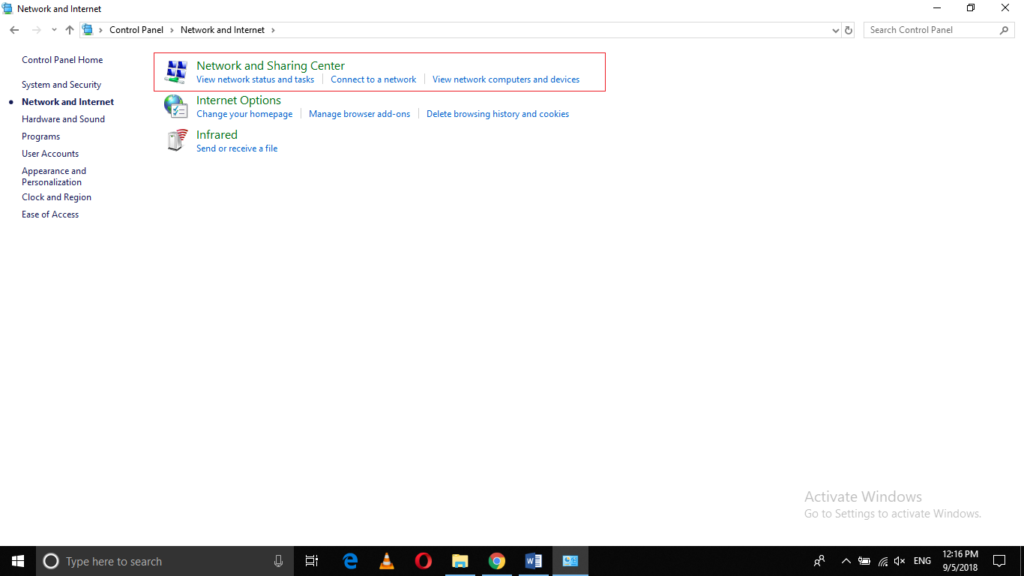
Click on Network and Sharing Center.
Now click Change Adapter Settings, as shown in the following figure:
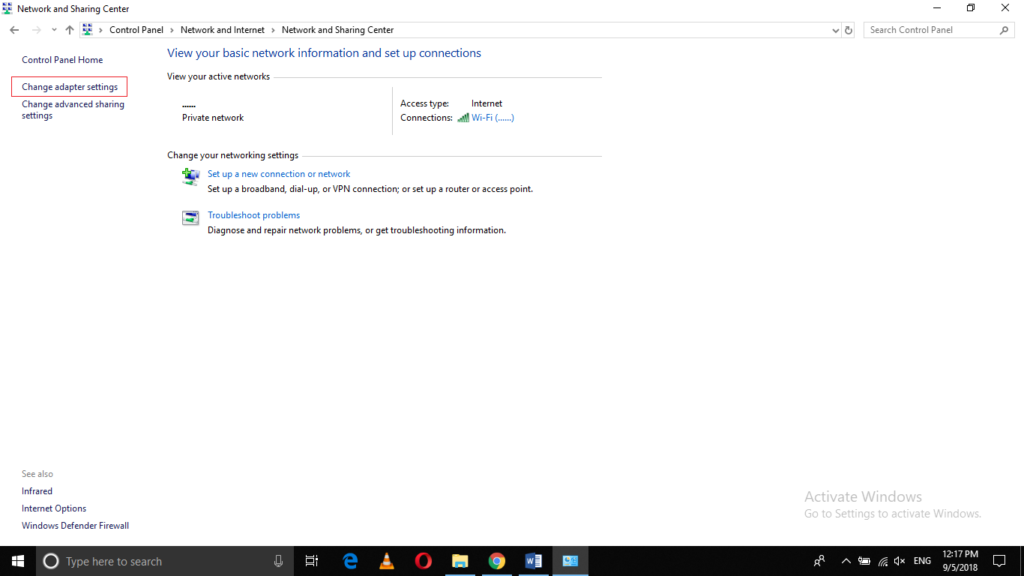
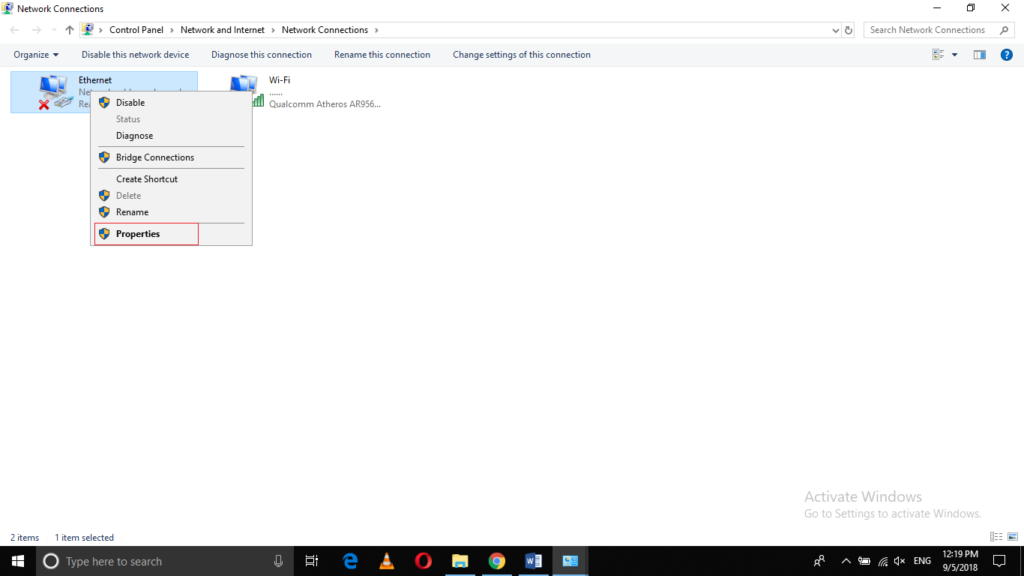
Now right-click on the respective adapter and then Properties, as shown in the following image:
Now click Configure as shown in the following image:
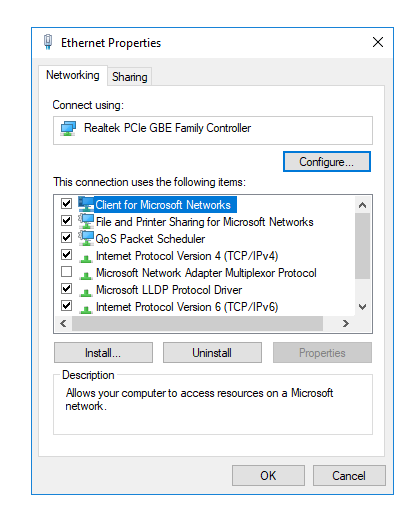
Once you click on it, the following window will open:

Click on the Advanced tab and then select Network Address.
Select the Value radio button, and then enter an appropriate value for your new MAC address in the corresponding text box, as shown in the following image:
Click OK to continue.
Conclusion
In this article, we have learned the importance of changing the MAC address of a device. By using one of the two methods listed above, you can easily change the MAC address of a device at any time and enable secure network communication. the MAC address of a device whenever you want to and can enable secure network communication.