
Whenever you buy a new laptop or a computer system, you must have noticed that its startup time is much less than that of your older machines. The reason behind that is, as we keep on using our computer systems, we enable some processes at startup intentionally or unintentionally. These startup processes are the root cause of the delay during startup time. In this article, we will explain to you the method through which you can disable the Windows 10 startup delay.
Disabling the Windows 10 Startup Delay
In order to disable the Windows 10 startup delay, you will need to perform the following steps:
Type regedit in the search section of your taskbar and click on the search results to launch the registry editor window. The newly opened Registry Editor window is shown in the following image:
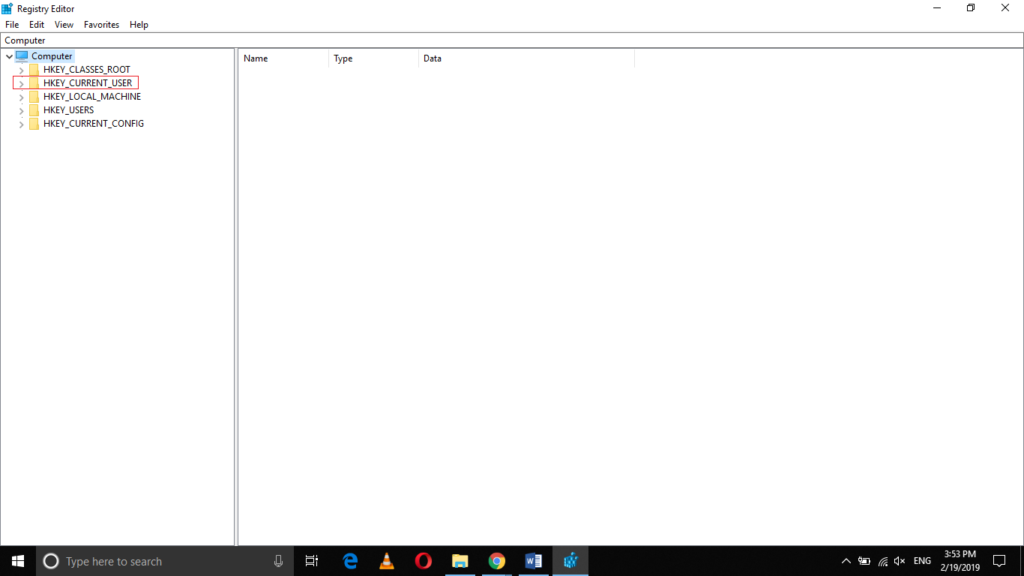
Now click on the HKEY_CURRENT_USER folder in order to expand it as highlighted in the image shown above.
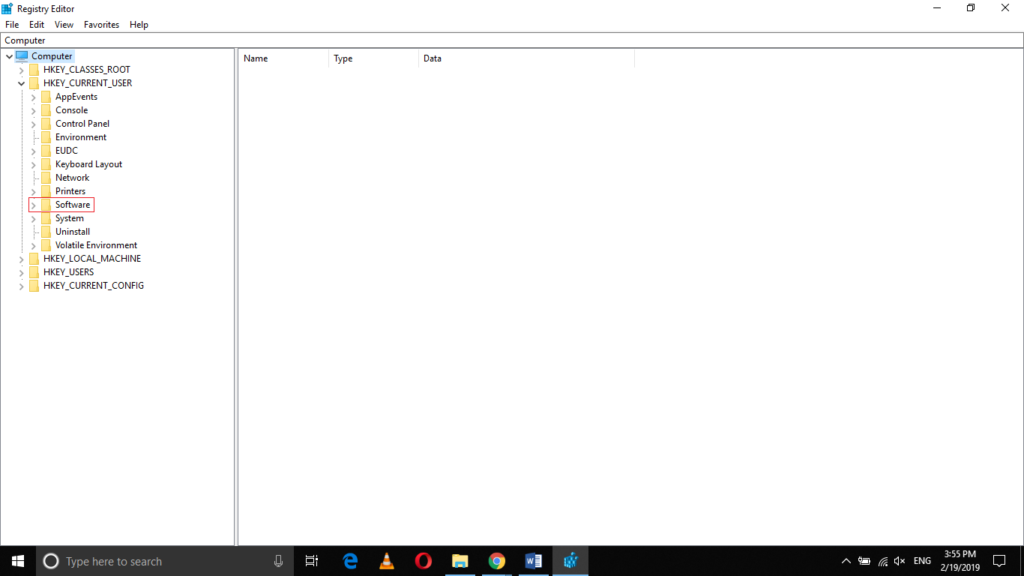
Under the HKEY_CURRENT_USER folder, click on the Software sub-folder as highlighted in the image shown below:
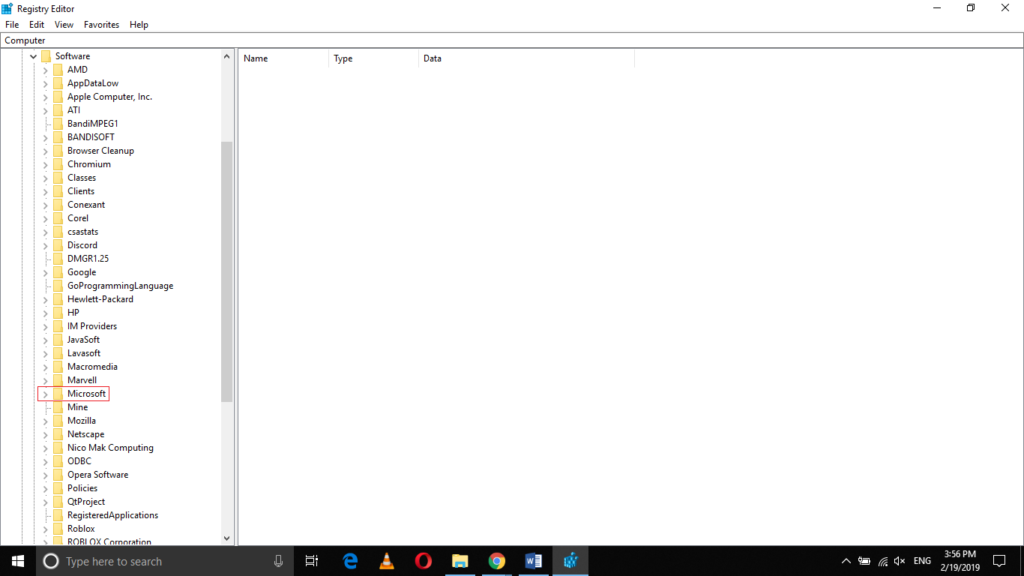
Now click on the Microsoft folder in order to expand it as shown in the following image:
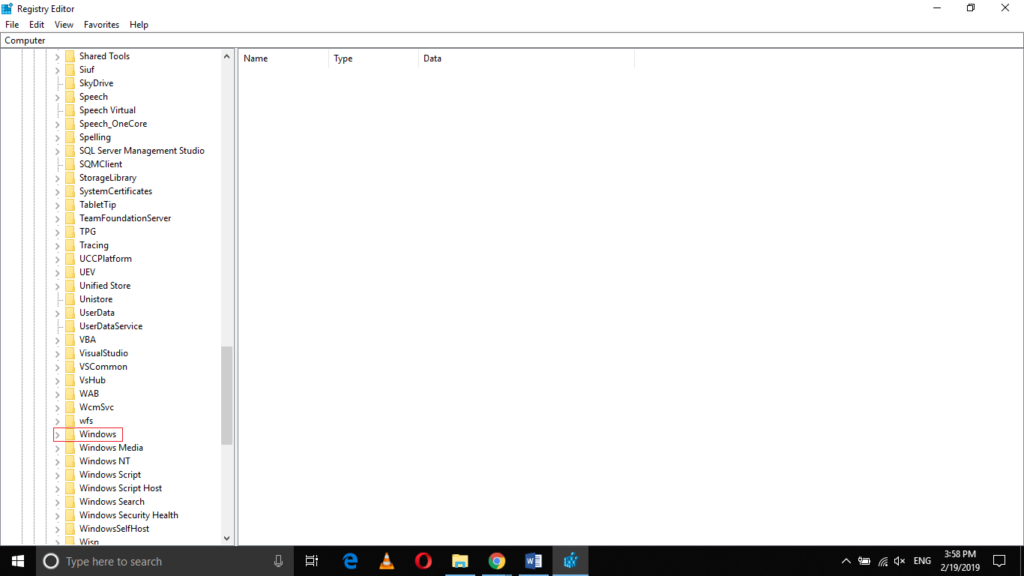
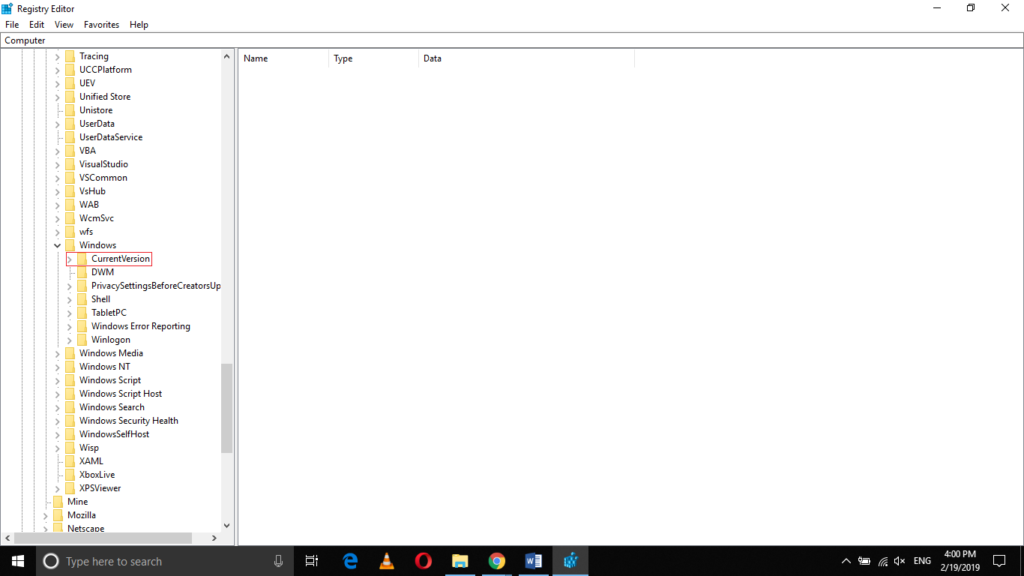
Under the Microsoft folder, click on the Windows sub-folder as highlighted in the image shown below:
Now click on the CurrentVersion folder in order to expand it as shown in the following image:
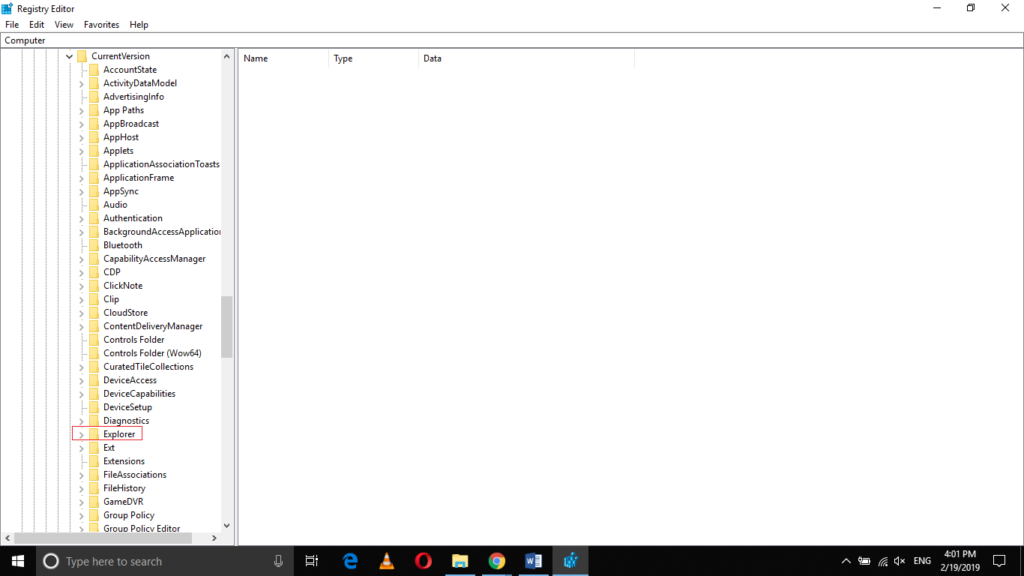
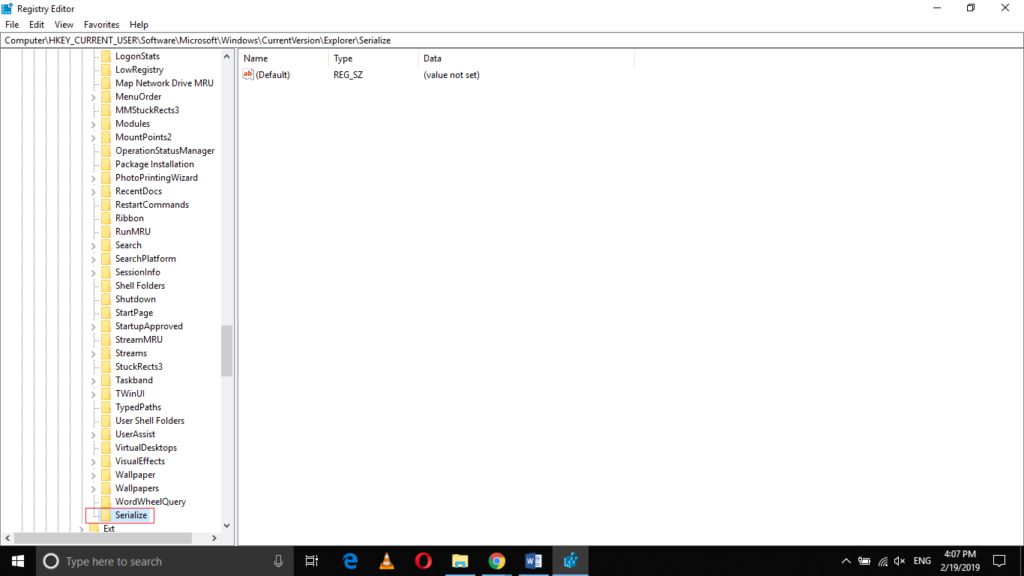
Finally, click on the Explorer folder under the CurrentVersion sub-folder as highlighted in the image shown below:
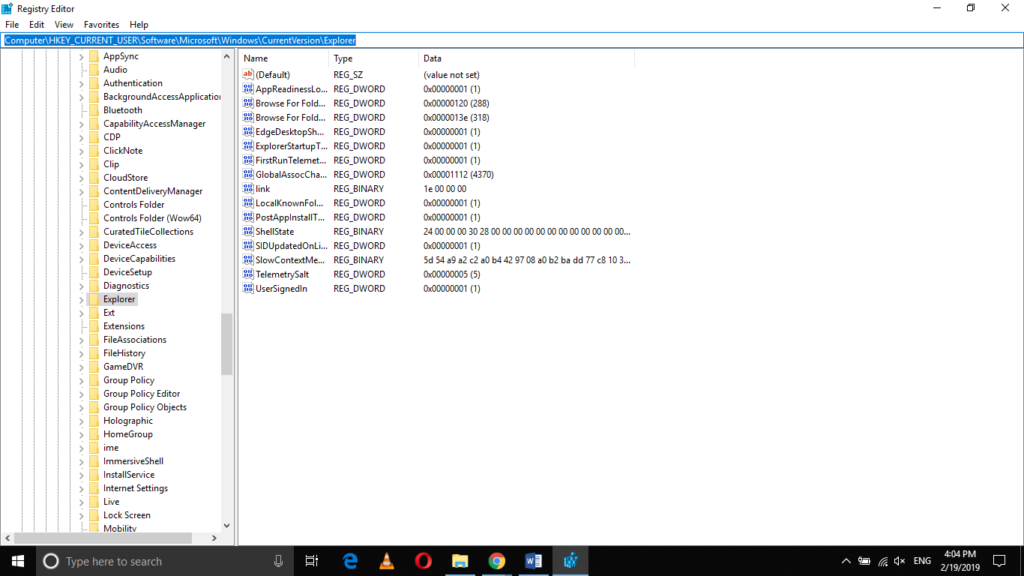
- Therefore, the complete path is as follows:
Computer\ HKEY_CURRENT_USER\ Software\ Microsoft\ Windows\ CurrentVersion\ Explorer
This path is also highlighted in the following image:
Now right click on the Explorer folder in order to launch a cascading menu as shown in the image below:
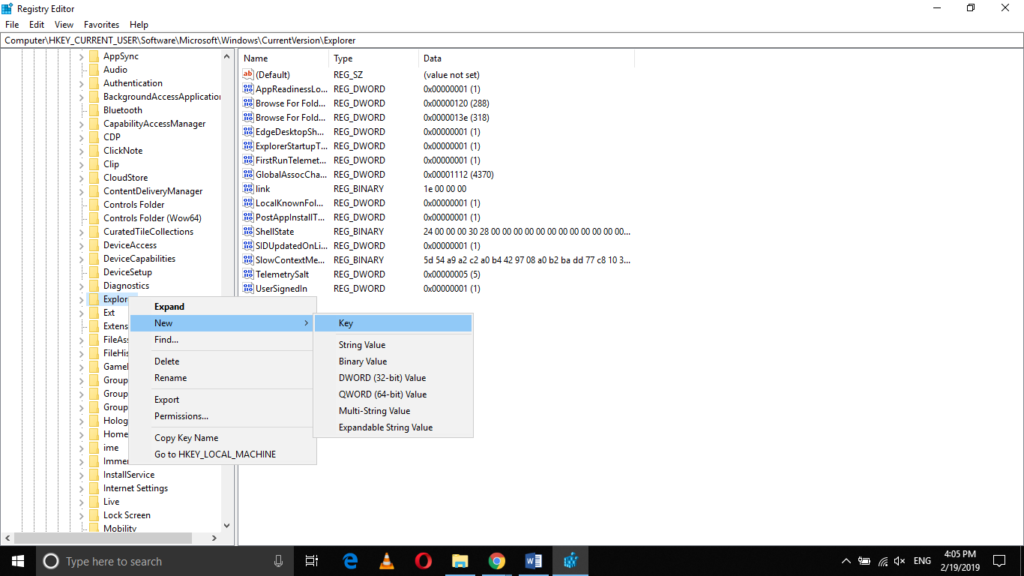
Select the New option from the cascading menu and then click on the Key option from the sub-cascading menu as highlighted in the image shown above.
Rename this newly created key as Serialize as highlighted in the following image:
Now right click anywhere in an empty space in the right pane of the window in order to launch a cascading menu as shown in the image below:
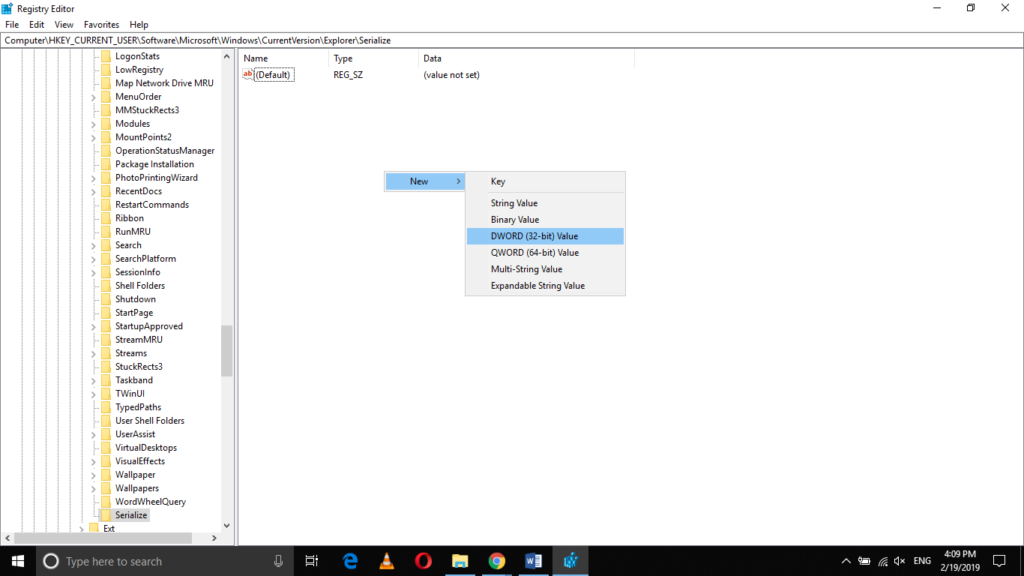
Select the New option from the cascading menu and then choose DWORD (32-bit) Value from the sub-cascading menu as highlighted in the image shown above.
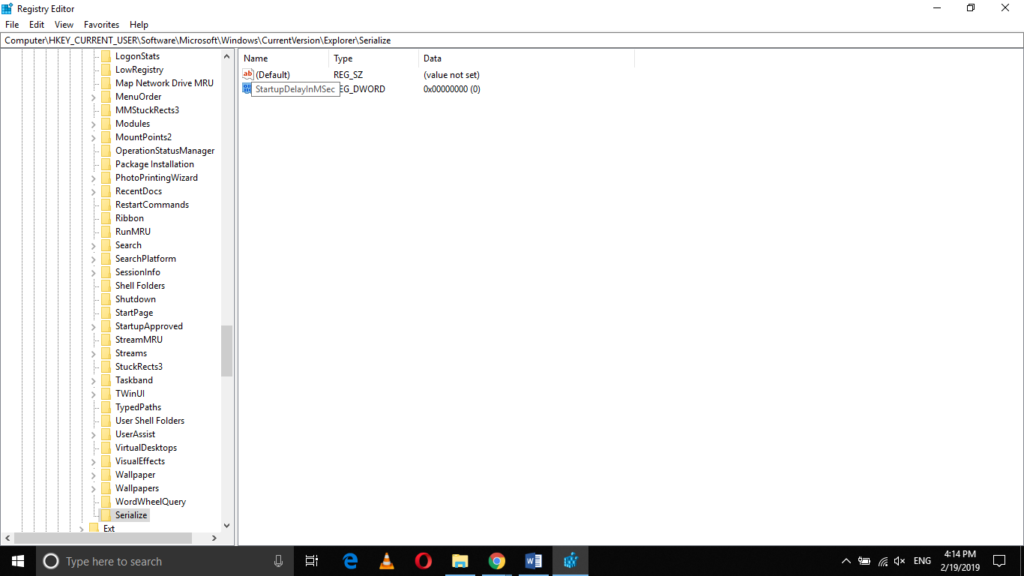
As soon as you will click on it, a new DWORD (32-bit) Value field will be created within the Serialize folder. Rename this newly created field as StartupDelayInMSec. This name is also highlighted in the following image:
Double click on this newly created field in order to launch the Edit DWORD (32-bit) Value dialogue box as shown in the image below:
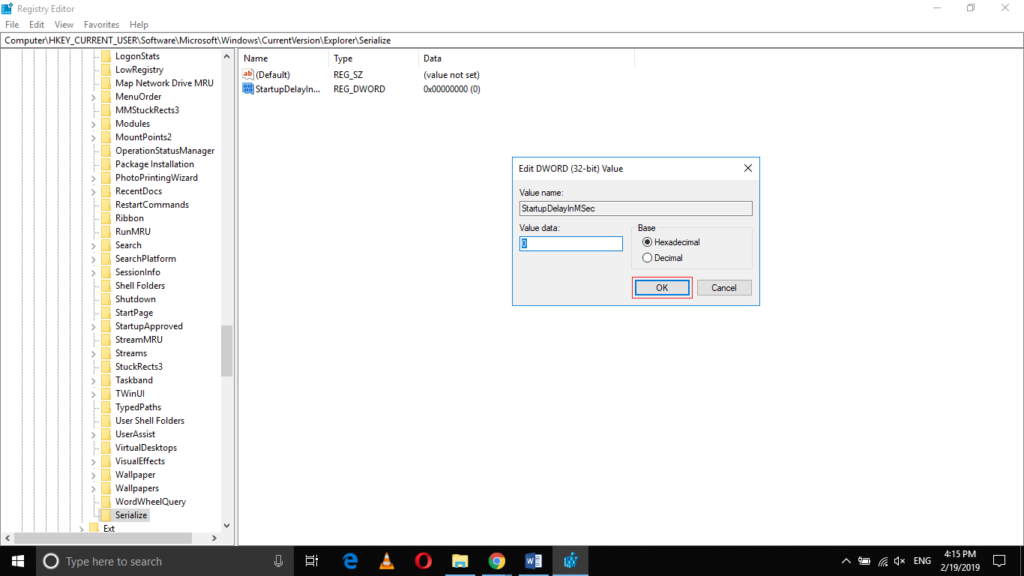
Type “0” in the textbox corresponding to the Value Data text field and then click on the OK button in order to save your settings as highlighted in the image shown above.
Conclusion
In this way, you can easily disable the Windows 10 startup delay by following the method discussed in this article. All you need to do is to be a little careful while dealing with your Registry Editor. Otherwise, this method is quite helpful and convenient to use.