In some cases, you may require hiding the C drive from ordinary users like students from a university campus. This tutorial is specifically written for this purpose. It has following the two parts and it assumes you are familiar with creating OU's (Organisational Units).
- Creating a Group Policy Object or GPO and then.
- Link a GPO to OU.
Creating a Group Policy Object
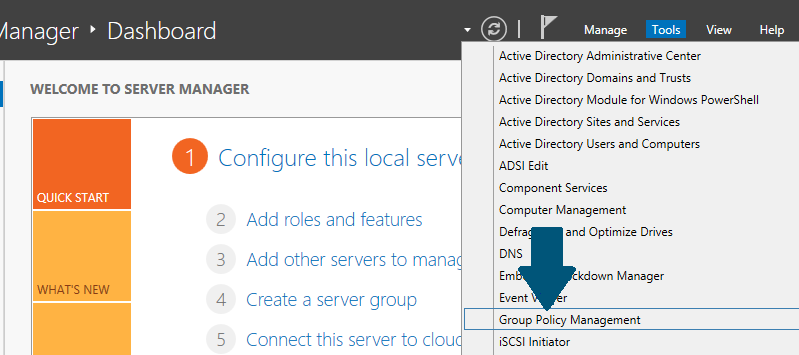
Step 1: Open server manager dashboard and click Group Policy Management.
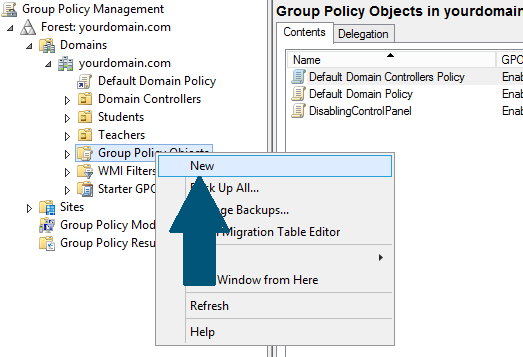
Step 2: Expand the Tree: <domain name> node and right-click Group Policy Objects. Click New.
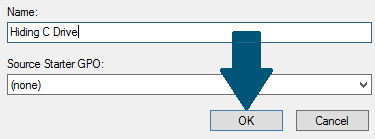
Step 3: Provide a meaningful name and click OK.
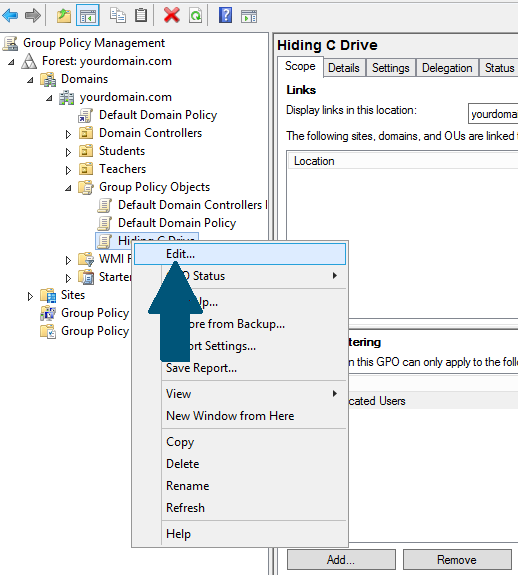
Step 4: Right-click the GPO (Group Policy Object) you created in above step and click Edit.
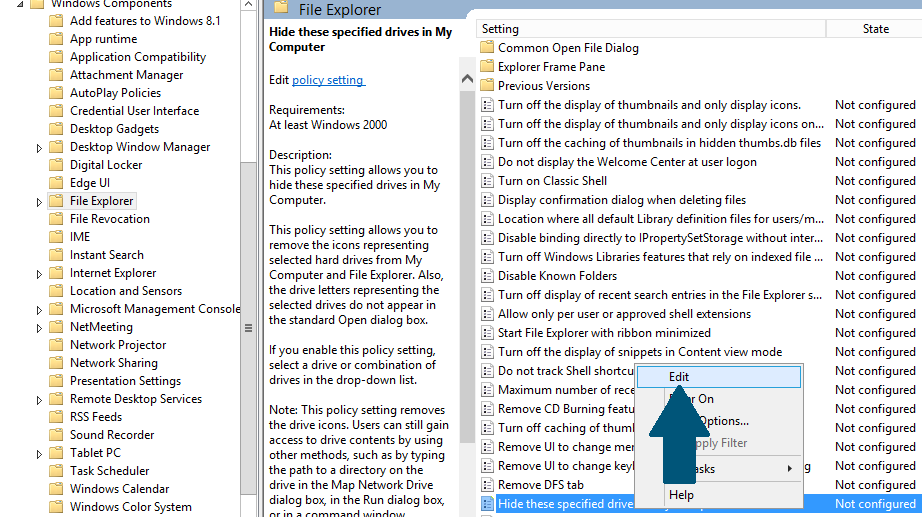
Step 5: Go to User Configuration > Administrative Template > Windows Components > File Explorer. Right-click Hide these specified drives in My Computer and click Edit.
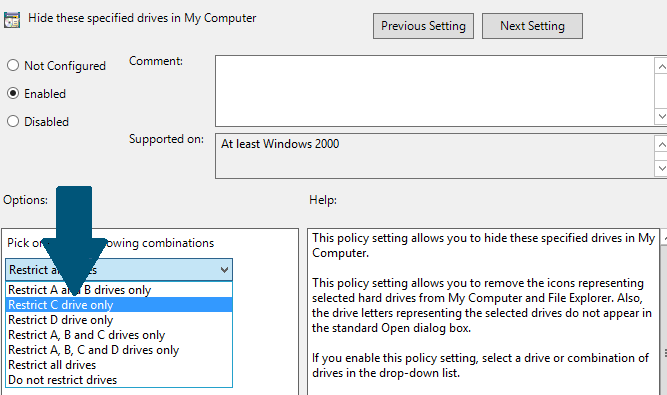
Step 6: Choose Restrict C drive only and click Apply and then OK.
Linking a GPO (GroupPolicy Object) to an OU (Organisational Unit)
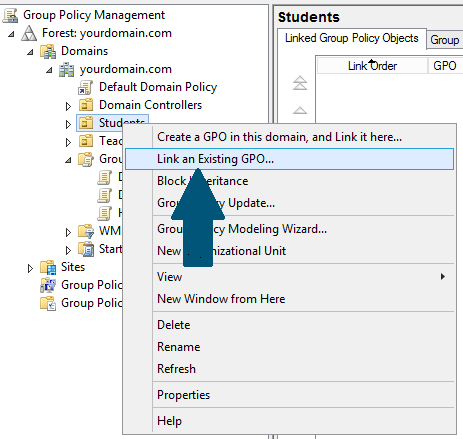
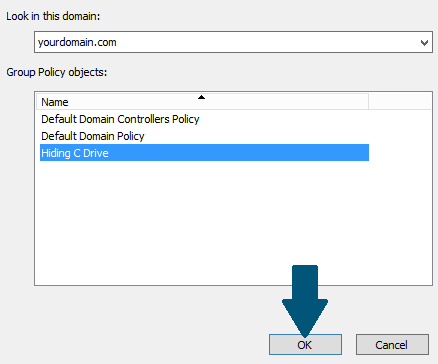
Step 1: Right-click the OU (In my case it is Students) you need to apply the policy and click Link an Existing GPO.
Step 2: Choose the GPO you created in above steps and click OK and you are done.
Testing the Group Policy
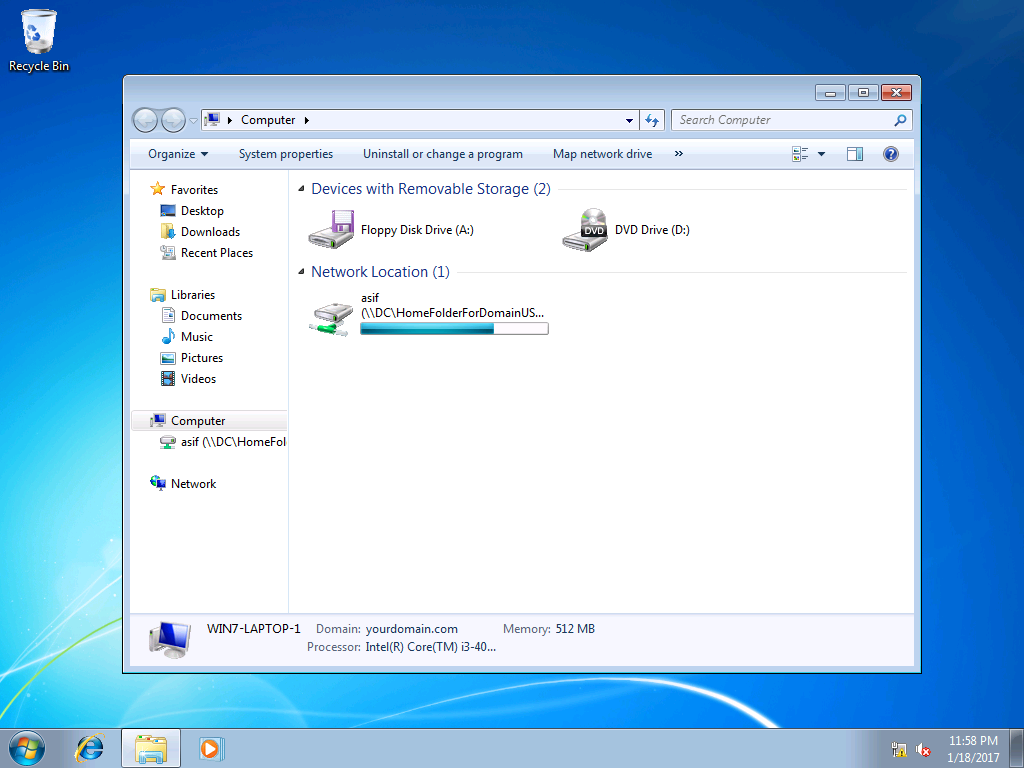
Step 1: Login to a client machine with a user and you will notice there is no C drive in My Computer. Make sure the user is from OU you chose in above steps.