This article is dedicated to the Domain Name System or DNS server which is the heart of any enterprise network. DNS is mostly used to resolve host names to IP addresses and IP addresses to host names.
This tutorial focuses on:
- Installing DNS server role
- Configuring forward lookup zone
- Configuring reverse lookup zone
- Adding a host record in forward lookup zone
- Adding a PTR record in reverse lookup zone
Prerequisites
For DNS server to be configured, you should meet the following requirements:
- Administrator account has strong password
- At least one static IP is configured
- Current security updates from Windows Update are installed
- Firewall is turned off
Installing DNS Server Role
Step 1: From task bar, open server manager dashboard
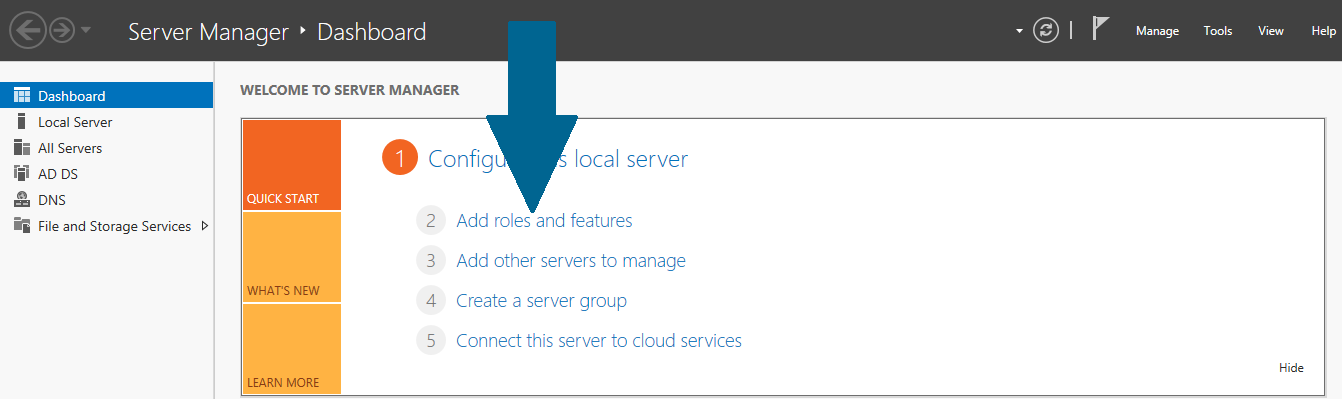 Figure 1
Step 2: Read the notes and meet the prerequisites. Click Next when you are done
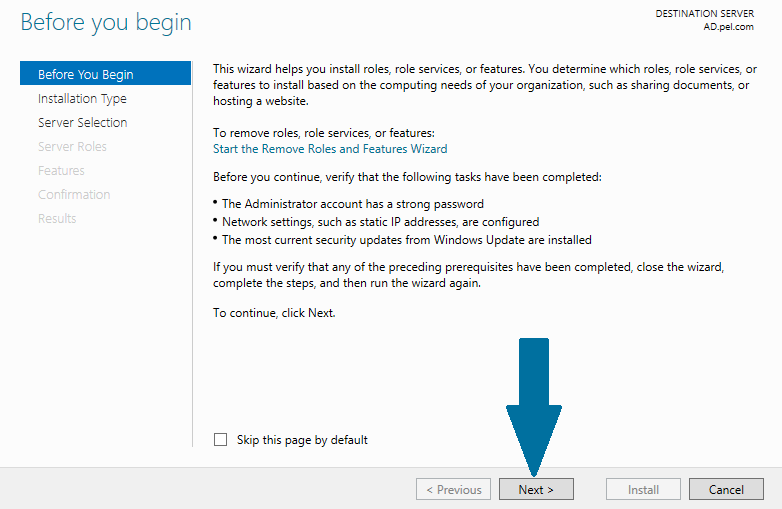 Figure 2
Step 3: Choose Role-based or feature-based installation and click Next
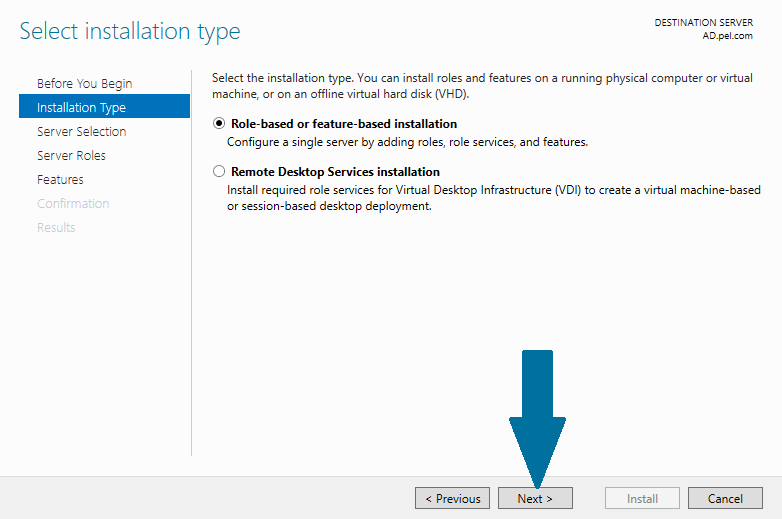
Figure 3
Step 4: Select the destination server from server pool on which you want to configure DNS and click Next
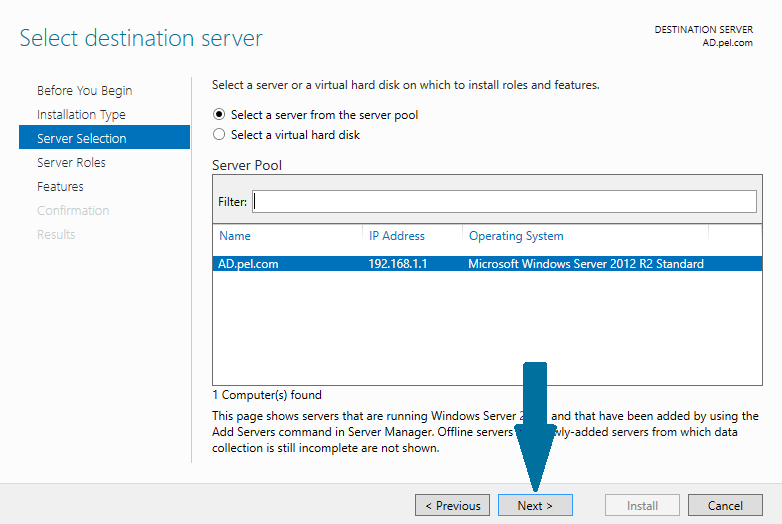 Figure 4
Step 5: Choose DNS Server from server roles. When prompted to install additional necessary features along with DNS server, click Add Features
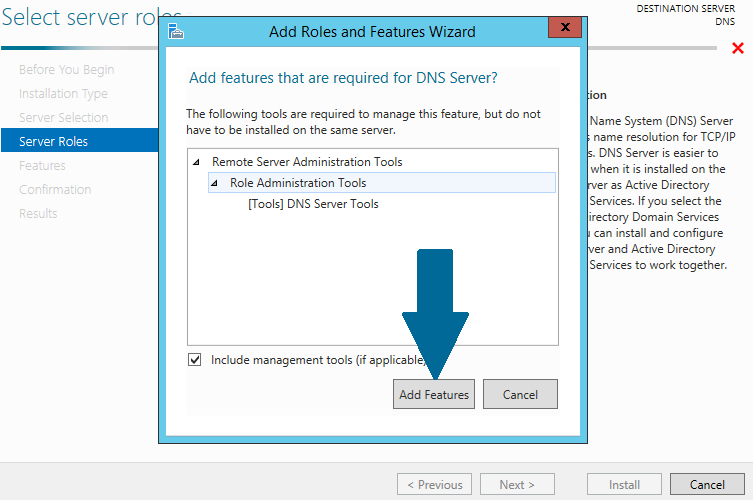 Figure 5
Step 6: Click Next
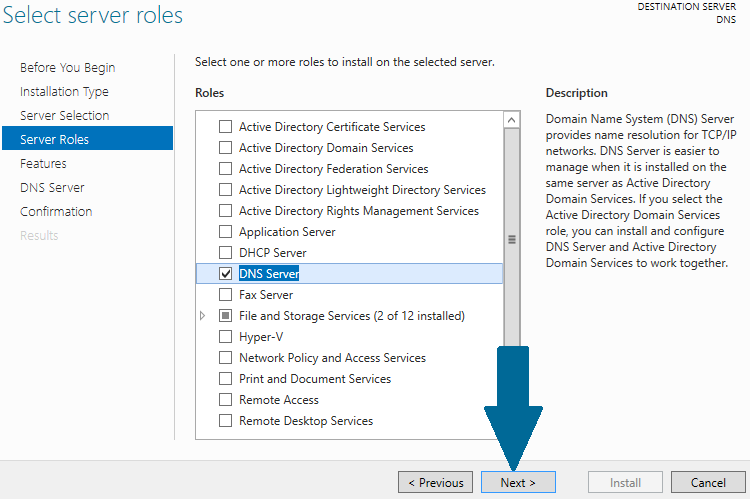 Figure 6
Step 7: Keep default selections and click Next
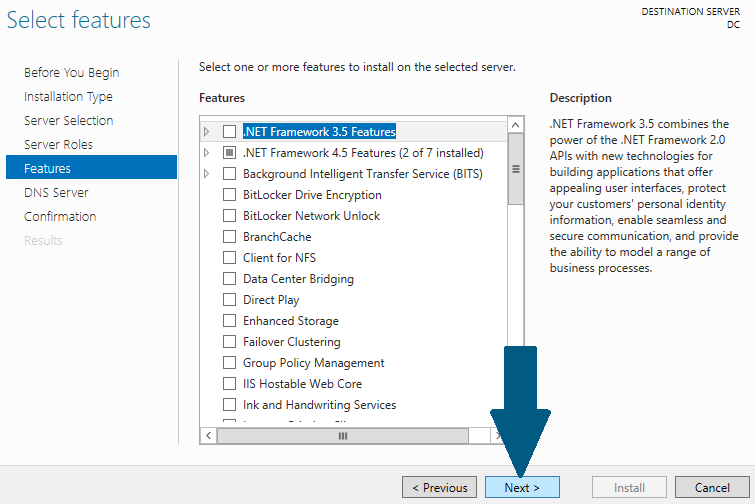 Figure 7
Step 8: Read the important notes and click Next
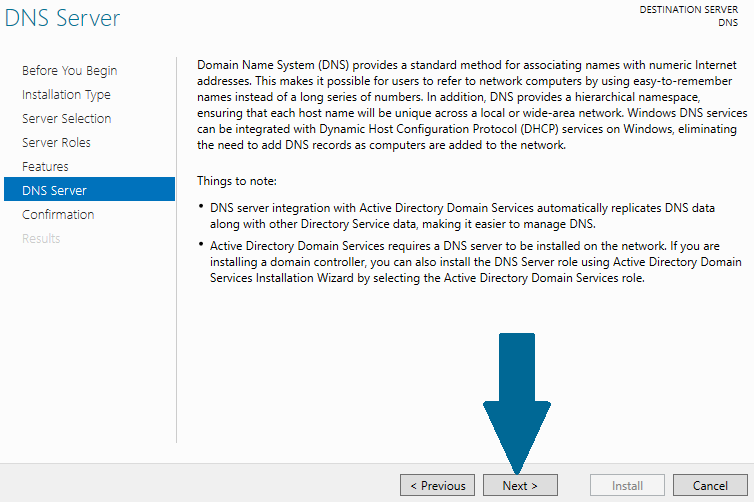 Figure 8
Step 9: Click Install. Wait for a moment before DNS role is installed
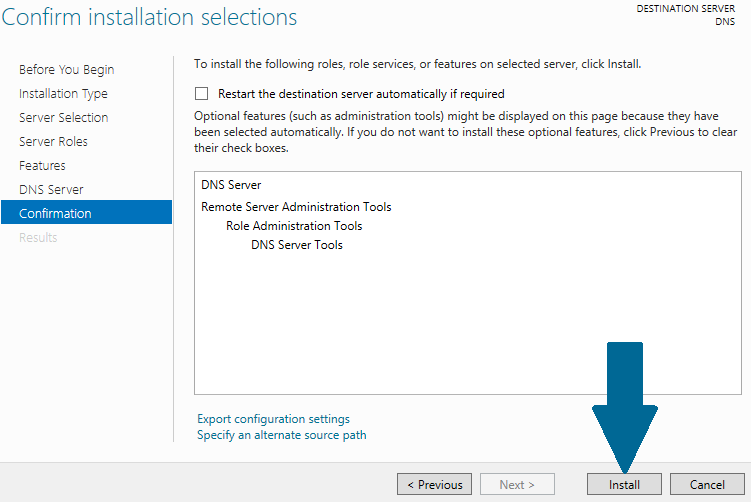 Figure 9
Configuring Forward Look Up Zone
Step 1: Open server manager dashboard, and then open tools. Scroll to DNS and click it
 Figure 10
Step 2: Right-click Forward Lookup Zones and click New Zone
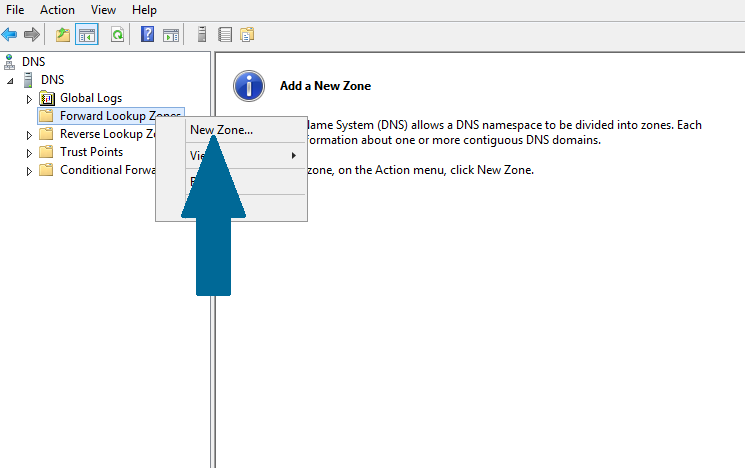 Figure 11
Step 3: Click Next
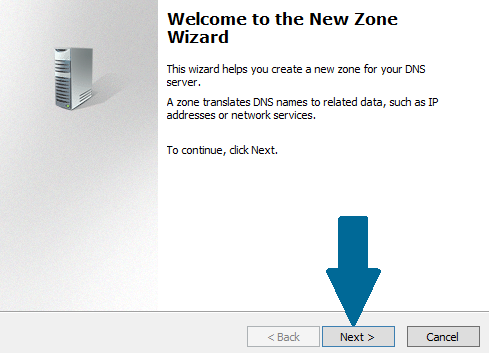
Figure 12
Step 4: Provide the zone name and click Next
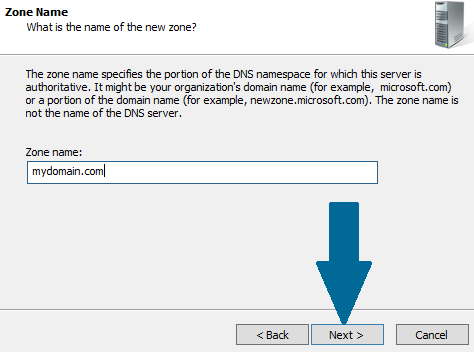
Figure 13
Step 5: Choose Create a new file with this file name and click Next
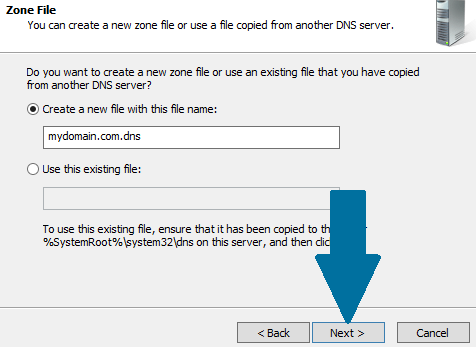 Figure 14
Step 6: Choose Do not allow dynamic updates and click Next
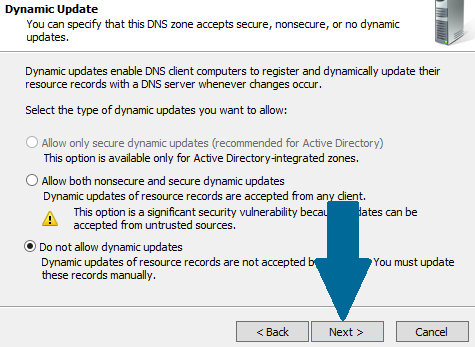 Figure 15
Step 7: Click Finish to successfully create the new zone
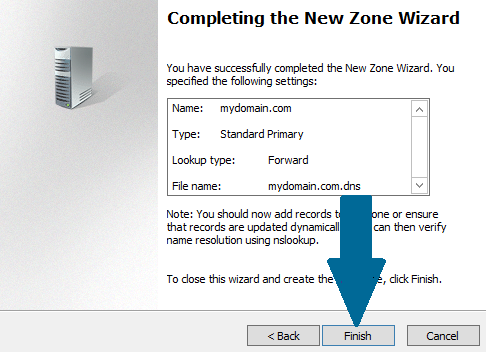 Figure 16
Configuring Reverse Look Up Zone
Step 1: Open server manager from task bar and click on Tools. Scroll to DNS and then click on it
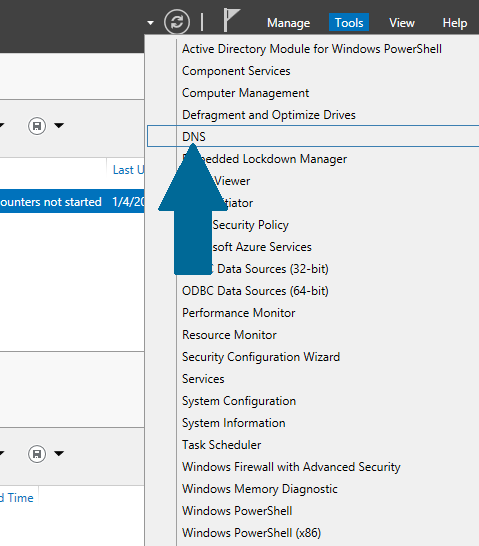 Figure 17
Step 2: Right-click Reverse Lookup Zones and then click New Zone
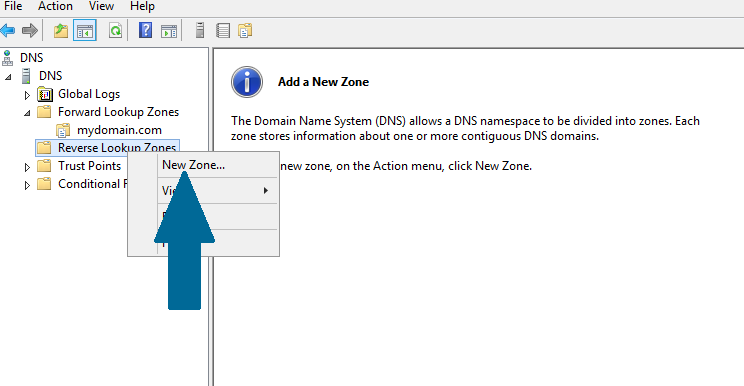 Figure 18
Step 3: Click Next
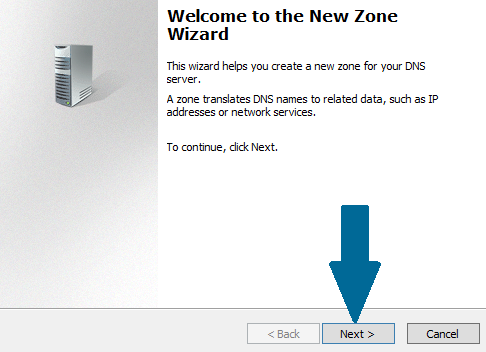 Figure 19
Step 4: Choose Primary zone and click Next
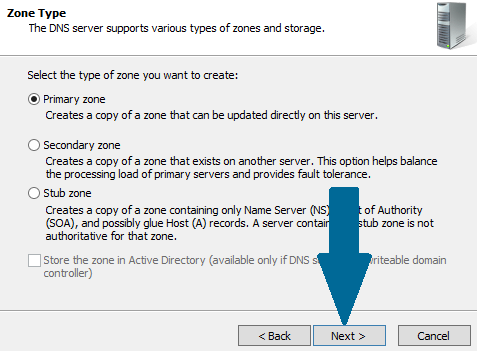 Figure 20
Step 5: Choose IPv4 Reverse Lookup Zone and click Next
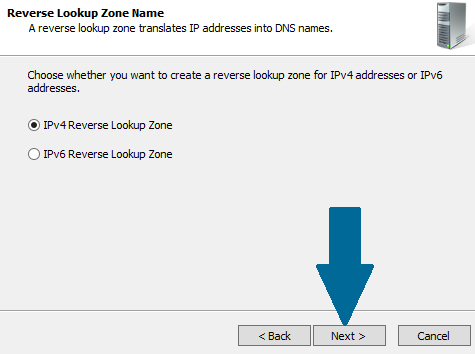 Figure 21
Step 6: Provide network ID and click Next
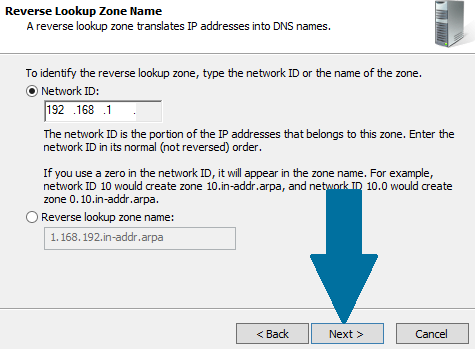 Figure 22
Step 7: Choose Create a new file with this file name: and click Next
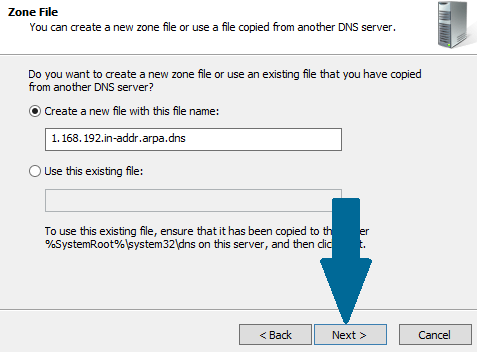 Figure 23
Step 8: Choose Do not allow dynamic updates and click Next
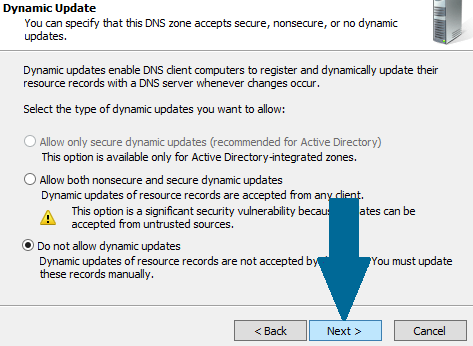 Figure 24
Step 9: Click Finish to end the wizard
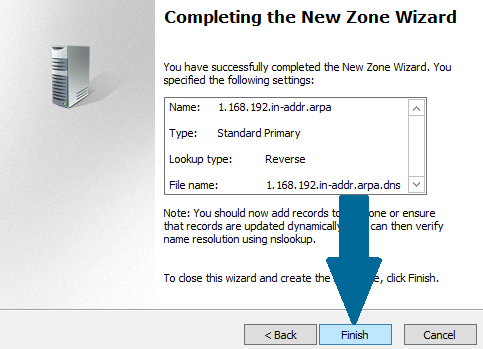 Figure 25
Adding a New Host Record in Forward Look Up Zone
Step 1: Locate the zone in forward lookup zones and right-click on it. Scroll to New Host (A or AAAA) and click on it
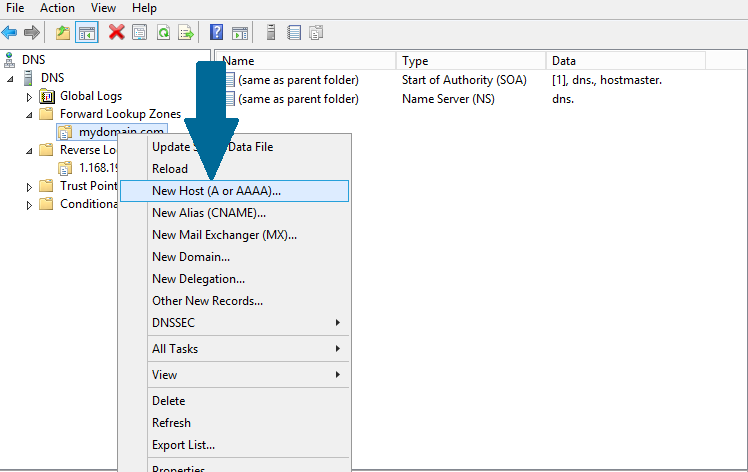 Figure 26
Step 2: Provide the name and click Add Host
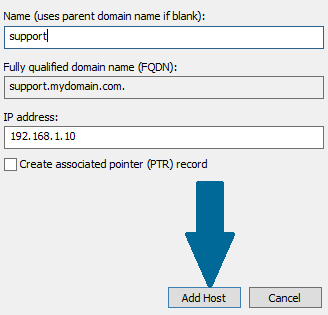 Figure 27
Step 3: Click OK and this new host record will be visible in zone
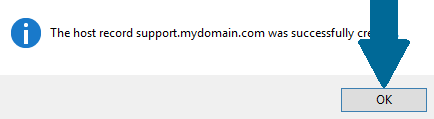 Figure 28
Adding a New PTR Record in Forward Look Up Zone
Step 1: Right-click the desired reverse lookup zone. Scroll to New Pointer (PTR)
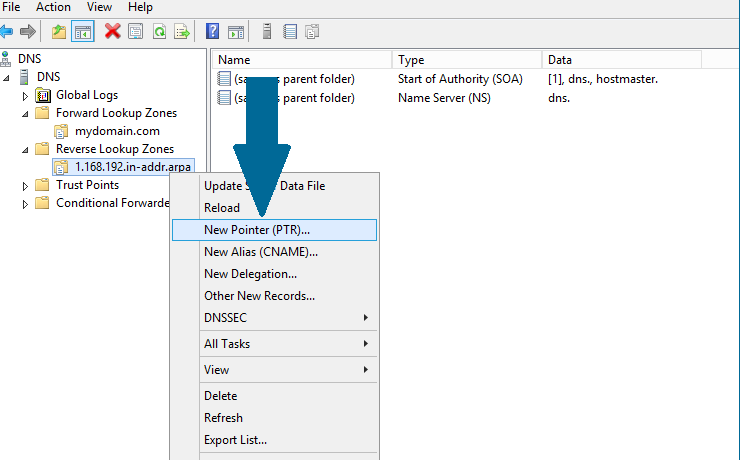 Figure 29
Step 2: Provide host name and click OK
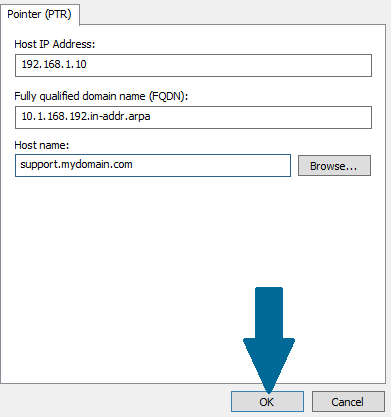 Figure 30
Conclusion
In this article, I have showed the steps which are used to configure DNS server on Windows Server 2012 R2. You can test this configuration by taking a DNS client and pointing its DNS setting to this server. You should be able to resolve the host you just created.